
Starlink sells three versions of Gen 2 hardware: Standard Actuated, High Performance, and Flat High Performance. In this article, I will detail the contents of the Standard Actuated Starlink hardware kit, so you know what to expect when your order arrives.
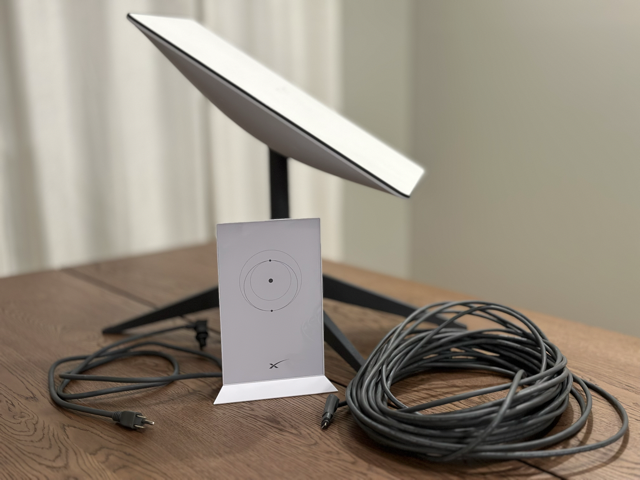
The Standard Actuated hardware kit is the default equipment for the Standard/Residential plan, as well as Mobile/Roam. You will get the following items in the Standard Actuated hardware kit:
- Starlink Antenna/Dish
- Mounting Base
- Wifi Router
- 50 ft. Starlink Cable
- AC Power Cable
- Stickers/Documentation
Now let’s dive into more detail on the individual items contained in the Standard Actuated Starlink hardware kit:
Table of Contents
Starlink Unboxing Video
Note: Some ad blockers will block our video player. If you don’t see the video, try disabling your ad blocker, and then reload the page.
Starlink Antenna/Dish
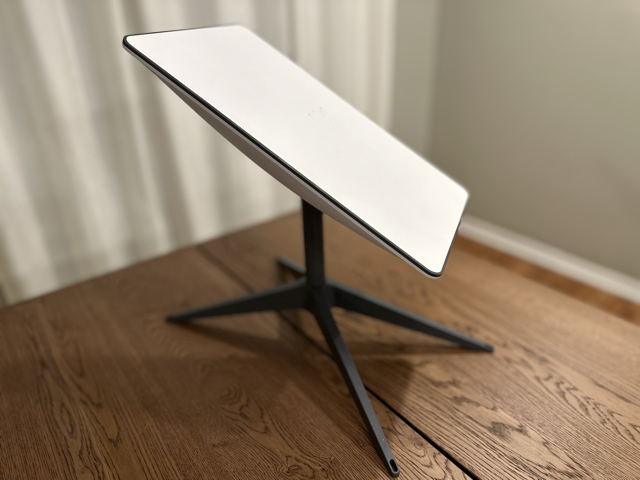
The dish that comes with the hardware kit is a phased array antenna. The Standard Actuated dish is rectangular, with a flat, smooth face. The rectangular dish is the 2nd generation of the Starlink dish. Originally, the dish was round, and officially nicknamed “Dishy McFlatFace”.
The dish measures 20.25″ x 12″. The mast, which connects the dish to the mounting base, is 10.75″ long and 1.5″ in diameter. Data and power for the dish are supplied by the 50′ Starlink cable, which we will cover later. The dish has motors, and is able to aim itself at the correct location towards the satellites.
For more detail on the dish measurements, check out our article on Starlink dimensions.
Mounting Base
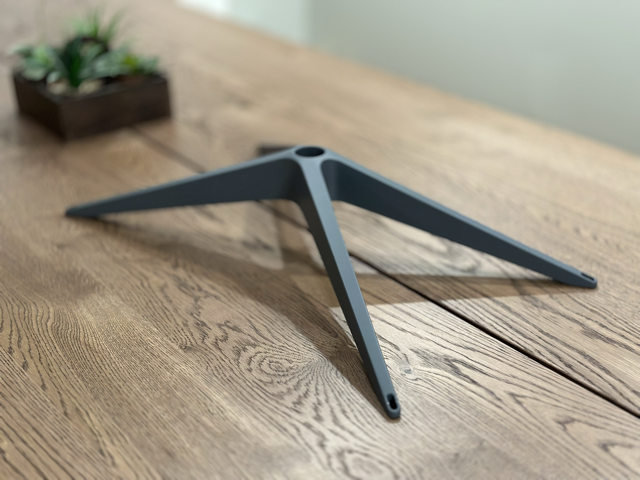
Does the Starlink kit come with a mount? A mounting base is included in the Starlink hardware kit. This mounting base is more of a temporary solution for most users, but it can be a great portable or travel mounting option.
The total footprint of the base measures 22″ x 13″. There are mounting holes on each of the 4 legs. The dish mast slides into the opening of the base, and locks in place with a spring loaded tab.
The Starlink dish mast must be within 5 degrees of vertical, so using the included mounting base on a pitched roof isn’t ideal. For ideas on permanent mounting options, check out our guide, Starlink Mounting Options – A guide to official and DIY mounts.
Wifi Router and AC Power Cable

Does the Starlink kit come with a Wifi router? The Standard Actuated kit includes a Gen 2 Wifi router. The dish connects to the router for data and power via the 50′ Starlink cable, detailed in the next section. The router measures 10″ x 7″ x 2.5″.
What kind of power supply is included? The router doubles as the AC power supply for the dish. An AC power cable is included with the router. A DC power supply is not available from Starlink, but we have a guide to create your own 12V DC power supply.
The Gen 2 router has Wifi 5 technology, supporting 802.11a/b/g/n/ac standards. It features WPA2 security. It can cover up to 2000 sq. ft. The router does not include an Ethernet port, but the Starlink Ethernet Adapter can be purchased separately if you need one.
50 ft. Starlink Cable
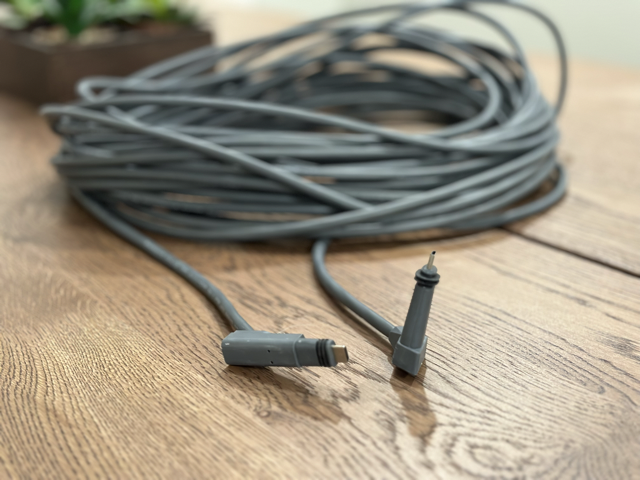
How long is the Starlink cable? The included 50′ Starlink cable connects the dish to the router, providing data communication and power. The cable itself is standard CAT5e, but the connectors on each end are proprietary to Starlink.
The dish side connector and the router connector have different shaped strain reliefs, so the cable can only be run one way. The dish side connector should be routed through an exterior wall from the inside during installation, because it requires a smaller diameter hole to be drilled compared to the router end of the cable.
For more information on routing the Starlink cable, check out our tutorial and review of the Starlink cable routing kit.
Stickers and Documentation
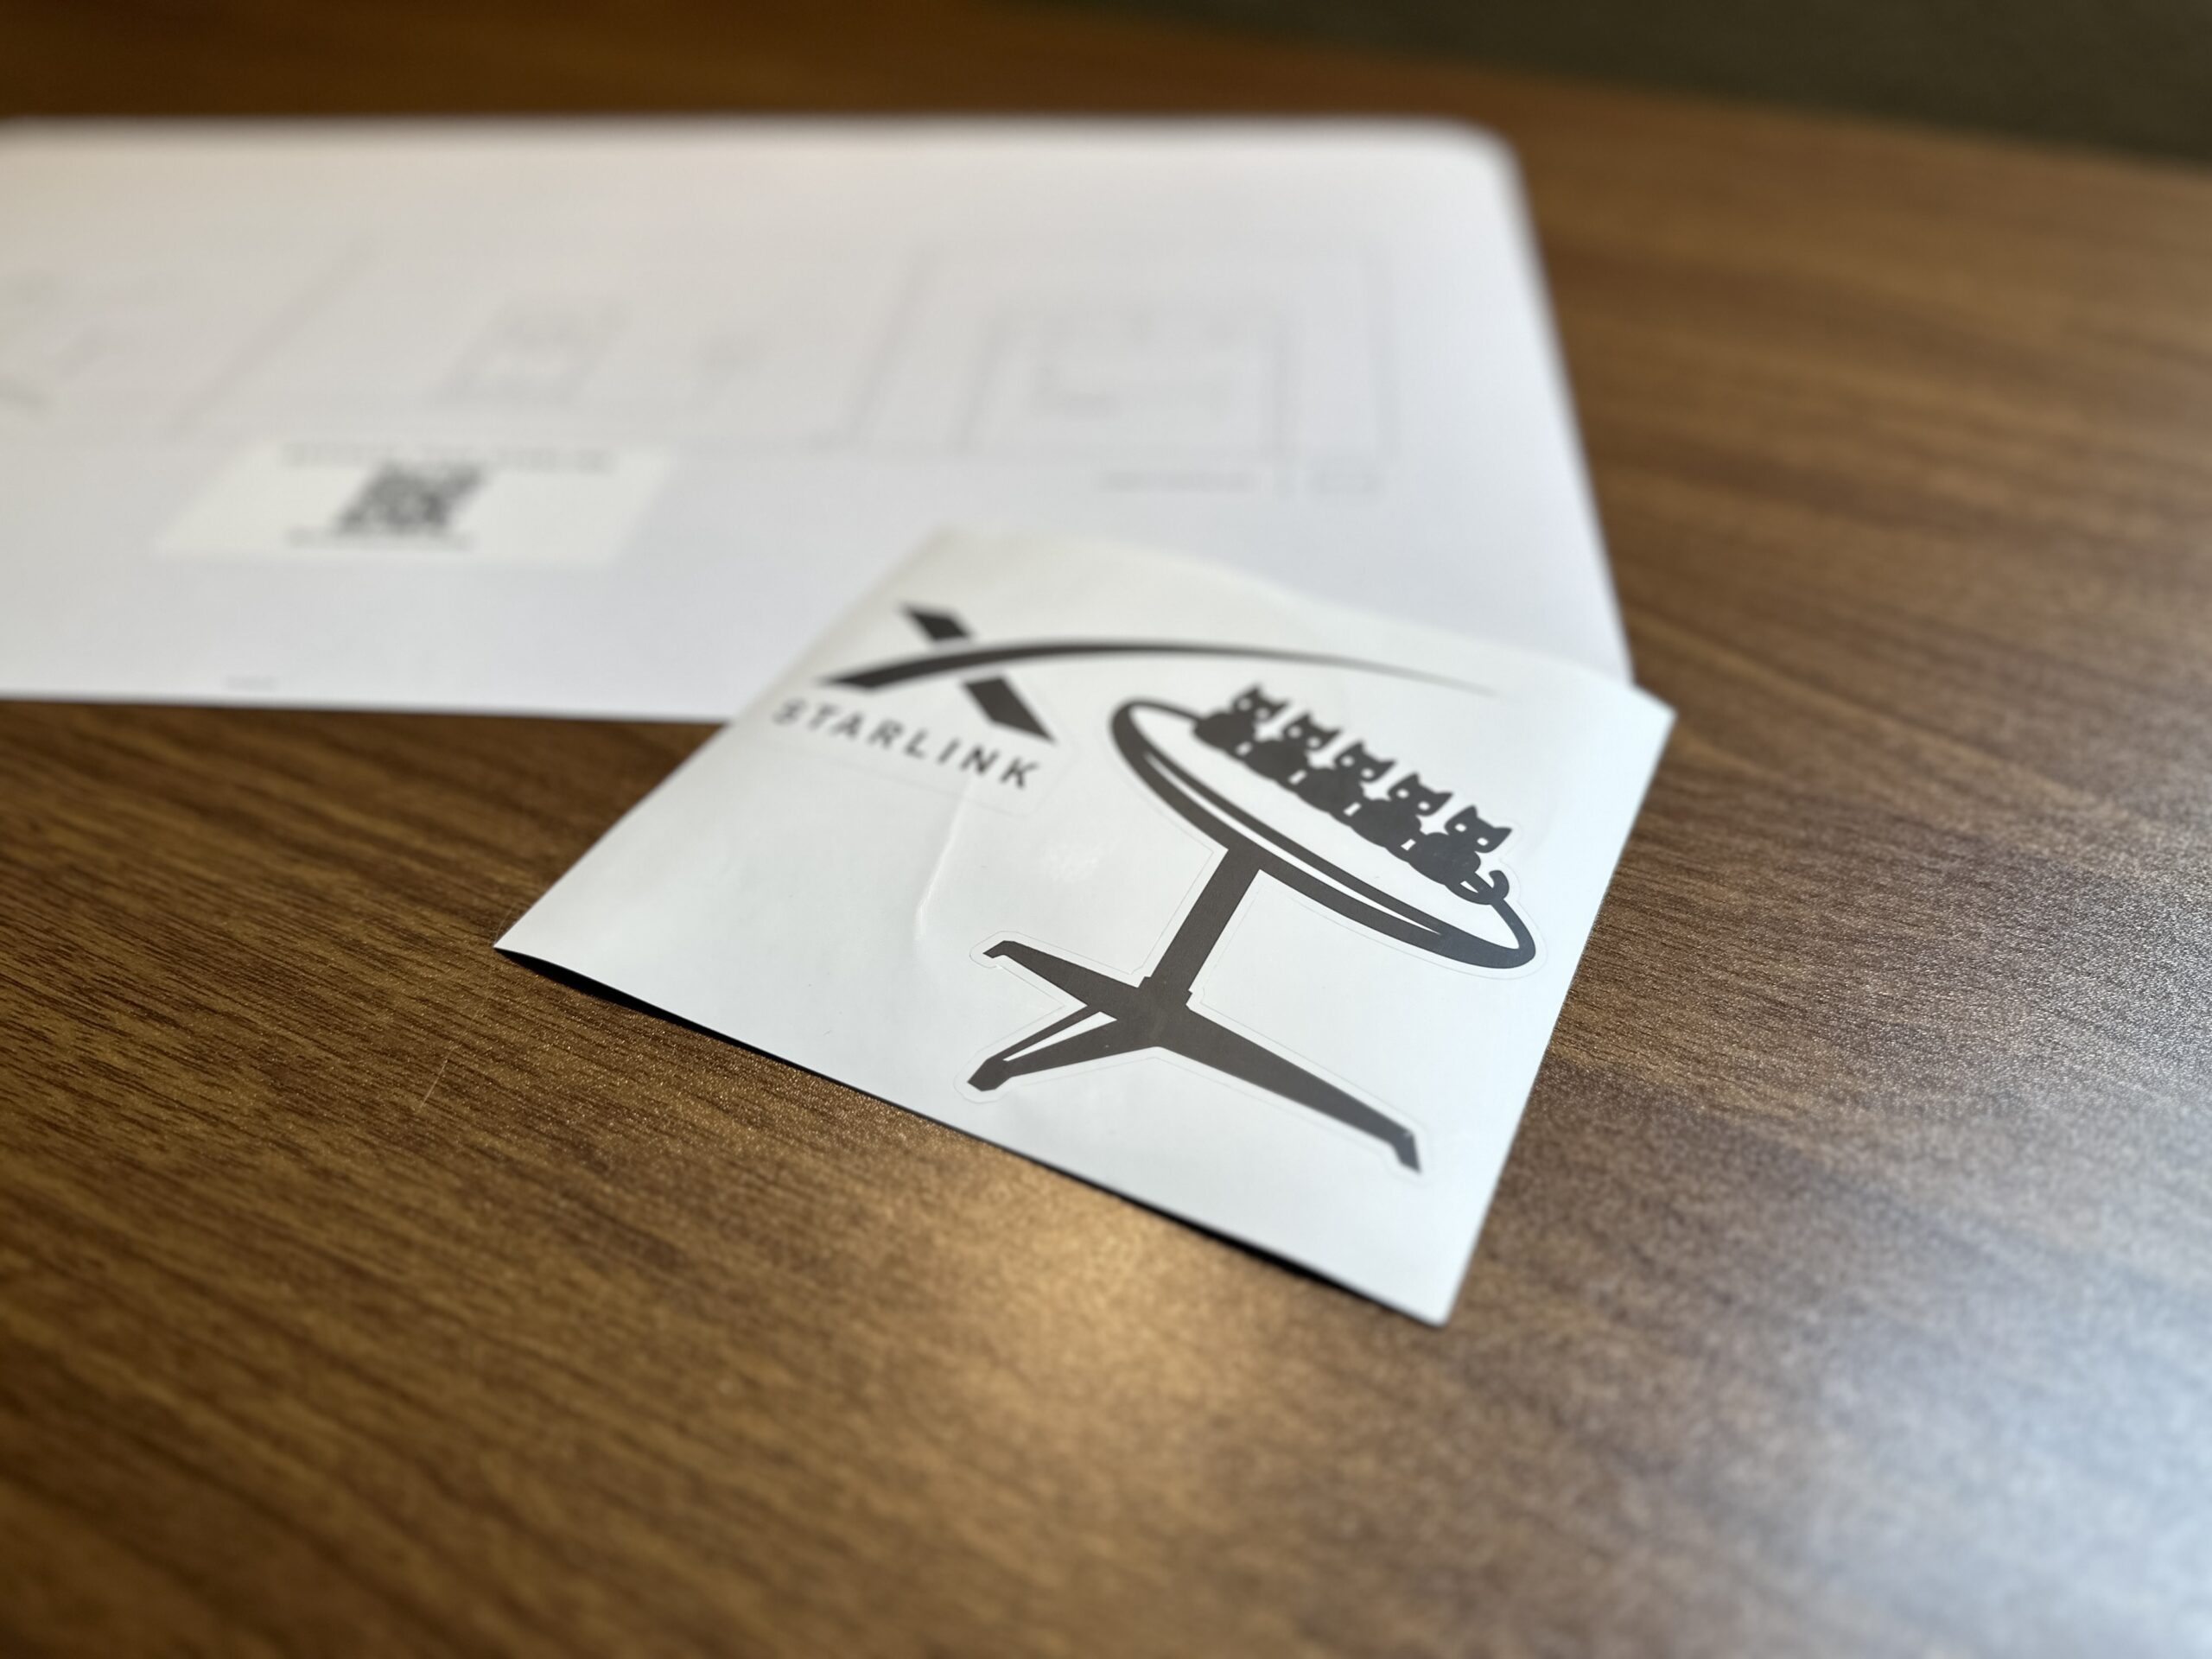
The last couple of things in the Standard Actuated Starlink kit are some stickers, as well as user documentation. Starlink recently started including stickers in the hardware kit, but they are also available separately on the SpaceX website.
Besides the stickers, you get a brief instruction sheet letting you know how to set everything up. The instructions are very short and not very detailed, so if you need more info, be sure to check out our Starlink setup and installation guide.
My house is wired with Cat6 cable which runs to an outside box connecting to our current provider, and it would be a bit ridiculous to not use it. Are the proprietary connectors available separately?
If you purchase the Starlink Ethernet Adapter, you can plug that into your existing CAT6 wiring.
Thanks. Now if only Starlink would recognize my address!
If they don’t accept your address, you can always use Google plus codes instead.
This article notes that a 50′ cable is standard, but when I go to order a longer cable, it states that it replaces the standard 75′ cable. I can not find anywhere in my standard residential order where it tells me what I’m getting.
It’s probably older wording on their shop page. The 50′ cable became the standard months ago, it used to be 75′ was standard. Here is the Starlink specification page that indicates each Standard kit comes with the 50′ cable:
https://www.starlink.com/specifications
Where does your cell phone and Television programs tie into star link?
Starlink provides internet, so your TV and phone would connect via Wi-Fi. Starlink doesn’t provide TV or cell service.
Found how to repackage for shipment:
” For instructions on how to Stow your Starlink for return, please navigate to the Starlink App. On the home screen click support> click additional resources> click stow. This will command your Starlink to stow itself for packaging.If your Starlink is not connected to the App, please see below for instructions on how to manually stow your Starlink.
Make sure dish is plugged in. Wait at least 5 minutes for it to auto-level if it wasn’t previously plugged in.
Take the dish out of the mount
Hold it by the stem, facing outward (90 degree angle to your body)
Wait 20-30 seconds. It should automatically ‘stow’ itself (will tilt so that stem of Starlink is not sticking out so much)
Once the Starlink ‘stows’, unplug the device so that it remains in stow position. You can now place the Starlink in the box!.
If your dish does not stow itself, try again but turn the dish a bit this time “
How do I repackage it for return? The “arm” or “trunk” is in a position that it will not fit in box. I am going to guess that I have to power it back up (thanks for the tip about the internal motors moving the disk), to try to get it back into packaging position. Sadly, I have too many trees for this to work in my area.
You have to stow the dish. You can do this by powering everything back up, and selecting stow from within the app settings. You can also power the dish up and flip it over so that it is upside down. The dish will auto stow if laid face down.
More details here in this guide:
https://www.starlinkhardware.com/how-to-stow-starlink/