
The Starlink Ethernet Adapter is an accessory from Starlink that adds an Ethernet port to your system. It’s a small device that plugs into the router. The Wifi router that is included with the Gen 2 Standard hardware kit does not have an Ethernet port. So if you would like to connect devices to the internet using a hardwire Ethernet connection instead of Wifi, you will need the Starlink Ethernet Adapter.
In this guide, I will walk you through the very simple steps of installing and setting up the Ethernet Adapter. I’ll also give you my review, including my initial impressions and a long term report of how it’s been working out since I bought it. Finally, I’ll answer a couple of important questions about compatibility and how to go about purchasing one for yourself.
Table of Contents
Overview

In order to decrease production costs, Starlink simplified a lot of the components with their 2nd generation Standard hardware. The power supply became integrated in the Wifi router, and the Ethernet LAN port was removed. Many people don’t use Ethernet connections at all, but some still have a need. That’s why Starlink decided to offer the Ethernet Adapter as an accessory, instead of including it on the system.
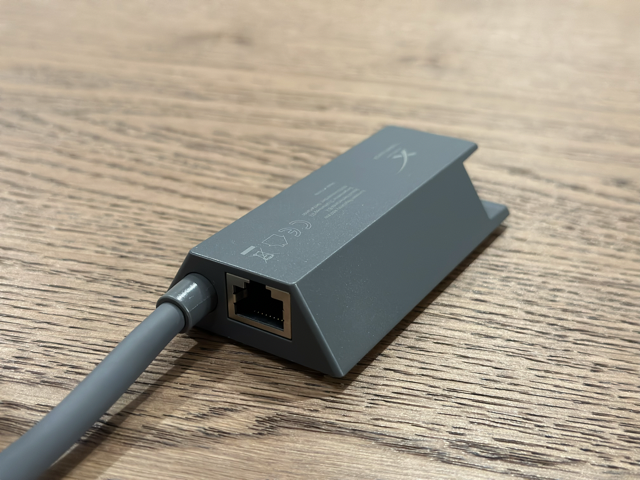
The Starlink Ethernet Adapter is a simple cable adapter that plugs into the Starlink router. The cable from the dish also plugs into it. Basically, the Ethernet Adapter sits in between your router and dish. What you get by installing the adapter is a single Ethernet LAN port. The port gives devices that are plugged in access to the internet and your home network.
You can plug almost anything in to the Ethernet port. Maybe you have a wired security camera. Or perhaps you have a network switch with lots of devices on your home network. Whatever the case, the Starlink Ethernet Adapter is required if you want an Ethernet port with the Gen 2 Standard hardware.
Features and Specs
The Starlink Ethernet Adapter supports up to 1 Gbps for the LAN interface. Like I mentioned before, you get a single Ethernet port. Besides the Ethernet port, there are two other connectors. There is a Starlink connector on one end that plugs into the router, and another Starlink connector that accepts the cable from the dish. Here are some additional specs:
- Dimensions: 6.5” x 4.5” x 1.5” (16.5 x 11.4 x 3.6 cm)
- Weight: 0.33 lbs (0.15 kg)
- Indoor use only
Where Can I Buy It?
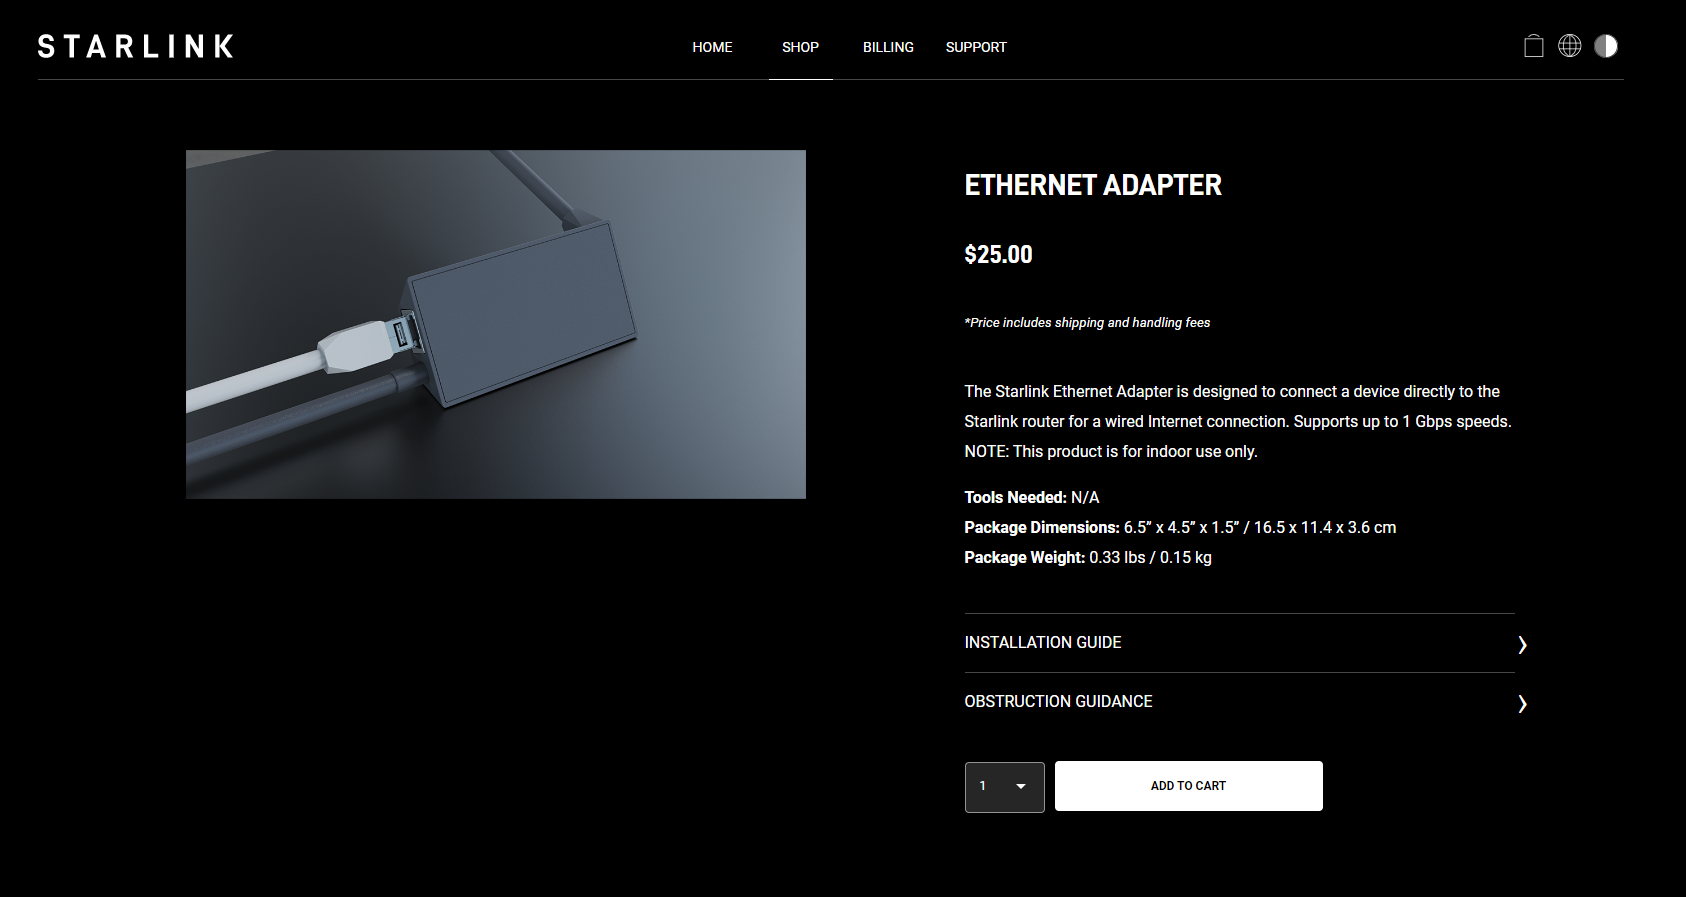
The Starlink Ethernet Adapter costs $25, and can be purchased at the official Starlink.com Shop. You need to have a Starlink account and be logged in to access the page.
Compatibility
The Starlink Ethernet Adapter is compatible with the following Starlink hardware versions:
- Gen 2 Standard
- Gen 2 High Performance
- Gen 2 Flat High Performance
You don’t need the adapter if you have the original round dish. The router for the round dish has a built in Ethernet port.
Although the Ethernet Adapter is compatible with the Flat High Performance and High Performance kits, it isn’t necessary. Those kits include a cable that will connect the dish directly to a 3rd party router, switch, or any other network equipment with an RJ45 connector.
Video Setup Tutorial
Note: Some ad blockers will block our video player. If you don’t see the video, try disabling your ad blocker, and then reload the page.
Setup and Installation
Installing the Starlink Ethernet Adapter is very simple, and there is virtually no setup required. You don’t need any tools or IT skills, just follow these steps:
Step 1 – Unplug the Starlink router AC power cord from the wall. You will want the dish and router turned off while we reconfigure the cables.
Step 2 – Unplug the Starlink antenna cable from the bottom of the router.
Step 3 – Plug the Starlink Ethernet Adapter into the router, where the Starlink antenna cable was.
Step 4 – Plug the Starlink antenna cable into the connector on the Starlink Ethernet Adapter.
Step 5 – You can now power everything back on by plugging in the router AC power cord at the wall.
Give the Starlink system several minutes to boot up and connect to satellites. You can monitor the status of the system from the Starlink App. Once the app indicates that Starlink is Online, you are all set! There is no additional setup required. Your Wifi will continue to work as normal, but now you can connect devices via Ethernet for internet access.
Review

I was an early beta tester for Starlink, when they were still selling the round dish. The round dish router has an Ethernet port built in, so I was confused by the decision to remove the Ethernet port for the next generation hardware that is being sold today to customers. My guess is that Starlink believes most people don’t use the Ethernet port. They are probably right. These days, everything connects via Wifi, from our TV’s, to our computers, to our cell phones. Most people won’t need an Ethernet port, so Starlink eliminated it on the router to lower manufacturing costs. And if your situation requires a hardwire connection, the adapter is just an extra $25 from the Starlink shop.
What else can I say, there really isn’t much to this device. It’s small and simple to install. It just sits between the router and the dish, and gives you one Ethernet port. It’s made of a nice looking plastic that matches the other Starlink hardware. It’s profile allows it to easily hang behind a desk or cabinet. If you’re like me, you will install it, shove it behind your desk, and forget it even exists. That’s a good thing in my book.
Long term, it’s worked as expected. I haven’t had a single issue with it, and I’ve mostly forgotten about it because it just does it’s job. I have my main PC plugged into it so that I don’t have to do any gaming or video conferencing over Wifi. Connecting via Ethernet has certainly proved to be faster and more reliable than Wifi. Is it worth it? Yes, and you don’t have much choice if you want an Ethernet port to plug devices in, or to use an aftermarket router with Starlink.
What exactly do I need to plug this adapter into my computer that has no ethernet port?
If your computer doesn’t have an Ethernet port, you will need some kind of adapter to add one to your PC. For example, there are USB Ethernet dongles that plug into a USB port on your computer to give you an Ethernet port. You can then plug the computer into the Starlink Ethernet adapter with an Ethernet cable.
Hi Noah, Starlink no longer sells this adapter on their website. I’ve seen one that looks to be the same or similar on Amazon, I think. Would you recommend the Amazon version now that Starlink doesn’t sell them any longer?
It’s still for sale, here is the link: https://shop.starlink.com/products/us-consumer-ethernet-adapter-gen2
Thanks, Noah!
Hi Noah, Could you confirm that the Starlink Ethernet port is driven from the Starlink WiFi Router and not just connected to the open internet. Its physical connection sitting between Dish and Router is confusing, and looks like a direct tap without router protection?
I can confirm the Ethernet Adapter port is connected back through the router, not directly to the internet.
Dumb…the 2.4 is best over long distance and penetration of building materials, but guess what when you have kids? Remote control toys on 2.4. Hardwired cat is best to your own network, why would you remove the port? Dumb
To get the shareholders happier than they already were when we bought the setup
No other reason…. Just greed
My Ethernet adapter is not working, Ive done factory resets and tried everything. The starlink doesnt connect to satellite while connected to adapter.
I recommend submitting a support ticket. Sounds like a cable or router issue if the installation of the Ethernet Adapter causes the dish to become disconnected or go offline.
I just ordered Starlink for an office/shop that I am building. If I get this ethernet adapter can then add a switch? From there can have an ethernet cable going to my computer, and an ethernet going to a bridge that would send internet to my house 600′ away? Would I need a separate router for the house then? does it matter what kind of router I use at the house?
Yes, you can add a switch connected to the Ethernet Adapter. Any Wifi router would work at the house. You could set it up in access point/bridge mode to maintain connectivity to your entire Starlink network, or have it on it’s own DCHP and routing.
Hi Noah,
I connected 2 additional routers (TP-Link) to my Starlink through ethernet cables, since I also needed connection quite far away from the main router, like Ben above. I set the routers to “access point” and it all works great, except for “gmail”; I cannot send emails. I have read it might be something about the IP address or something called NAT, but I can’t figure out how to fix it since I am no tech… Any clues on what could be happening? Thanks!
That’s odd, I can’t think of why gmail would have a problem with Starlink. Starlink uses CGNAT to distribute IP addresses, but that’s only usually a problem for services that require a static or public IP address. Gmail doesn’t need either one of those things. Are you using the gmail app or website to try to send? If you are using a 3rd party mailbox with gmail, you might try to reset it, and go through the setup again. Otherwise, try sending from a different browser or device on the Starlink Wifi.
Starlink intercepts port 25, probably so as to prevent people abusing their equipment for spam. Simply change your mailer to use port 587 for SMTP.
Is it possible to add a v2 router to the new gen 3 router via ethernet using this ethernet adapter. I have a building that is too far away from my dish for wifi but is wired for ethernet back to the dish. I want to have wifi in the remote building using a v2 router as an access point. Thanks.
It is not possible to connect the two via Ethernet, but they can pair wirelessly and mesh together if they are within a reasonable range.
Thats what I was concerned about. Thanks for the quick response.
What about using the V2 router with Ethernet adapter to connect to Gen3 router as a mesh router? I have Gen2 system in metal wall divided building and need to expand to other side?
Starlink mesh only works wirelessly, it doesn’t support Ethernet connections from the main router to the mesh node.
I have learned far more from your web site than the Starlink website. Great job and great resource.
If I understand all this correctly:
The Ethernet port adaptor combined with a regular antenna is intended for wired Ethernet end point such as PCs, laptops, cameras, etc. and leverages the existing Starlink Wi-Fi router network services such as NAT, DHCP, and DNS. If I place the existing Starlink Wi-Fi router in router bypass mode, I can connect a third party router to the Ethernet port adapter and can of course plug any client device I want into the third party router.
The Ethernet cable that comes with the Flat High Performance antenna is intended to provide a wired Ethernet connection to a third party router since that configuration does not use the Starlink Wi-Fi router at all, and you need NAT, DHCP, and DNS. The third party router would provide those services.
Is this a correct summation?
Thanks,
BN
That summary is correct, and very well put! And thank you for the kind feedback, I appreciate it.
Hello, is it possible to connect it info a PoE switch? Thank you
Yes, you can plug into any switch to expand your network.
Mr noah clarke in my home network connection with starlink i used my Ethernet adapter to connect to a switch and then to another long range access point(grandstream 7664lr, distance is upto 300m) so that i can have a long range connection in my backyard of 200m to my suprise am only getting less than 30m. Where is the problem? Have i did the right setup? Is the Internet connection comming from my starlink router which i guess is less than 50m and not using my long range grandstream 7664lr access point?
It doesn’t sound like the access point is working, you might factory reset it.
If I use the Ethernet adapter, can I turn off the wifi signal? I only want to use the ethernet so the wifi signal doesn’t interfere with other devices, etc.
Thanks!
Yes, just turn on bypass mode in the Starlink app settings:
https://www.starlinkhardware.com/how-to-bypass-the-starlink-router/
I forgot to post my other question. Can you use a virtual network adapter with Starlink?
Yes, most work, but Starlink doesn’t give you a public IP address. It’s a dynamic IP issued by CGNAT. This causes problems with some platforms.
Good morning i have an issue. I’m an installer in Nigeria and I’ve installed starlink for a customer with an Ethernet adapter which goes to a smart switch and everything is working fine.
But yesterday i bought a Ethernet adapter and connect it to another smart switch for a customer but STARLINK keeps saying no internet or working for few minutes and stop internet access. What might be wrong? The smart switch has an IP address of 192.168.0.193 while my starlink had 192.168.1.1. What’s the problem?
Reboot the system and try a factory reset. If the issue persists, create a support ticket and have Starlink check the system. Could be a defective router, cable, or Ethernet Adapter.
I work from home and am considering a move to van life. I have to be hard wired to use my Horizon VM ware. I thought I would have to quit my job if I do decide to move until I read that you can get an ethernet adapter for Starlink. How reliable is it?
Overall I’ve heard mainly good things, and I haven’t personally had any issues. It’s honestly probably the least likely thing to break on Starlink. People have router and cable issues more often. If you are relying on Starlink for your job, I recommend keeping a spare Ethernet Adapter and Starlink cable on hand just in case.
I have the ehternet adapter and have tried to connect it to a netgear router that I want to connect a LAN printer – no light appears on the router when I connect the CAT from the ethernet adapter — and I cannot connect to the printer — does this mean the ethernet adapter is faulty
It could be. Have you tried connecting the printer directly to the Ethernet Adapter? Do you have another device like a PC that you could connect to the Ethernet Adapter to see if it connects to the internet?
Hello, following the deployment of the STARLINK router with a FORTINET 60F (7.0.12 Mature OS) box for IPSEC coexistence at a corporate site, we have noticed a negotiation issue between the FORTINET interface and the ETHERNET adapter of the STARLINK router. The FORTINET port is set to AUTO, and we have a 1Gb connection, but we are experiencing significant packet loss in the PING. The only solution we have found so far is to decrease the FORTINET speed to 100Full, but this results in poor throughput for our IPSEC VPN. Is there a problem with the adapter? Thank you in advance. Kind regards.
This seems to be a common issue with the Starlink router and Ethernet Adapter. Lots of other people are having the same problem, even years ago, without much in the way of a solution from what I’ve read.
My suggestion would be to upgrade to the High Performance hardware, so you can ditch the Starlink router and Ethernet Adapter completely. The Standard hardware wasn’t designed for anything too advanced, and I wouldn’t be surprised if Starlink intentionally limited the Ethernet Adapter in some way. Most customers aren’t relying on 1 gig home networks, or really any task that would push the Ethernet connection beyond 100 mbps.
I do not agree with this. We have thousands of clients that use ethernet networks at their home. Starlink is also used by small businesses as well, for both backup at work and also for their home offices if they work from there.
its the Forigate 40 and 60 F series that have the problem. My cheap D-link router doesn not recreate the issue.
A dumb switch in between the Ethernet adapter and fortigate fixes most of the packet loss. Not sure about speed degredation. I hope the buisness unit works ok. Lots of issues on the redit forum abou this. Do you think a cross over cable would help. It’s in bypass mode on the SL router, but physically they are both routers so maybe it is forcing some extra negotiation?
How would I connect my Starlink Gen 2 to my home coax network?
You can’t connect Starlink to coax.
Do you mean connect to the network that your Cable internet vendor is connected to, or do you mean directly to the Cable Modem/Gateway?
If you are connecting to your home/business network that gets internet from a cable vendor, then you will need a firewall/router with dual WAN capabilities, that just means that your router has 2 internet inputs and can failover from one to the other in case of an outage. Hope that’s it.
If you mean attaching the Starlink router to the actual Cable internet gateway as a backup or to increase speeds, that’s not possible, at least with the ones I’ve worked with.
Thanks for explaining how this stupid thing works. It’s frankly unbelievable. Not everything connects to wifi and not everyone WANTS everything to connect to wifi. Fuggin thing is called a router and doesn’t have a network port!?!?!?! Would be nice if they were availabel for $25, they’re hard to source at all in many contries and I’ve seen one place selling them here for a couple of hundred dollars each! Despicable bull shite from Starlink.
I was told by our tech person we can have either WiFi or a hardwire connection, but not both, with the high-performance dish, and it has something to do with the shape of the plug where the ethernet adapter plugs into the HP equipment. Is that correct? We need our dish to be able to do both, and I want to use the mesh nodes, not a third-party wifi router.
No, that isn’t right. If using the included Starlink router, you can plug the Ethernet Adapter into the router, and then use the included “router cable” to plug the Ethernet Adapter into the power supply. Ethernet is provided by the adapter, and Wi-Fi from the router.
That’s what I thought but he said for the high-performance dish the angle of the cord is different ??. I’m not there in person right now since I’m traveling, but I don’t understand why that would be the case.
I think he is looking at the wrong cable. The HP kit comes with a couple different cables. There should be one cable that plugs into the power supply at one end, and then a right angle connector on the other end that can plug into the Ethernet Adapter or directly to the router itself.
Possibly – I’ll look into it more when I get back at the end of the month. Thanks for the feedback!
From the Ethernet adapter, how many feet of Cat6 can be run? 100Meters? Less?
I would stay under 100 meters for the best performance.
Will Apple TV work with the latest Starlink router and the Starlink RJ45 wired adapter?
Yes, I haven’t heard any reports of issues with Apple TV devices.
hi I have the rectangle starling dish, so no ethernet connection, I purchased a ethernet connector to run stuff with ethernet, it didn’t work and after a few frustrating days concluded it must be faulty. ordered anew one and its arrived and same thing, can’t get my computer to connect to starling via ethernet.
I have rebooted the starling several times and nothing different.
does anyone out there have any suggestions????????
Most likely a faulty router. I would create a support ticket so Starlink can send you a new one to try.
Ethernet cable question. does the adapter use a 6 or 8 wire connection?
There are 8 pins on the connection. It’s an RJ45 port.
Is it a Type A or Type B wiring configuration?
T568B
Hi Noan Clarke,
Thank you very much for your detailed article ” How To Bypass The Starlink Router.
Could you please help me solve my problem with old model round dish ( with AUX port on bottom) StarLink internet router
I think I accidentally set it in some strange mode. It is behaving like this in row being connected to my WiFi network “ValLor2022″ CH6 (2437 MHz) (20MHz)
and
” (2437 MHz) (20MHz) CH6 (2437 MHz) (20MHz) (TP-Link).
1. “ValLor2022” connected upload and download for 20 seconds
2. switched to “ValLor2022” connected “upload only” for 20 seconds
3 switched to “ValLor2022” connected “download only” for 20 seconds
repeating this sequence indefinitely
The “ValLor2022_EXT” sometimes up and sometimes totally gone (not shown at all).
What should I do to remove “ValLor2022” and “ValLor2022_EXT” completely and set new WiFi network(s)?
Please help me, I am shucked.
Best Wishes,
Val
I would factory reset the Starlink router. With the Gen 1 router, there is a reset button to press with a paperclip or something small. Then you can set up your Wifi network again.
I’m currently on DSL at the house and we run a cat5 from the house router to a garage office so it has its own wifi. If I get this adapter and Starlink in the house can I do the same setup? Will it run a secondary router? The garage is too far for wifi.
Yes, simply replace the DSL connection with Starlink and your setup will work the same.
Hello, continuing with this topic, I have set up the mesh, added the Starlink adapter and my Ethernet is not working. Do you have any suggestions? Thank you.
I suggest trying a different device to verify the Ethernet is the issue, and then create a support ticket with Starlink to see about getting a replacement router and Ethernet adapter if the problem continues.
Hi! Have you personally used the Starlink ethernet adapter with the high performance dish? I’ve used that ethernet adapter many times with the residential Starlink dish, but I tried to use it with a high performance dish and it completely crashed the Starlink router. I had to factory default the router to get it back online. I unplugged the system from power when making the change. I’ve found zero documentation from Starlink showing that this adapter works with the HP dish.
It is compatible according to their website. When you visit the online shop, the Ethernet Adapter is shown as an accessory for the High Performance dish. I haven’t personally used this setup. Most people will go straight to a 3rd party router with the HP hardware, so the Ethernet Adapter isn’t necessary.
Thanks. Seems like I cannot look at the shop unless I am a Starlink customer.
Hi there, we have had our Starlink for two months and are very happy with it. We are wanting to extend coverage to our man cave to run a golf simulator. I would also like to have wifi in that building 100 feet from house clear view. The building has metal siding, I think I can get signal to the building with a TP Link point to point…my question is can add a router to that client port to run a wifi signal in the man cave. I am not tech savvy at all so hesitant to get started. do I need to bypass the home wifi via starlink to do that?
The easiest way to do this would be to run the TP Link router in “access point” mode. It won’t act as another router, it will just expand Wi-Fi coverage.
Hi Noah, thanks for the incredibly useful information! We are building a new house and our only option for high speed internet is Satellite and obviously Starlink is by far the best way to go. I am considering doing Cat7 throughout the house. My question is what is the best way to setup the network? Ethernet hub after the adapter then switches or just daisy chain switches throughout the house? We will be streaming television throughout the house, have a security system that works best with ethernet, have 2 separate AV stations, and 2 computer desks that will need to be setup for video conferencing, using Zoom mostly. Also would you recommend a third party WIFI router? Also is there a better way other than what I am asking? Thanks!
I would install a central network cabinet somewhere in the house, and route the Starlink cable there, with the Starlink router and Ethernet Adapter also inside the cabinet. From the Ethernet Adapter, connect to a network switch. All your devices can also be run down to this switch. A 3rd party router or mesh system is recommended for more advanced networking settings, but the Starlink router will be fine for most applications.
Thanks Noah, I hired a networking specialist and he 100% agrees with you and it is what we will do.
Good afternoon!
Noah Clarke, thanks for sharing your knowledge and how to use the adapter.
I have a difficulty, maybe a problem.
I have 03 kits and for each one we buy the ethernet adapter, when using the adapters our internet bandwidth limited to 5Mbps for download and 10/15Mbps for upload.
Did you encounter this problem in your test?
NOTE: When using the router’s wi-fi network, I have an average of 200Mbps.
If you get this result with 3 different kits and Ethernet Adapters, I’m thinking the device you are connecting to it is the problem. Probably a link speed setting.
Did you get this resolved? We’re having the same problem.
Hi there, thanks for a very helpful blog. I have a question regarding my existing wired home network. I had no problem setting up the Ethernet adapter, and restarting the starlink router and having successful connection to the existing network. However eventually (typically a day or so) the connection is lost to the network (while the starlink hub still works fine) and I have to restart the starlink hub to reconnect the network. The Ethernet adapter connects to a D-link switch, where cables run out to sensors, an AirPort Extreme base station which serves as Time Machine for a couple computers with a usb cable to a printer so it can be accessed wirelessly, and a cable also runs from the d-link switch to separate building where there is an apple wireless hub in what I think is extension mode for wireless and also Ethernet connections to sensors, solar panels and a computer. Sounds like a complex setup, but it has worked fine with our old router on dsl, and I simply switched from the old router to the starlink hub through Ethernet adapter. Where do you think the culprit for dropped connection may be? Is it starlink hub, d-link Ethernet switch, having other wireless hubs in bridge or extension mode on the the local Ethernet network? Would be delighted to hear any suggestions. Thanks!
Are there any other network routers involved? I’m not familiar with the Apple products mentioned, but I’m assuming the AirPort can act as a network router? If so, and you are doubled NAT’ed (having two routers on the same network), that can cause issues like this.
Thank you, yes the airport extreme can act as a network router, though it is set in bridge mode. I keep it on there as a time machine to back up my laptop wirelessly. The other router in the separate building may also cause such an issue. I could disconnect and see if that helps.
Or would setting the starlink hub in bypass mode potentially resolve the issue?
If you don’t mind the router in the other building handling everything, it would be best to run the Starlink router in bypass mode. Keep in mind, this disables the Wifi on the Starlink router. If you don’t have other access points, that might be an issue. Alternatively, you could run the separate building router in access point mode and leave the Starlink router on.
Thanks Noah. I actually disconnected both other routers to see if that would help, and I still lost LAN connection to the starlink hub after a few hours. So Bypass mode might be best to try. I saw on the app that the starlink router will require a reset if I wish to disable bypass and return to normal status (if I find out it does not help my LAN connectivity). Have you ever heard of people having issues with resetting their starlink hub?
By the way, can the d-link switch cause similar problems with connectivity?
Haven’t heard of issues doing a factory reset on the Starlink router. The switch can cause issues, depending on the type of configuration it has. Is it acting just as a hub or are there advanced settings in place like VLAN’s?
it is an unmanaged switch acting as an ethernet hub. https://amzn.to/3rNtQhY
Well I went into bypass mode, and then nothing worked. And then I realized I had been bypassing a Gargoyle hub I had put in the original network before the router to measure individual device bandwidth usage. The house router was set in bridge mode, and the second router working as a second access point. This may explain the dropping network, the fact it was running without the gargoyle hub it initially had. Needless to say, hooked up Gargoyle, with Starlink in bypass mode, and all is working swimmingly. Thanks for taking the time to help me troubleshoot, and hopefully this is a resilient resolution 😉 sure enjoy Starlink after DSL! Thanks again.
Hello, I have Starlink and will be using a series of TP Link deco M4’s to create a mesh to boost the signal.
My first question is ; should I use the Starlink router as the router to disable it and use the deco as the router?
If I do then am I correct in thinking I use bypass mode on the Starlink and then I need to use my decos in router mode and not AP mode?
second question ; what will give faster speed. Starlink router and mesh as AP’s or bypass Starlink and use docos as router.
many thanks
Hi Noah –
first question should read –
should I use the Starlink router as the router OR disable it and use the deco as the router?
No problem, I understood what you meant. I recommend disabling the Starlink router and using the Deco router instead.
I recommend using the TP-Link as the router. So you would turn on bypass mode in the Starlink app to disable the Starlink router. You’ll get better mesh performance by using the TP-Link as the router instead of the Starlink unit.
Hello, I am hoping someone can help here. I have TWO items that I have to plug in. Is it possible to do this by purchasing two of them from Starlink?
I recommend purchasing an unmanaged switch. Plug the Ethernet adapter into the switch, and then plug any devices into the switch. Something like this is cheap and would work great:
https://amzn.to/3NTY7nz
we have the rectangular disk set up and functioning properly but the first ethernet adaptor cable failed after a few days and now the new replacement will NOT work. We HAVE TO HAVE ETHERNET cable – customer service with Starlink is HORRIBLE and all we are getting is the standard BOT suggestion ie: “make sure everything is plugged in, etc”
Any suggestions other than just sending it all back for a refund?
What are you plugging into the Ethernet Adapter? I would try to factory reset the Starlink router and see if that helps. I’ve also seen that the router itself can be the issue causing the Ethernet Adapter to not work, so that would be the next thing to replace.
I had to set the router to bypass mode for it to go to my firewall, can you not use the ethernet adapter and have wifi at the same time?
Bypass mode turns off the Starlink router Wifi, so you need a 3rd party Wifi router in order to have Wifi when bypass mode is on.
Hi, I am installing my Starlink and would like to connect it via the Ethernet adapter to my existing Ethernet/Wi-Fi mixed network that starts from a 24-port switch.
Will the Starlink Router be able to reassign all ports automatically?
If you have an existing router and Wifi setup, no need to change anything except your internet source. Just plug into your existing equipment from the Ethernet Adapter and bypass the Starlink router. Bypass mode is found within the app settings:
https://www.starlinkhardware.com/how-to-bypass-the-starlink-router/
If I have multiple items to plug in do I just buy multiple Ethernet adapters and plug them into themselves?
Buy an unmanaged switch to act as an Ethernet hub. The Ethernet Adapter would plug into the switch, and all your devices would also be plugged into the switch.
where can you get this UNmanaged Swtich? I need one as I have more than one item to plug in (2 acutaly)
Here is a popular one on Amazon:
https://amzn.to/3NTY7nz
Hi, I purchased the Ethernet adaptor to run my old A3 printer (still very good) via Ethernet It seems the Ethernet connector is on different IP address range than the wifi. Wifi is 192.168.1.xxx while the Etehrnet is 192.168.15.xxx. So how do I print from a device connected to the wifi?
It should still all be on the same local network, the printer should be visible. One test I can think of is to use a PC or some other device that is also connected via Ethernet (might need a switch or something like powerline adapters to get an extra Ethernet port) and see if the printer is visible when using Ethernet instead of Wifi. If you can confirm that Wifi vs Ethernet is the issue, you can then troubleshoot that issue.
Does the adaptor hang any wired client directly off the dish? ie; logically in parallel with the wifi router? Or is it hosted by the wifi router – logically in series? I ask because i’d like to know if a client would get DHCP from the wifi router or directly from Starlink
DHCP would come from the router. The Ethernet port is wired back into the router itself even though it’s an external device.
Noah,
I will need to put the primary router in a closet (dist to first router). I have cat 5 run throughout my house. If I buy the Starlink mesh and an ethernet adapter – will I be able to connect my cat 5 network through a node, or doe it need to be the primary wire from the dish to the router?
For the best performance you would want the cat5 network connected directly to the Starlink Ethernet Adapter. It would work plugged into a node, though.
Starlink Ethernet Adapter Satellite Internet V2 for Rectangle Dish
Is there a place where I can buy this product at least 100 pieces?
No, Starlink isn’t currently supporting resellers for accessories. Customers should buy direct from Starlink to avoid 3rd party profit markups.
Was kann ich tun wenn Ich ein ethernet kabel 20 m am ethernet adapter einstecke hanbe ich kein internet vom starlink rauter mehr. Wenn Ich Das kabel wieder entferne geht es wieder. Danke fuer nachricht
(google translate)
Ich würde ein Ticket bei Starlink erstellen. Meine Vermutung wäre ein defekter Ethernet-Adapter. Du verlierst auch das WLAN?
What if I don’t want wifi? I have the Starlink connected to a router and everything hooked up to ethernet. If I bypass the Starlink router, do I have to set up the other router somehow?
Yes, if you put the router in bypass mode, it disables the routing functions like DHCP. So if you don’t want Wifi at all, an aftermarket router where you can just turn off Wifi would be recommended. Otherwise, with the Starlink router, you can just not use it and use the Ethernet Adapter connection to your devices instead.
Does the Starlink ethernet adapter support POE?
No, it does not provide any power via PoE.
I already have BNC and Ethernet cables run when the house was built.
Does Starlink offer an adapter for the dish also. I really do not want to drill another hole into my house.
BNC/coaxial cables are not compatible with the Starlink system. The Starlink cable will have to be routed into the house. But you can take advantage of your existing Ethernet wiring with the Starlink Ethernet Adapter.
Hello, How many “ethernet adapters” can I buy to my house at one time.
I think they limit 3 per checkout in the online shop.
Can I use my Ethernet adapter to cone t my Starlink mesh to my router, if I have the adapter for both of them?
No, the Starlink mesh nodes don’t support Ethernet backhaul. Only wireless connections to each other.
Hi Noah,
What do you refer to by the “original round dish”?
Also, is it possible for me to connect to a switch serving a LAN of 10 computers and 5 printers?
Hi I have 2 cabins and a main house. I want to install 2 TPLINK AC1200 Whole Home Mesh Wi-Fi System. Have only owned the Dish for a week. Unfortuantely the cabin is only receiving 1-2 bars and is located 20 mtres away from the router. Hoping an extender will help to pull the Wifi over. Is the Mesh system going to be compantible with the Starlink Satellite Ethernet Adapter?
I am interested to hear this answer also Joe – I loose all coverage around 10 metres – still waiting for my adapter to come in the mail – guess when it arrives, we shall see hopefully next week if you dont get a response, as I have the tp link mesh here already.
Yes any aftermarket extender or mesh system will plug into the Ethernet Adapter. The Starlink Mesh System is not compatible with the Ethernet Adapter and is wireless only. For home to cabin, you might look into wireless Ethernet solutions from companies like Ubiquiti. Essentially, you just wirelessly beam a signal from one building to another. Works great at longer distances where traditional Wifi won’t reach.
Good article on the physical connection. Nothing on the layer 2 or 3. Is there a settings page? Is ipv4 dhcp enabled? What is the default ip address? Is the wireless default gateway 192.168.1.1 visible from the ethernet side? Can you configure dns settings?
The Ethernet Adapter is just adding a LAN connection to the router. There are no network settings associated with it. Everything happens on the Starlink router. Custom DNS and other settings can be configured from the advanced network settings in the app, although the amount of customization is minimal with the default Starlink router. You’ll need to replace it with an aftermarket router for advanced functionality.
https://www.starlinkhardware.com/how-to-access-the-starlink-router-settings/
This should be included for free. The fact they don’t include a Ethernet connection is fucking unbelievable.
The High Performance kit comes with an Ethernet cable, but the instructions don’t say anything about how to use it. I thought maybe it’s to bypass the router and use the dish on a wired basis FROM The Power Adapter, but it did not work. Do you have any idea how to use the cable?
It’s to be able to use your own router without needing the Ethernet Adapter. You can plug it directly into a 3rd party router.
Please report the type of ethernet supported. Is it only 1 GB, cat 6, cable? Does it support 10 GB, cat 7 cable?
1 Gbps max transfer speed on the Ethernet Adapter.
What if I want to hard wire more than one device? I have just purchased this extra device but it only has one node? I need to hardwire 3 TV’s. What is the solution please?
I would recommend purchasing an unmanaged switch. This switch will act as a hub, where you can connect all the devices to. There would be a connection from the Ethernet Adapter to this switch, and anything else plugged into the switch will be on the same network.
We have now a Starlink rectangle dish and have the ethernet adapter, we also have tmobile internet through 4g mast.
When i plug the starlink in bypass mode and put him in our Linksys ea9500 router the internet is not getting through.
It is very slow and some of our computers(3) do not have internet at all.
We are living in the netherlands.
We want to use the ethernet so that we can use our synology server, the rest can be on wifi (printers etc).
Make sure the Ethernet cable from the Starlink Ethernet Adapter to your router is connected to the “Internet” port on the Linksys router. Try a factory reset of the router, and then go through the install wizard on the router admin page to make sure all the connection settings are good. It could be a faulty Ethernet Adapter, too. You can rule this out by plugging a PC or other device directly into the Ethernet Adapter and running internet and speed tests to ensure you are getting a good connection. If you have good speeds and internet connectivity directly at the Ethernet Adapter, it’s a Linksys router issue.
Worked thank you
Can I hardwire an router in an outbuilding to an Ethernet adapter and still use the Starlink router in the main building
If you want to hardwire access points into multiple buildings, it’s best to buy aftermarket routers and access points, as Starlink routers don’t support Ethernet backhaul. So you would need the Starlink Ethernet Adapter plugged into the your main router, and then you could connect additional access points via Ethernet so that they would all be on the same network.
I need 3 ethernet ports – I have 2 security camera system dvrs that I can view over internet at any time if they are connected by ethernet (they are older so they are not wifi) and a device that connects my home alarm system to ethernet – it is older too so no wifi. (Again all older items but they work fine) I got starlink back in October 22 (this is the new version with the rectangular dish) and was shocked that the router did not have any ethernet ports. I bought the adaptor above and plugged everything in. It worked flawlessly for about 3 months, it stopped 1/13/23 in case something changed firmware wise on that date. Now the only way I can get any internet is from the star link router and if I disconnect any wired switch and a TP link mesh router that was working fine before. I am not a tech person by any means but I can wire and plug things in, My intial installation was (Star link router (operating as a wifi spot with an SSID and password which worked) to ethernet adaptor connected to a TP Link Deco mesh router with 2 additional nodes. The intial TP link node was plugged to a wired ethernet switch – which in turn went to my 2 dvrs by wire and my home alarm system. The TP Link was working as a wifi spot also with its own SSID and password that worked. This all worked flawlessly until 1/13/2023. I have done some research and in appears the starlink system does not like a “Double NAT” which seems is what I have. I followed the instructions to use the bypass mode on the star link router. This did disable the wifi SSID on the star link router but I never could get any internet through the TP Link router. I did the manual reset of the star link router to turn off the bypass mode and now have internet through it as long as nothing is connected to the adapter ethernet port. I will add that I had found that some had problems with the adaptor so I bought another one. I installed it I believe on the 1/23/23 and it worked flawlessly until 1/27/23. I put the dates in again if there were some firmware changes. Is it possible that I have 2 bad adaptors? This shouldn’t be this difficult. Any insight would be appreciated.
If you can get internet directly from the Starlink Ethernet router (PC connected directly to it, not the TP link hardware) then I would say the problem is with the TP Link equipment. It’s possible to have two bad Ethernet Adapters, but unlikely. It’s more likely that the Starlink router is bad/intermittent.
Did you find a solution/resolution to this? I’m experiencing the same issue; only difference is my took place in February.
The router for the internet connection is inside the dish if I read it correctly. so is the dish and ethernetconnecor working even without the wifi-router? That would be very nice because i want to plug into my router’s wan-port.
The modem is inside the dish itself, as is the power supply for the dish. The Starlink router is required, although it can be set to bypass mode in the software if you want to use your own router. Setting it to bypass mode turns off the Wifi, routing, DNS, and DHCP functions and allows your own router to handle that via the Ethernet Adapter connection.
I’m confused by this. Where does this adapter sit? Is there a network diagram for what StarLink provides? I would need to place StarLink antenna on a pole and I need it to be a microwave modem, that it..
The adapter will be near the router. The adapter plugs directly into the router and the cord isn’t very long. So wherever you put the Starlink router/power supply is where the Ethernet Adapter will be. I misspoke in my previous comment, I meant to say that the dish is the modem, and the router is the router and power supply.
Once you set the Starlink router into bypass mode and shut the internal Starlink WiFi down, then the Starlink app with its troubleshooting tools will no longer be accessible, correct?
The app and statistics page at dishy.starlink.com should still be accessible, as long as the dish IP can be reached with your router settings. If you can’t get the app or dishy.starlink.com to connect, try creating a static route in your router settings:
https://www.starlinkhardware.com/how-to-bypass-the-starlink-router/#Managing_Starlink_in_bypass_mode
Thanx for the clarification.
Starling router’s WiFi is not very good and when testing the speed, while in the same room it screams that the WiFi connection is not good and shows that the speed of the router itself is significantly higher. And if the router is in the next room, there will be no normal connection at all. Another important thing is that the antenna is outside and you can often make the input in the house not where you need it, in such cases you can only get to the required room through a cable, so I think an Ethernet port router is necessary.