
The Starlink ‘stow’ feature allows you to move the dish back to its default orientation. You might need to stow the dish to send it back to Starlink, for troubleshooting, or to move it to a different installation location. In any case, you will probably encounter a situation where the feature comes in handy at some point.
There are three methods that you can use to stow a Starlink dish. You can do it using the app, but there are also a couple of manual methods that require a more hands-on approach. You can even stow the dish if it is broken or unresponsive. In this tutorial, I will walk you through each method, from easiest to hardest.
Stowing Starlink with the app
The best way to stow a Starlink dish is to use the Starlink app. This method works if your Starlink is functional and you can connect to it, either locally or remotely.
Step 1 – Open the Starlink app on your device
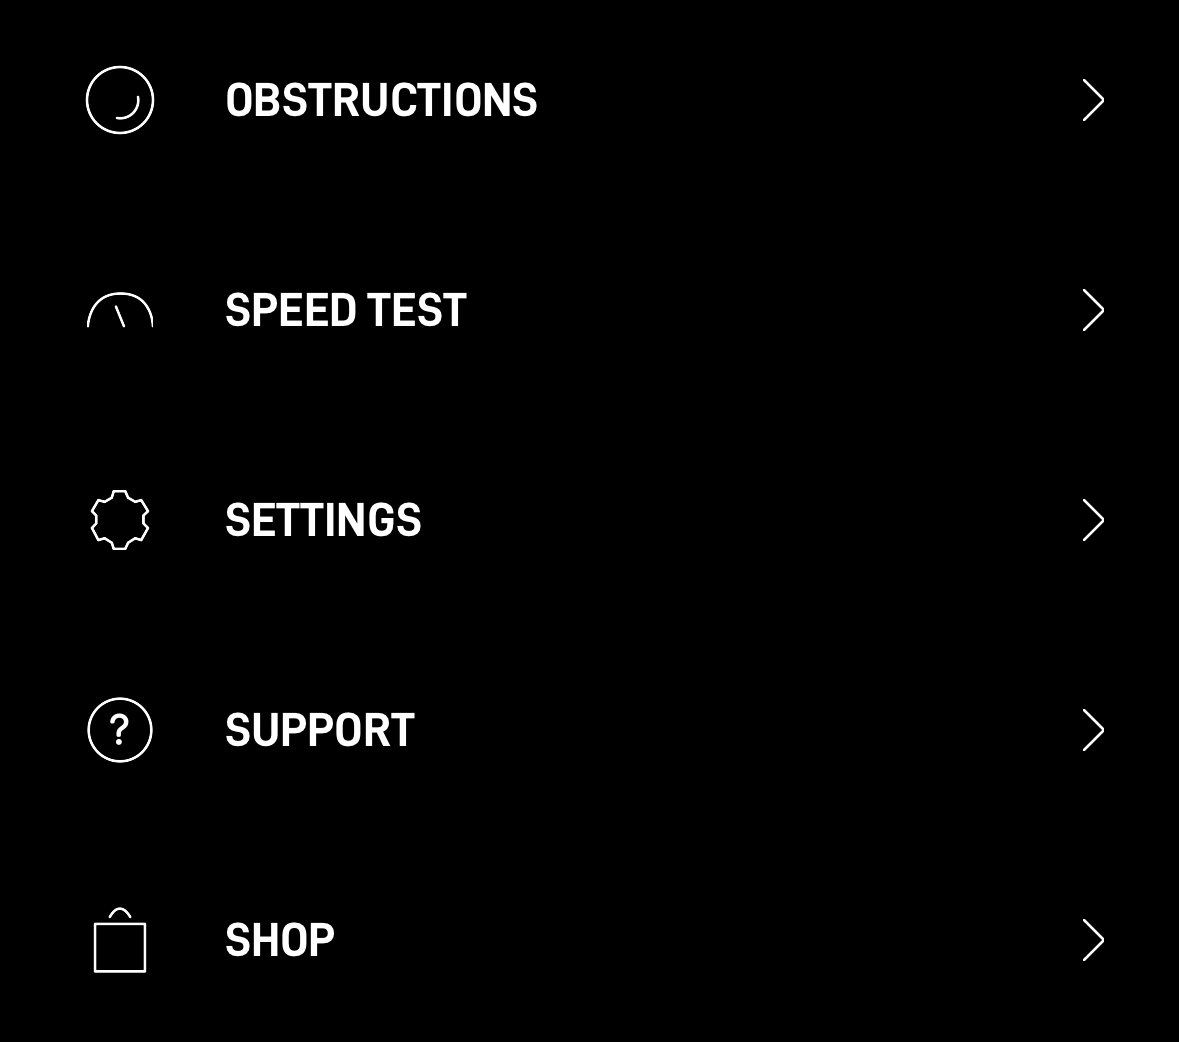
Step 2 – Tap Settings
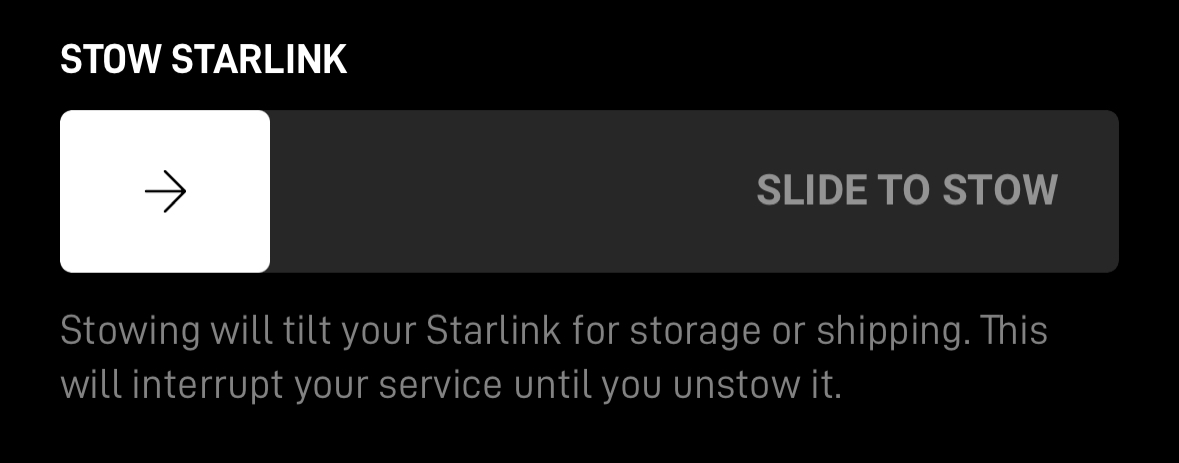
Step 3 – Scroll down to the Stow Starlink section, slide the toggle to the right
Step 4 – If you are locally connected to your Starlink, sliding the toggle will stow the dish. If you are remotely connected (for example using cellular data or your work Wifi), an additional confirmation appears. Tap OK to confirm and stow
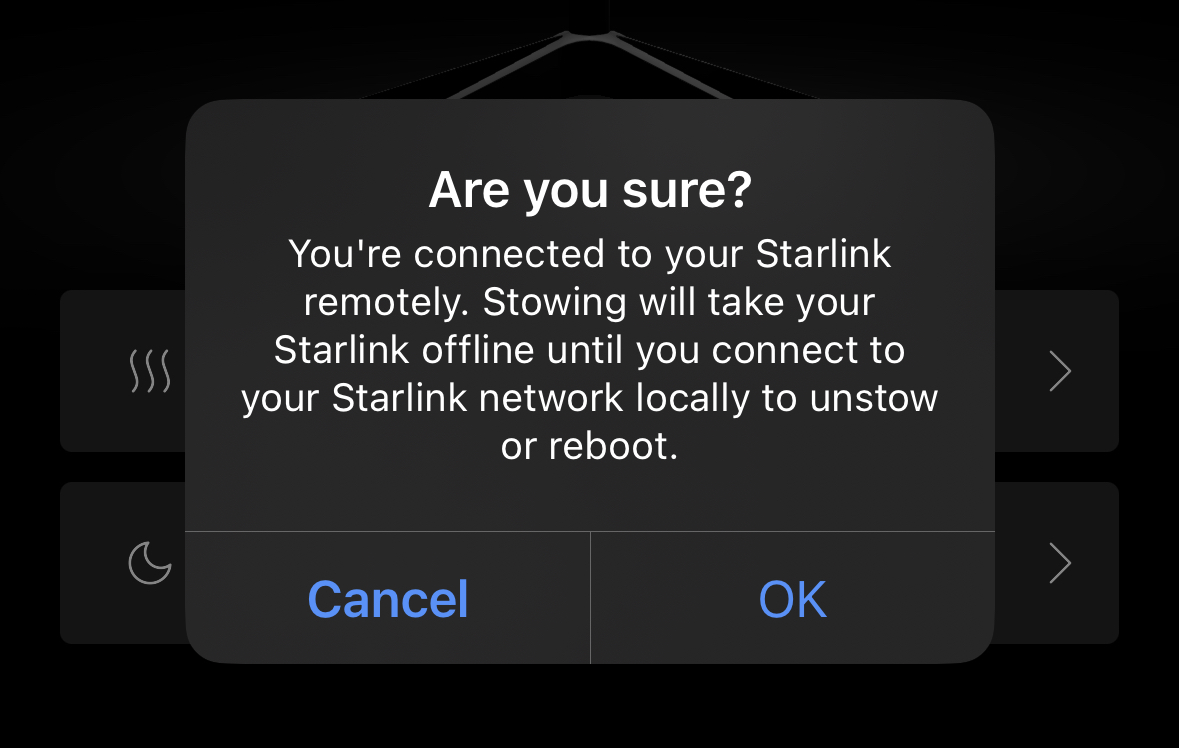
You will not be able to un-stow and restore internet service if you stow the dish through a remote connection!
Your Starlink service will be interrupted while the dish is stowed. The router and Wifi network will remain on, but you won’t be able to access the internet. To un-stow the dish and restore service, follow the same steps. You will see an option to Unstow in the Settings, instead of Stow. If you are remotely connected with the app, you won’t see the un-stow option, as you need to be locally connected to Starlink in order to restore service. It will take several minutes for Starlink to boot back up.
Stowing without the app
If you don’t have access to the Starlink app but you can access the dish, try this method of stowing:
Step 1 – With the dish plugged in and turned on, remove it from the mounting base
Step 2 – Place the Starlink dish face down on a flat surface
Step 3 – After about a minute, the dish will automatically tilt into the stow position
Step 4 – Immediately unplug the dish (Starlink cable or router power cable) so that it remains stowed
To restore service to a dish stowed with this method, install it back in the mount and apply power. The dish will automatically start to search for satellites and orient itself after several minutes.
Manually stowing a broken Starlink dish
If the previous two options don’t work because your dish is broken, you can still stow it manually. If you are sending the dish back to Starlink for repair or replacement, you are allowed to force it into the stowed position for shipping.
Step 1 – Remove the dish from the mount, unplug the Starlink cable
Step 2 – Place the dish face down on a flat surface
Step 3 – Slowly apply force to the mast part of the dish, pushing it down into the stow position
You may hear some clicking or grinding. It’s just the electric motor and gears being forced to turn. As long as you move slowly, and don’t attempt to push the mast too far, you won’t break anything.
Noah…….. I am a new STARLINK user and I am about to leave my winter home and want to stow my STARLINK dish and place it safely in the house . I also would like to suspend service until I return next September. I am confused about the order and the best method to successfully do this. Do I stow the dish first and then cancel service or do I change to mobile and then put the service on hold and stow the dish. Some questions come to mind. If I am fairly confident I can get residential service when I return should I cancel my service and reapply on my return in September? If I go from residential to mobile can I then go back to residential. I am only interested in using and paying for the service for the winter months!
Stowing and cancelling are two different things, so it doesn’t matter which order you do it in. If it were me, I would just cancel Residential, and activate it again in the spring. No need to convert to Mobile only to pause the account.
Noah. I am trying to stow a Starlink that won’t connect because it is broken (for return–they sent me a new one). I am trying to push it down as the instructions say but it is just not moving. Any other ideas?
If the dish won’t power on at all, the only choice is to force the mast down into the stowed position. You might have to break the gears/motors to do so, which is fine to do if they’ve already sent you a replacement and have instructed you to send the broken one back. If you can’t physically get it to move, you might be forced to find a different box that will accommodate the dish un-stowed. If you are nervous about breaking the dish, you can always follow up with support to see if they have any further recommendations.
You suggest that it is okay to force a dead dish into stow mode for shipping back to Starlink. Do you have a reference for this? I can’t get support to say that is okay, but it is what would need to happen if I’m to send a dishy back (at least in the mfg box) that appears to have gone kaput after only a few hours on the job.
Are you assuming this from the last line of their FAQ on stowing that says, “To stow your Starlink Standard, move the kickstand from the supporting position, to flat under your Starlink for storage,” but they don’t elaborate on how exactly to move the kickstand?
My source for this article was the FAQ page you mentioned, but it doesn’t have the same information anymore. They’ve updated the FAQ section today, with the release of the Gen 3 dish. That’s what the part about the kickstand is about (Gen 3 has a kickstand by default, no mast or motors to stow). For the Gen 2 Standard dish, the FAQ used to say that you could manually force the dish by pushing it into the stow position. If it won’t power on at all, that’s the only way to get it back in the box. But follow what support says if they have other recommendations.
I’m at my summer (vacation) house up on Lake Superior and will be stowing my dish when we leave for the winter; I intend to use the “stow without the app” methodology and take the dish down for the season. Is it correct to assume that after removing the dish, that I then can just disconnect the electrical power plug to the router and that the entire system will be down for the winter—-that when I go to restart the system in the spring that I can just reconnect electrical power to the router—-reinstall and reconnect the dish—-and that within a few minutes (after the dish has reorienting itself) that the system will boot right back up?
Yes, all of that is correct. After stowing the dish you can unplug the router. When you come back, plug everything in, and it will automatically boot back up and aim itself.
Thank you Sir!
When I cancel service do I need to send the equipment back? Will I get a full refund? If I decide to start service again, will I be put on a waiting list?
No, you don’t need to send the equipment back, it’s yours. You only get a refund if you are within the return window. I believe it’s 30 days for a full refund. There is no more waitlist, so you can reactivate service at any time.
I had problems with my first Starlink kit and received a replacement – which works. I am attempting to stow the old antenna to return it. I connected the old antenna to my replacement base & cable. However, the stow option doesn’t appear in my settings. Will Factory Reset stow the antenna?
No, the factory reset won’t. I recommend just powering it on and putting it upside down to get it to stow.
Does stowing also pause service and stop requirement for monthly billing?
No, it is just for easier storage or moving of the dish, it doesn’t do anything with service or billing.
if a remotely ( 500km away) stow the starlink, you mentionned that we will not be able to unstow remotely… will remote reboot will unstow the dish and bring back to live the internet? I purchased my system in 2023, and my app has the unstow swip
Did you try that ?
I would like turn on the starling on demand only when need, to minimize power consumption.
When you stow the dish, remote communication becomes impossible because the dish is stowed, so you can’t even reboot the system remotely.
I’m disconnecting Starlink for the winter at our vacation home. Do I need to take it off the roof because of snow etc? Or is it ok to stay on roof with electric off?
It’s fine to stay up on the roof during the winter.
I must be missing something about un-stowing. If you need to be connected to your Starlink wifi system to unstow, the antenna would need to be unstowed to connect. How can I connect to my Starlink wifi if the antenna is stowed? What am I missing? Thank you!
The Wifi network stays running because that comes from the router, not the dish. So if you can connect locally with Wifi, you can still talk to the dish even though it’s stowed.
After stowing the dish can you just disconnect the router or do you have to do something special with that
Nope, just disconnect the cables, no special shutdown procedure or anything like that.
I purchased a used kit in Canada. The gentleman didn’t stow it before he canceled the service. I set up my service in the Dominican Republic because I am traveling. I set everything while still in Canada, haven’t gone to the Dominican Republic yet, can’t stow the unit, any suggestions?
It can take 5-10 minutes after power is applied to the system, for the dish to move on its own. If you manually forced it to stow, the motors could be broken. Service/activation has nothing to do with stowing or dish movement. It will always point straight up after a few minutes of turning on. Could be a bad cable or bad router if it never moves. The warranty transfers from the previous owner, so reach out to Starlink support if you can’t get it to work and the cable replacement doesn’t help.
How flat will the post go? I’m delivering this to someone and with the tilt of post out of the box it won’t fit in my carryon bag.
The post doesn’t lay flat. You can see the indent on the bottom of the antenna, which is as far as the post will come down. But it should fit in a typical luggage bag for carry-on.
This is very clear and very helpful. Thank you.
You’re welcome, glad the article helped!
I can’t unplug the cable housing from the base. Maybe it’s misaligned. Any tips? I don’t want to yank too hard lest I damage it.
There have been reports that a manufacturing defect has caused some of the plastic or other material to melt and sort of glue the connector in place. Give it some downward force and wiggle it a bit, it should slide out.
So I hit the stow button. It did not give me the second “are you sure” message and now I can’t unstow. In this article it says I will not be able to unstow until I am directly connected to my Starlink internet again. So how do I go about directly connecting again?
They may have changed it, I see that they just recently updated the app and now it’s a swipe toggle for the stow. I will work on updating this guide. As far as getting it out of stow mode, you just need to be connected to your Starlink Wifi network. What I mean by directly connecting is that you can’t unstow by remotely connecting to your system from work, school, cellular data, etc. You have to be physically at your Starlink location, connected to the Wifi.
do I have to stow the starlink if I want to return it but have never taken out of the box
It’s already stowed if it’s in the box.