
The Starlink Cable Routing Kit is an official accessory that allows you to run the Starlink cable through an exterior wall. It includes everything you need to install it yourself. While it is possible to install the cable through a wall using off-the-shelf parts, I think most people will appreciate this complete DIY kit, designed specifically for the Starlink cable.
You can buy the Cable Routing Kit from the Starlink shop. Only customers can access the shop, so you’ll need to be logged in to view the page. It costs $26 in the US market. The kit is available for all current Starlink hardware models.
In this tutorial and review, I’m going to show you how to run the Starlink cable through a wall. I’ll explain the tools needed, what’s included in the Cable Routing Kit, and walk you step-by-step through the installation process. Finally, I’ll give you my impressions of the kit, as well as some final thoughts about the overall project.
Table of Contents
Kit contents
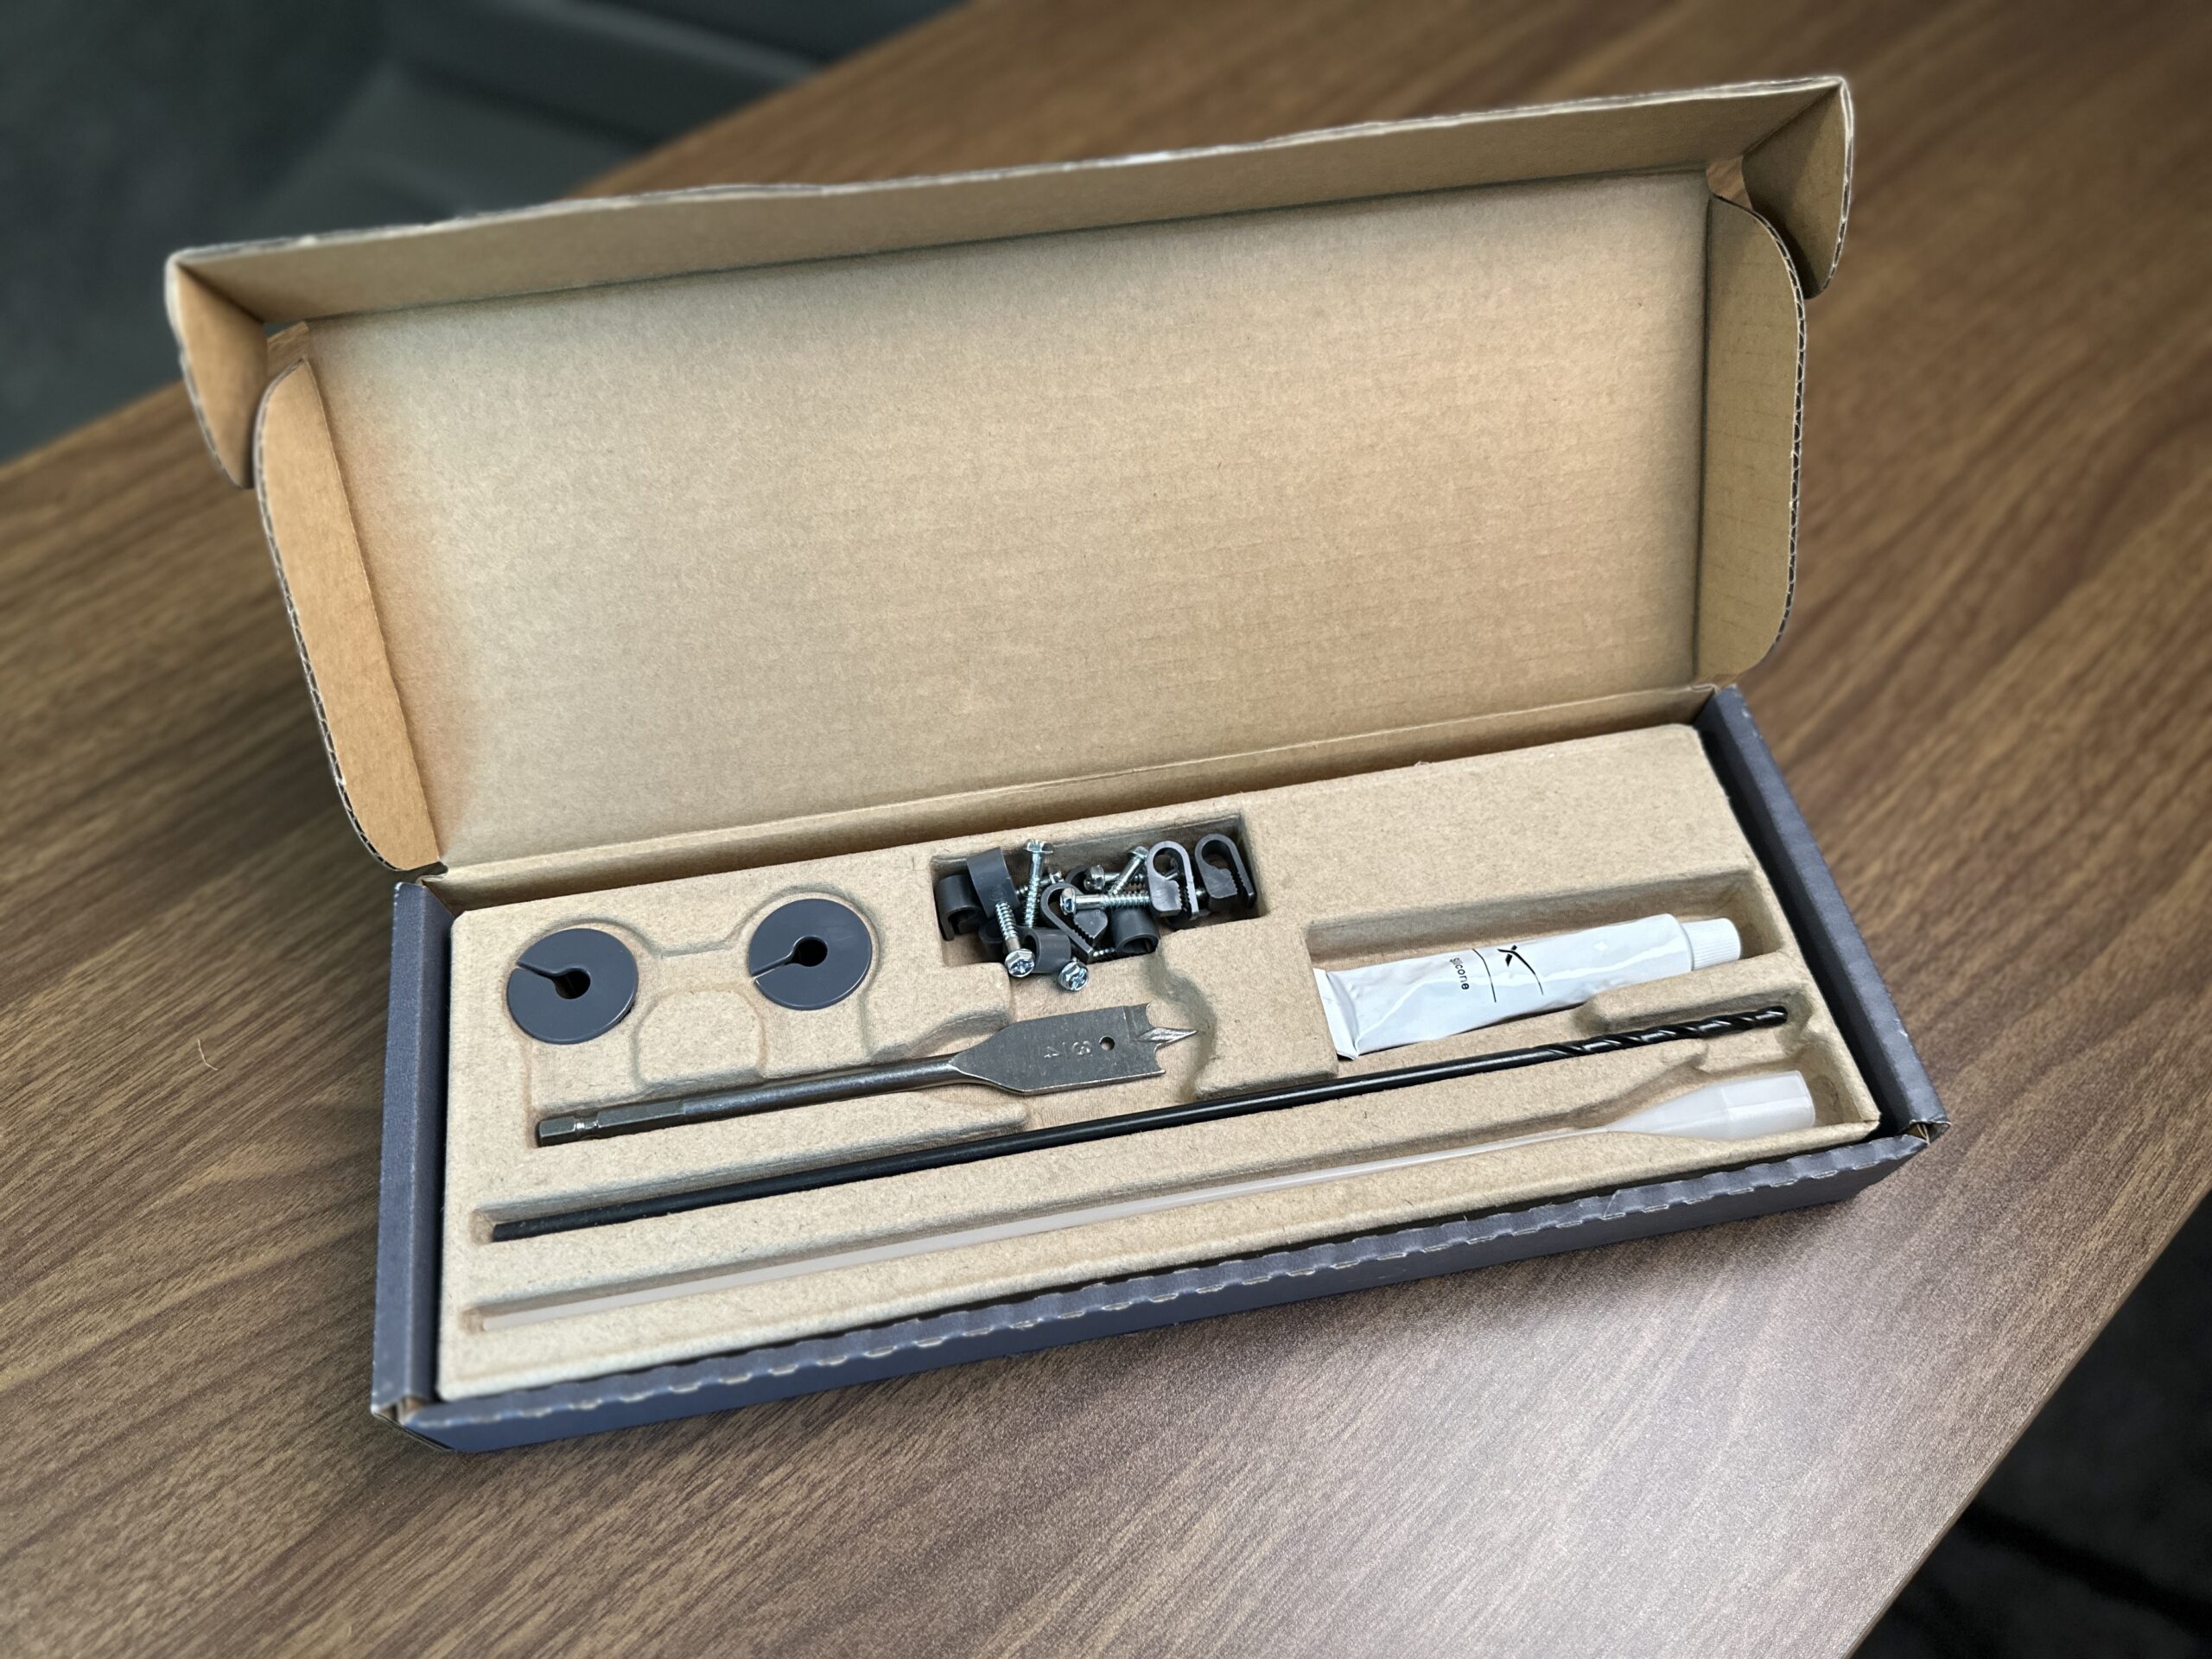
The Starlink Cable Routing Kit contains all the supplies needed to run the cable through a standard wood frame exterior wall:
- 3/4″ spade bit
- Pilot drill bit
- Cable routing tool
- Silicone sealant
- Grommets
- Wall clips
Tools needed
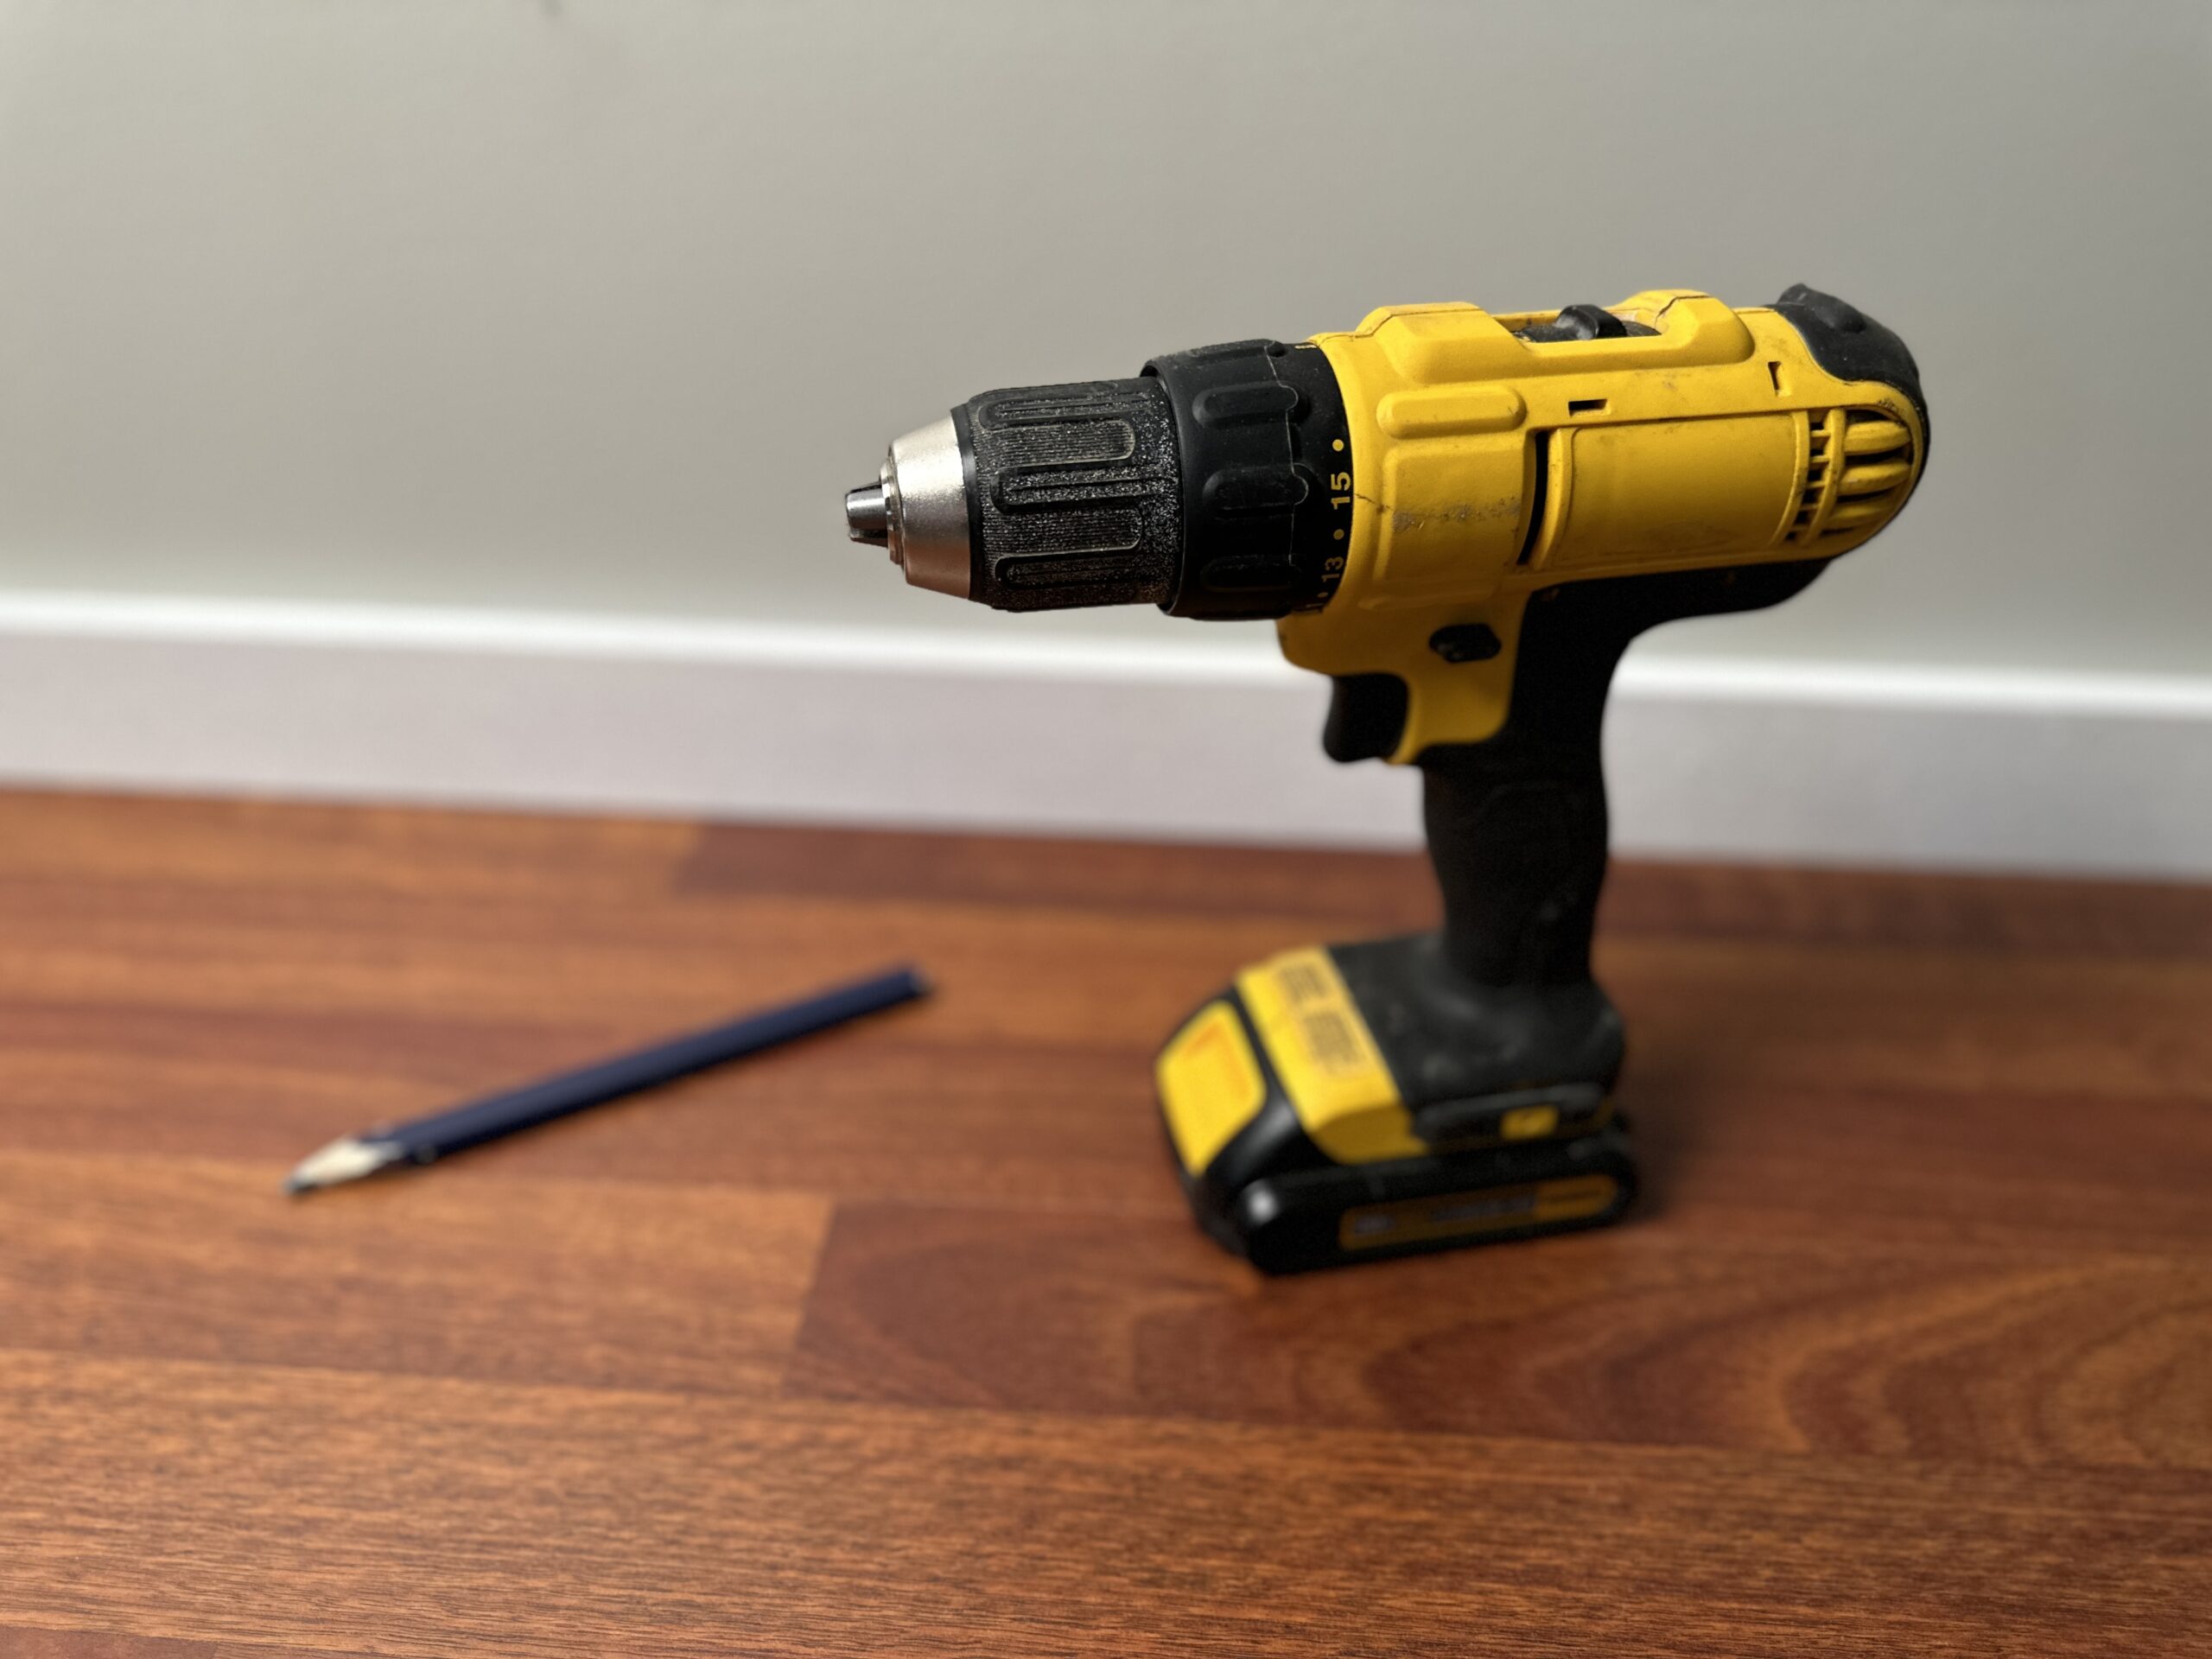
You will need these tools to complete the installation:
- Drill
- Stud finder (optional)
- Marking pencil (optional)
Video tutorial
Note: Some ad blockers will block our video player. If you don’t see the video, try disabling your ad blocker, and then reload the page.
Installation
Like I mentioned earlier, the Starlink Cable Routing Kit is designed to run a cable through a standard wood frame exterior wall. If you have concrete, masonry, or another type of exterior structure, this kit is not recommended. Starlink does offer a Masonry Routing Kit. Now, let’s proceed with the installation on a typical exterior wall.
Preparation
Unplug the AC power cord from the Starlink router, and unplug the Starlink cable from the dish. Bring the cable inside, as we will be routing it from inside to outside later on.
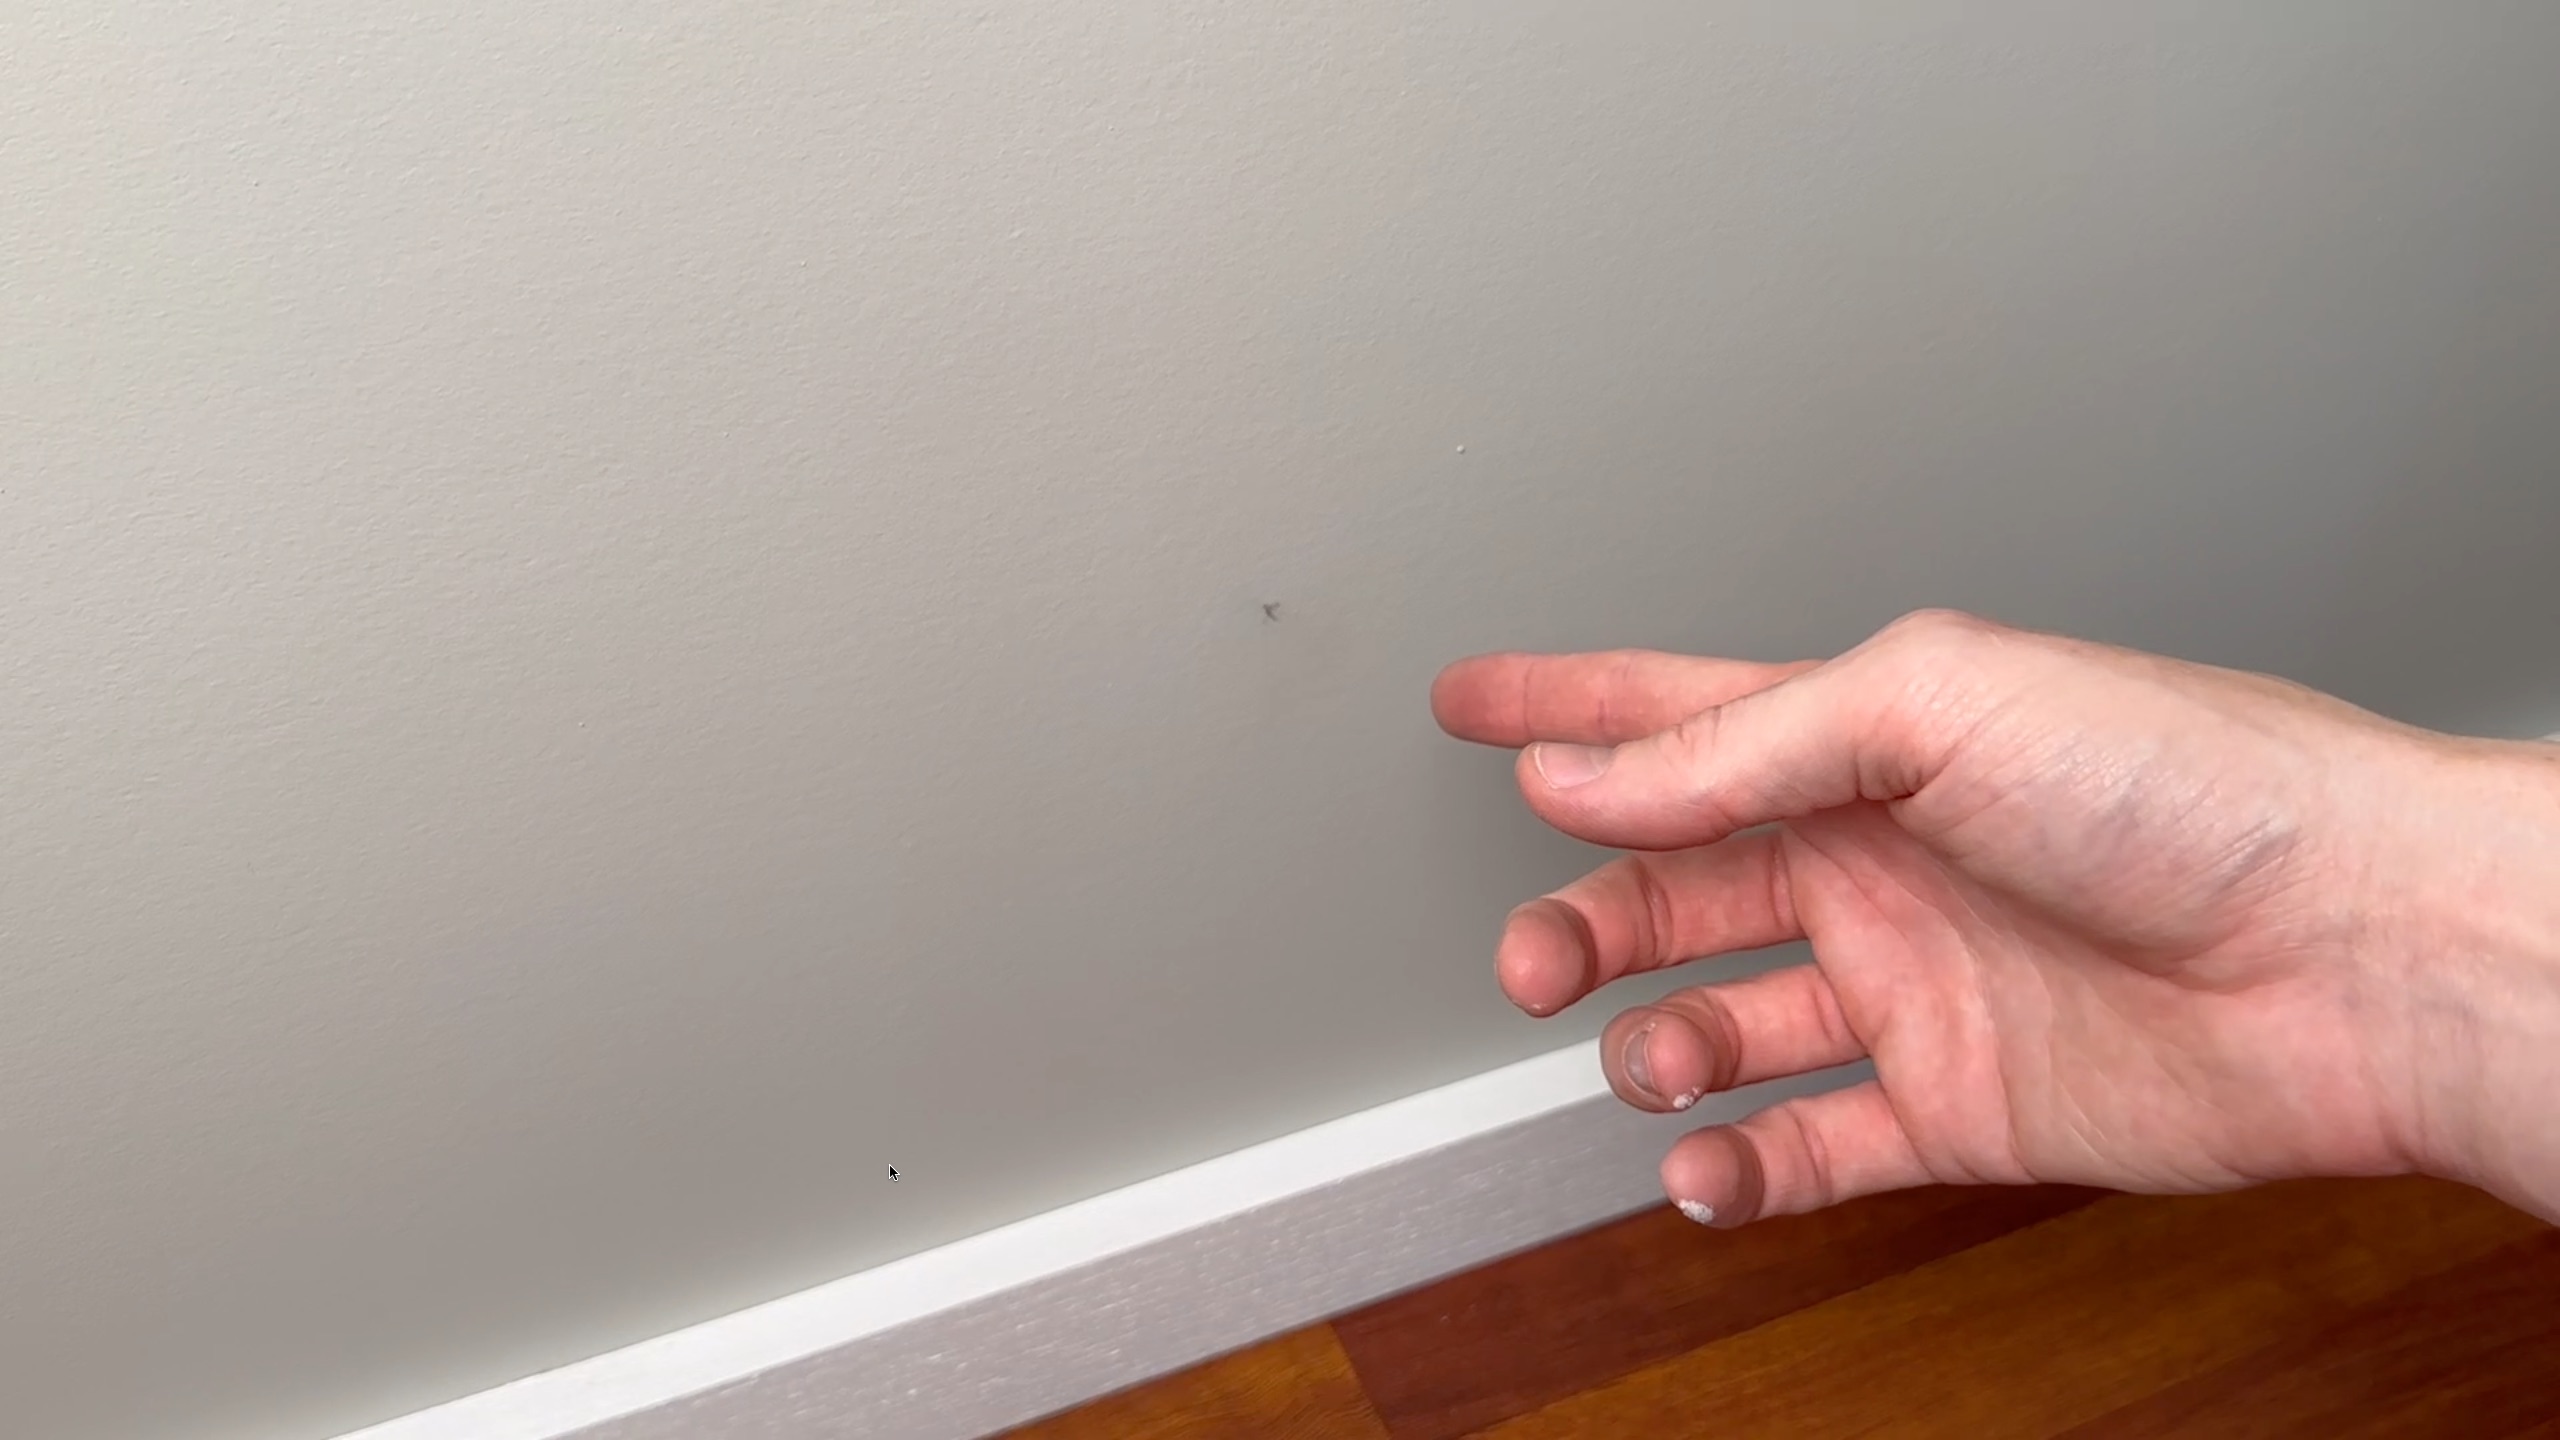
Find a suitable location for a hole through an exterior wall. Make sure to select a spot free from plumbing or electrical wires. Use a stud finder to select a clear spot on the wall, and mark a location for the pilot hole.
Drill pilot hole
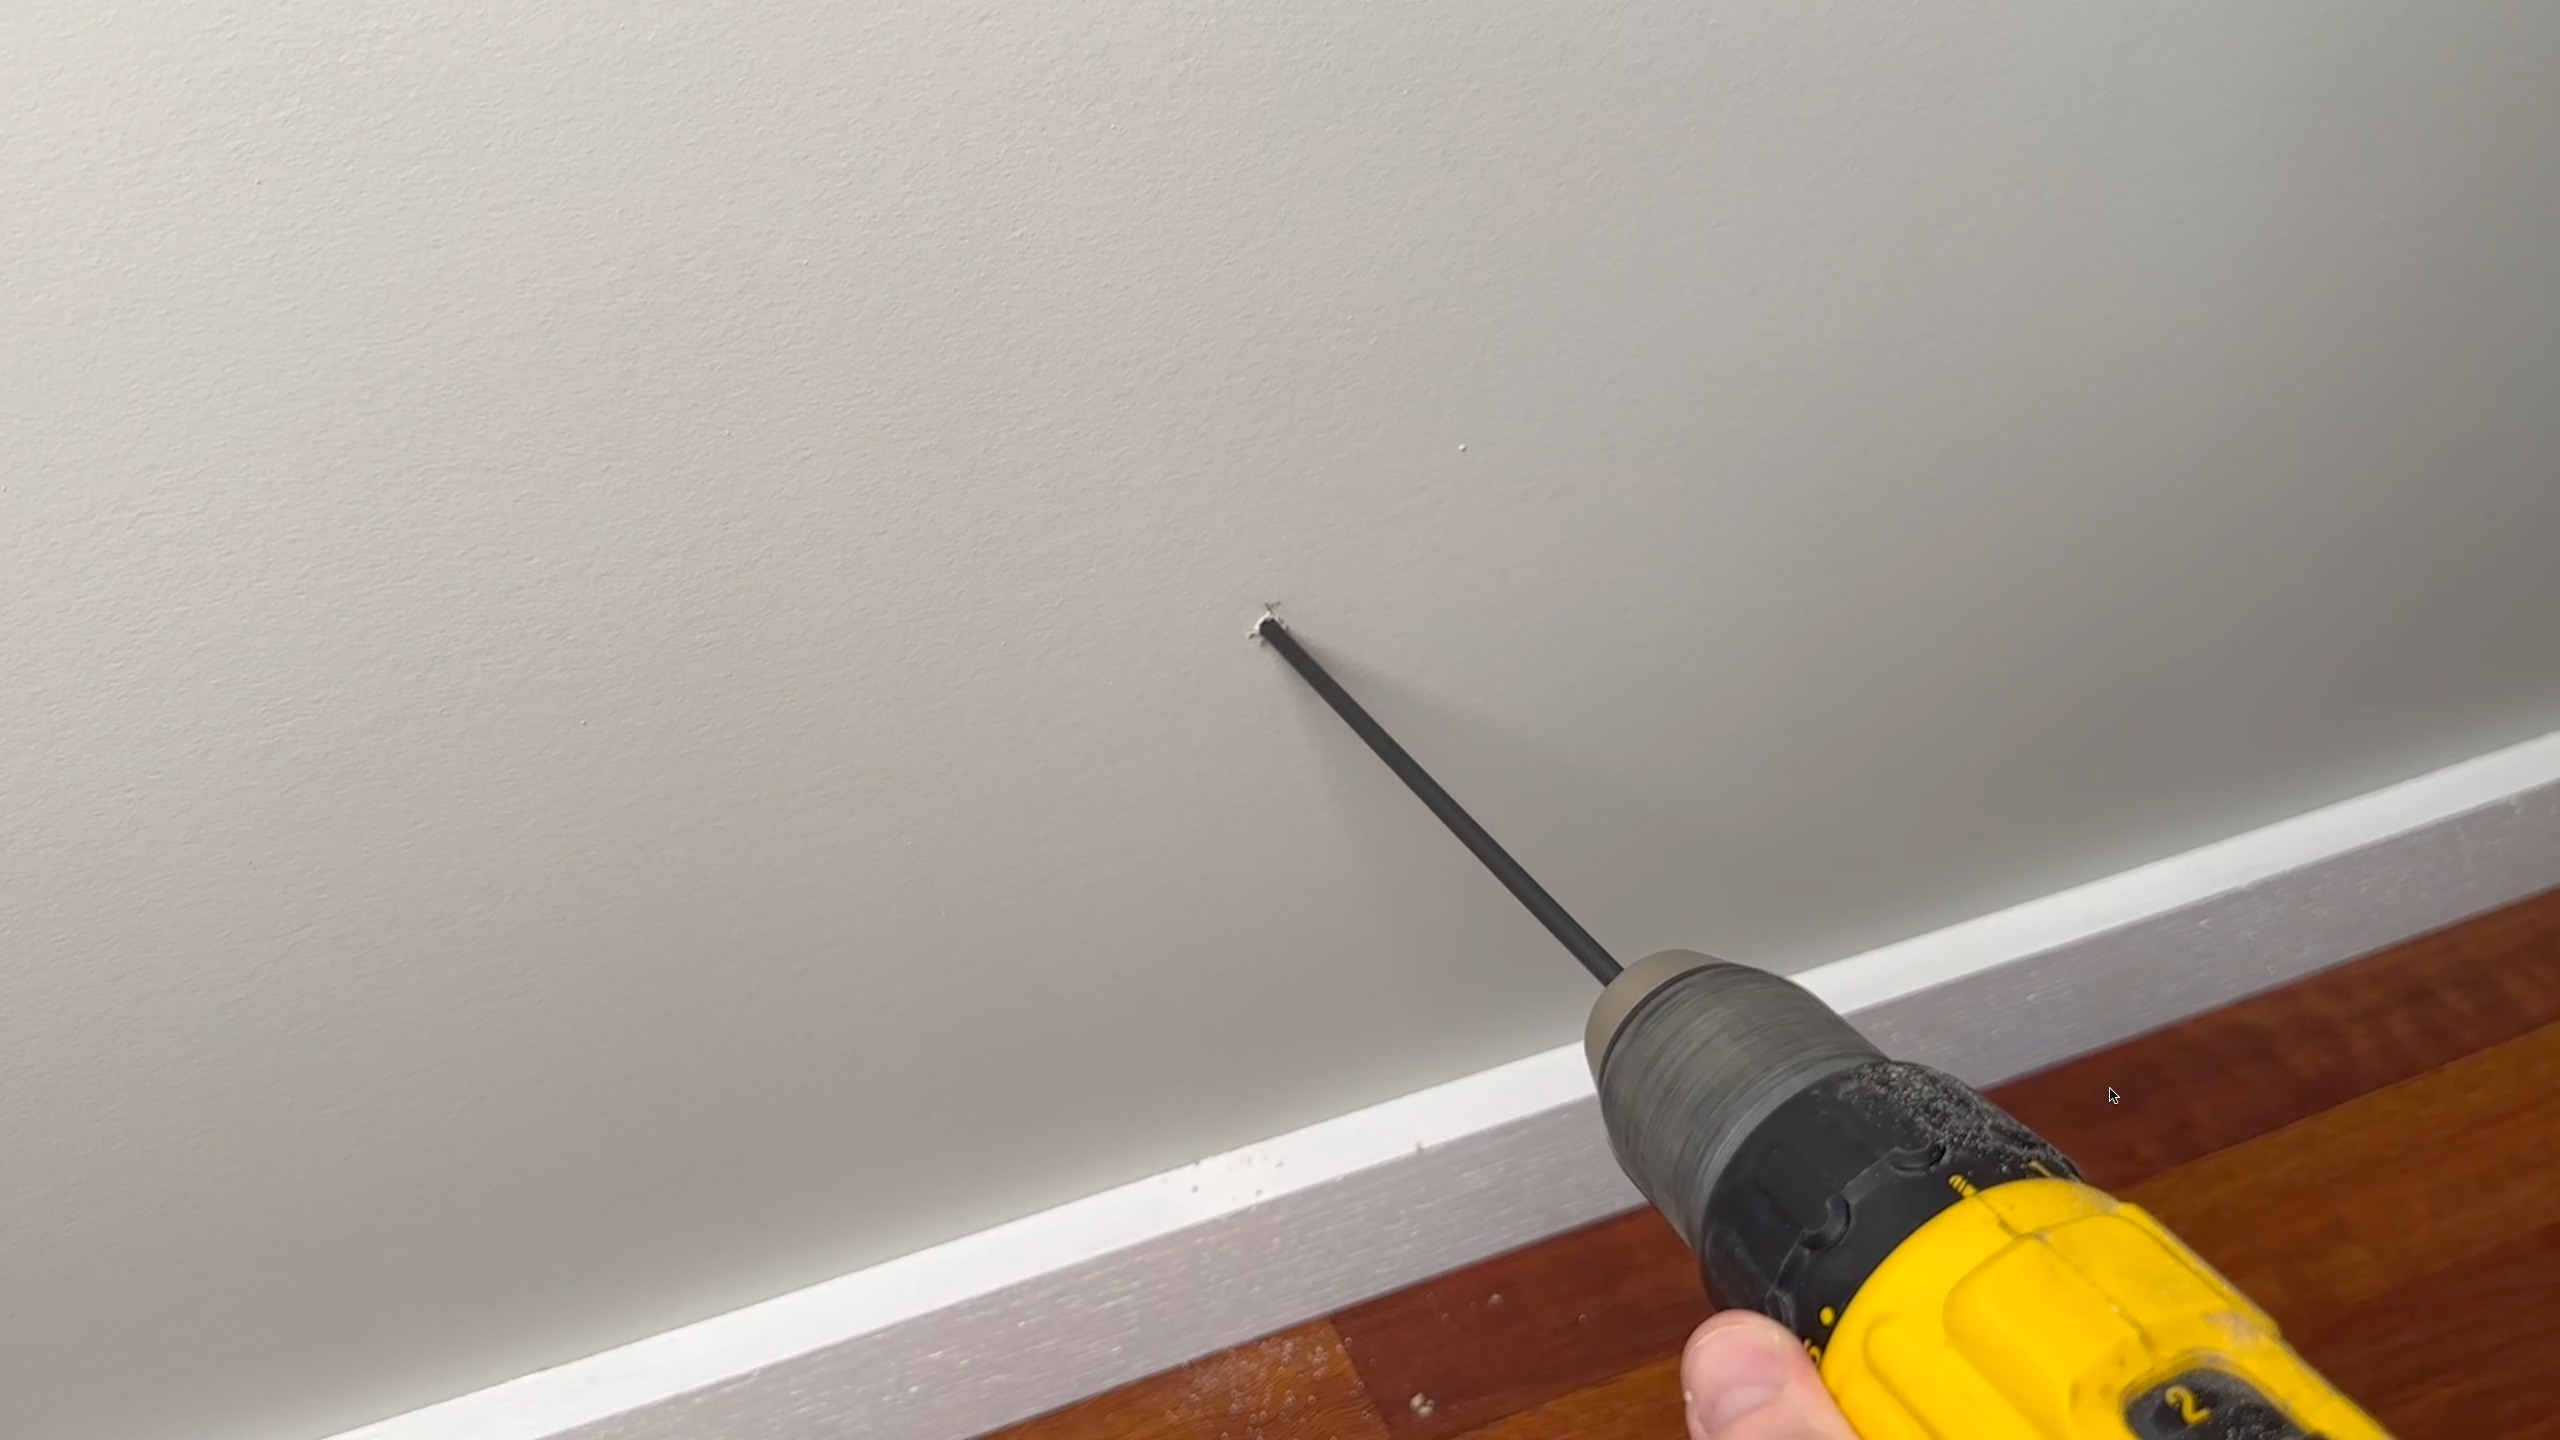
Once a suitable spot has been selected, use the included drill bit to drill a pilot hole through the wall, starting from the interior side. The drill should be slightly angled down, so that the exterior hole is lower than the interior side.
Drill interior and exterior holes

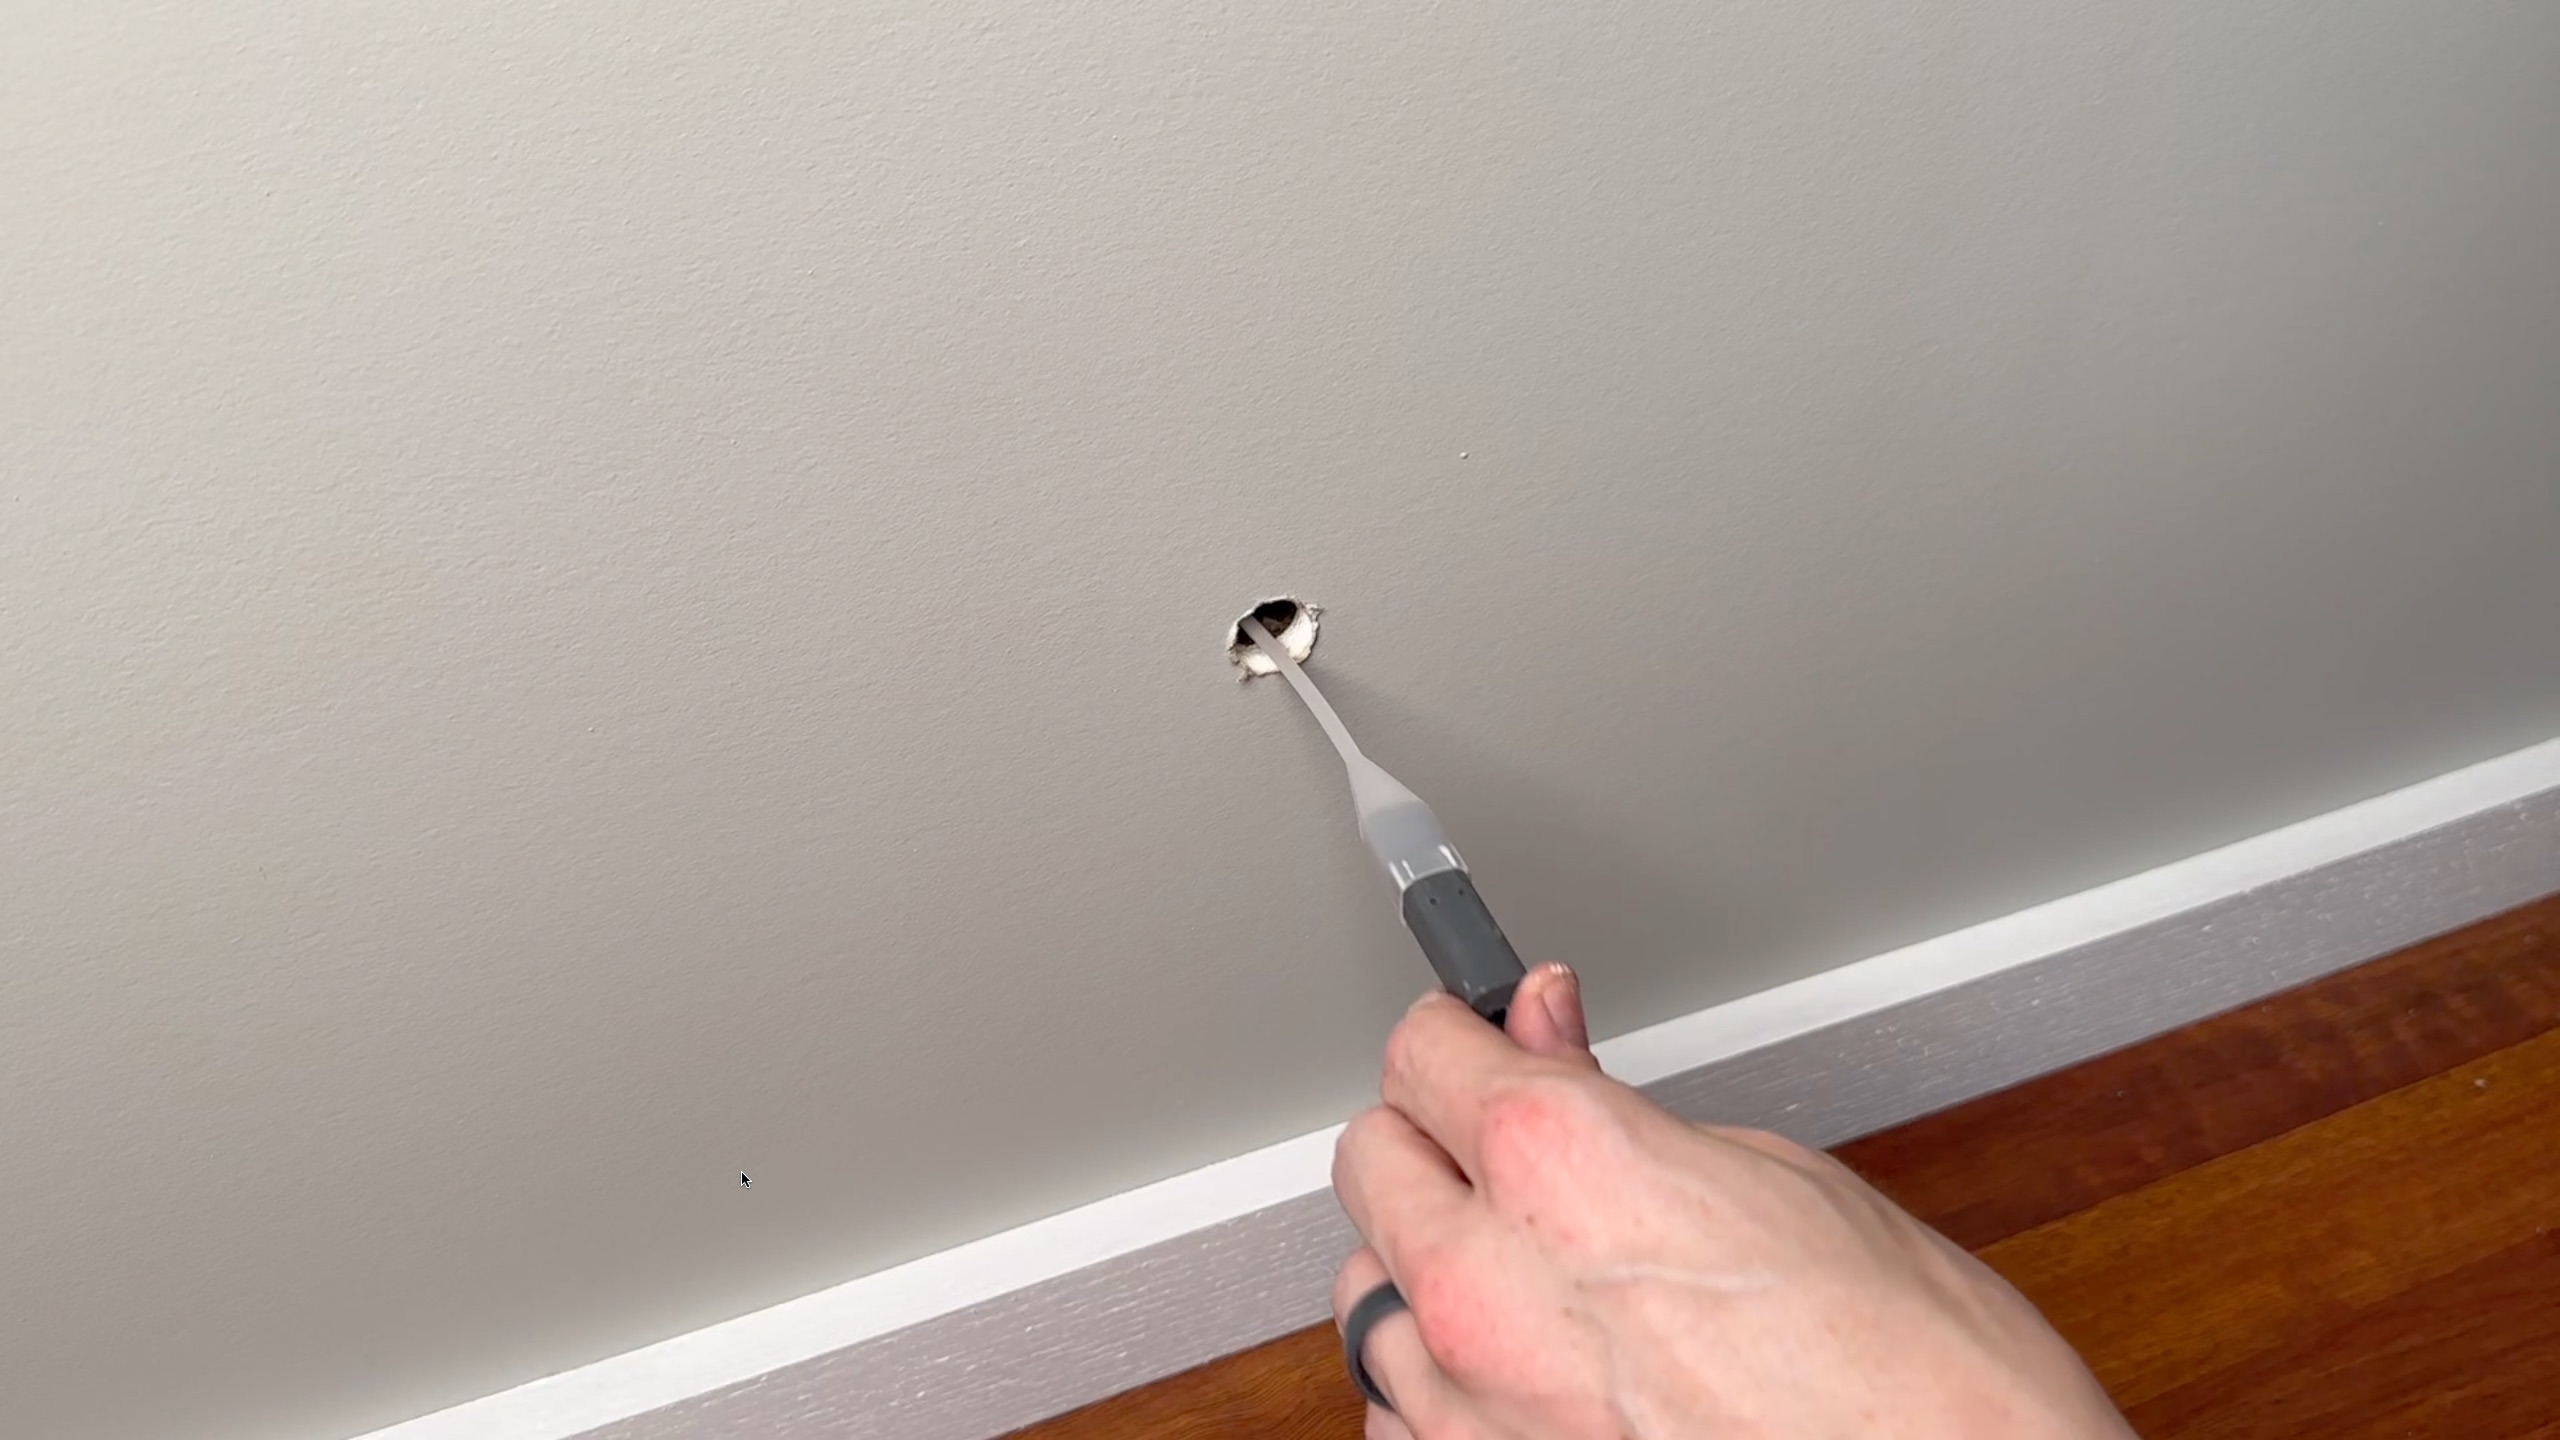
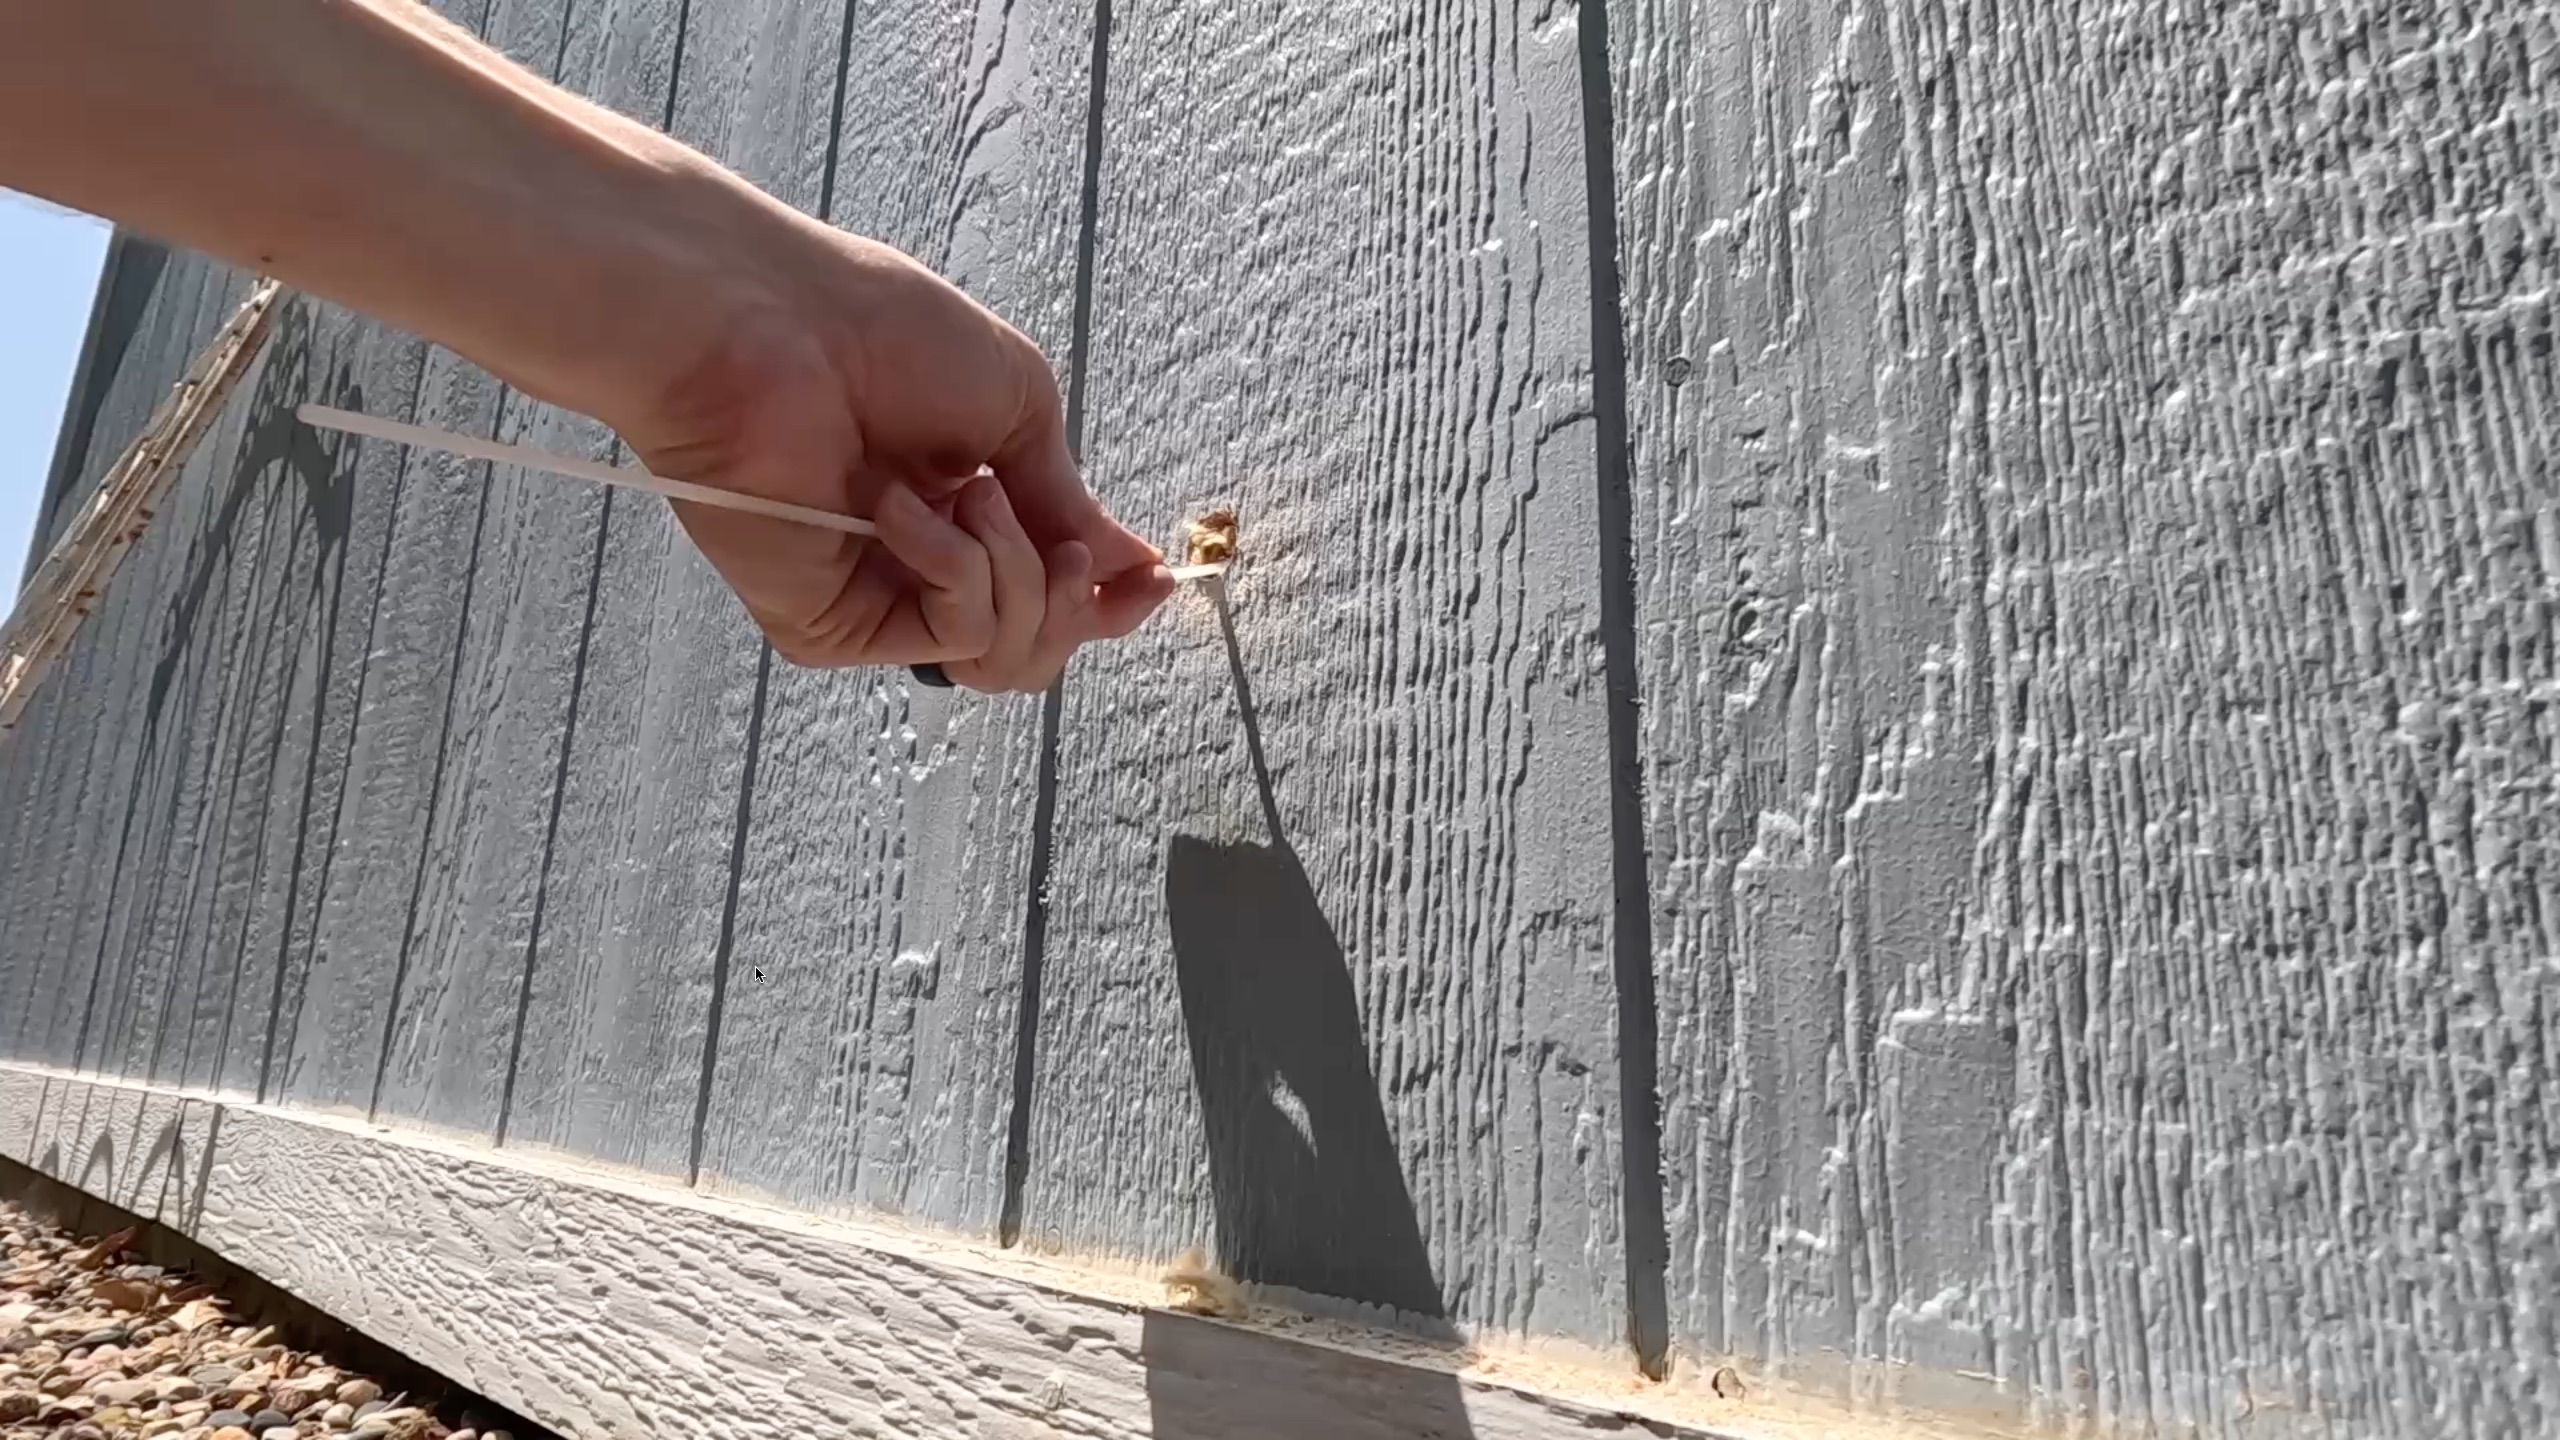
With the pilot hole drilled all the way through the wall, now we can load the included 3/4″ spade bit into the drill. We will start with the inside wall. Use the spade drill bit, centered on the pilot hole you already drilled, to drill just enough to get through the drywall. You just need to go far enough to get to the insulation, we aren’t going all the way through with the spade bit.
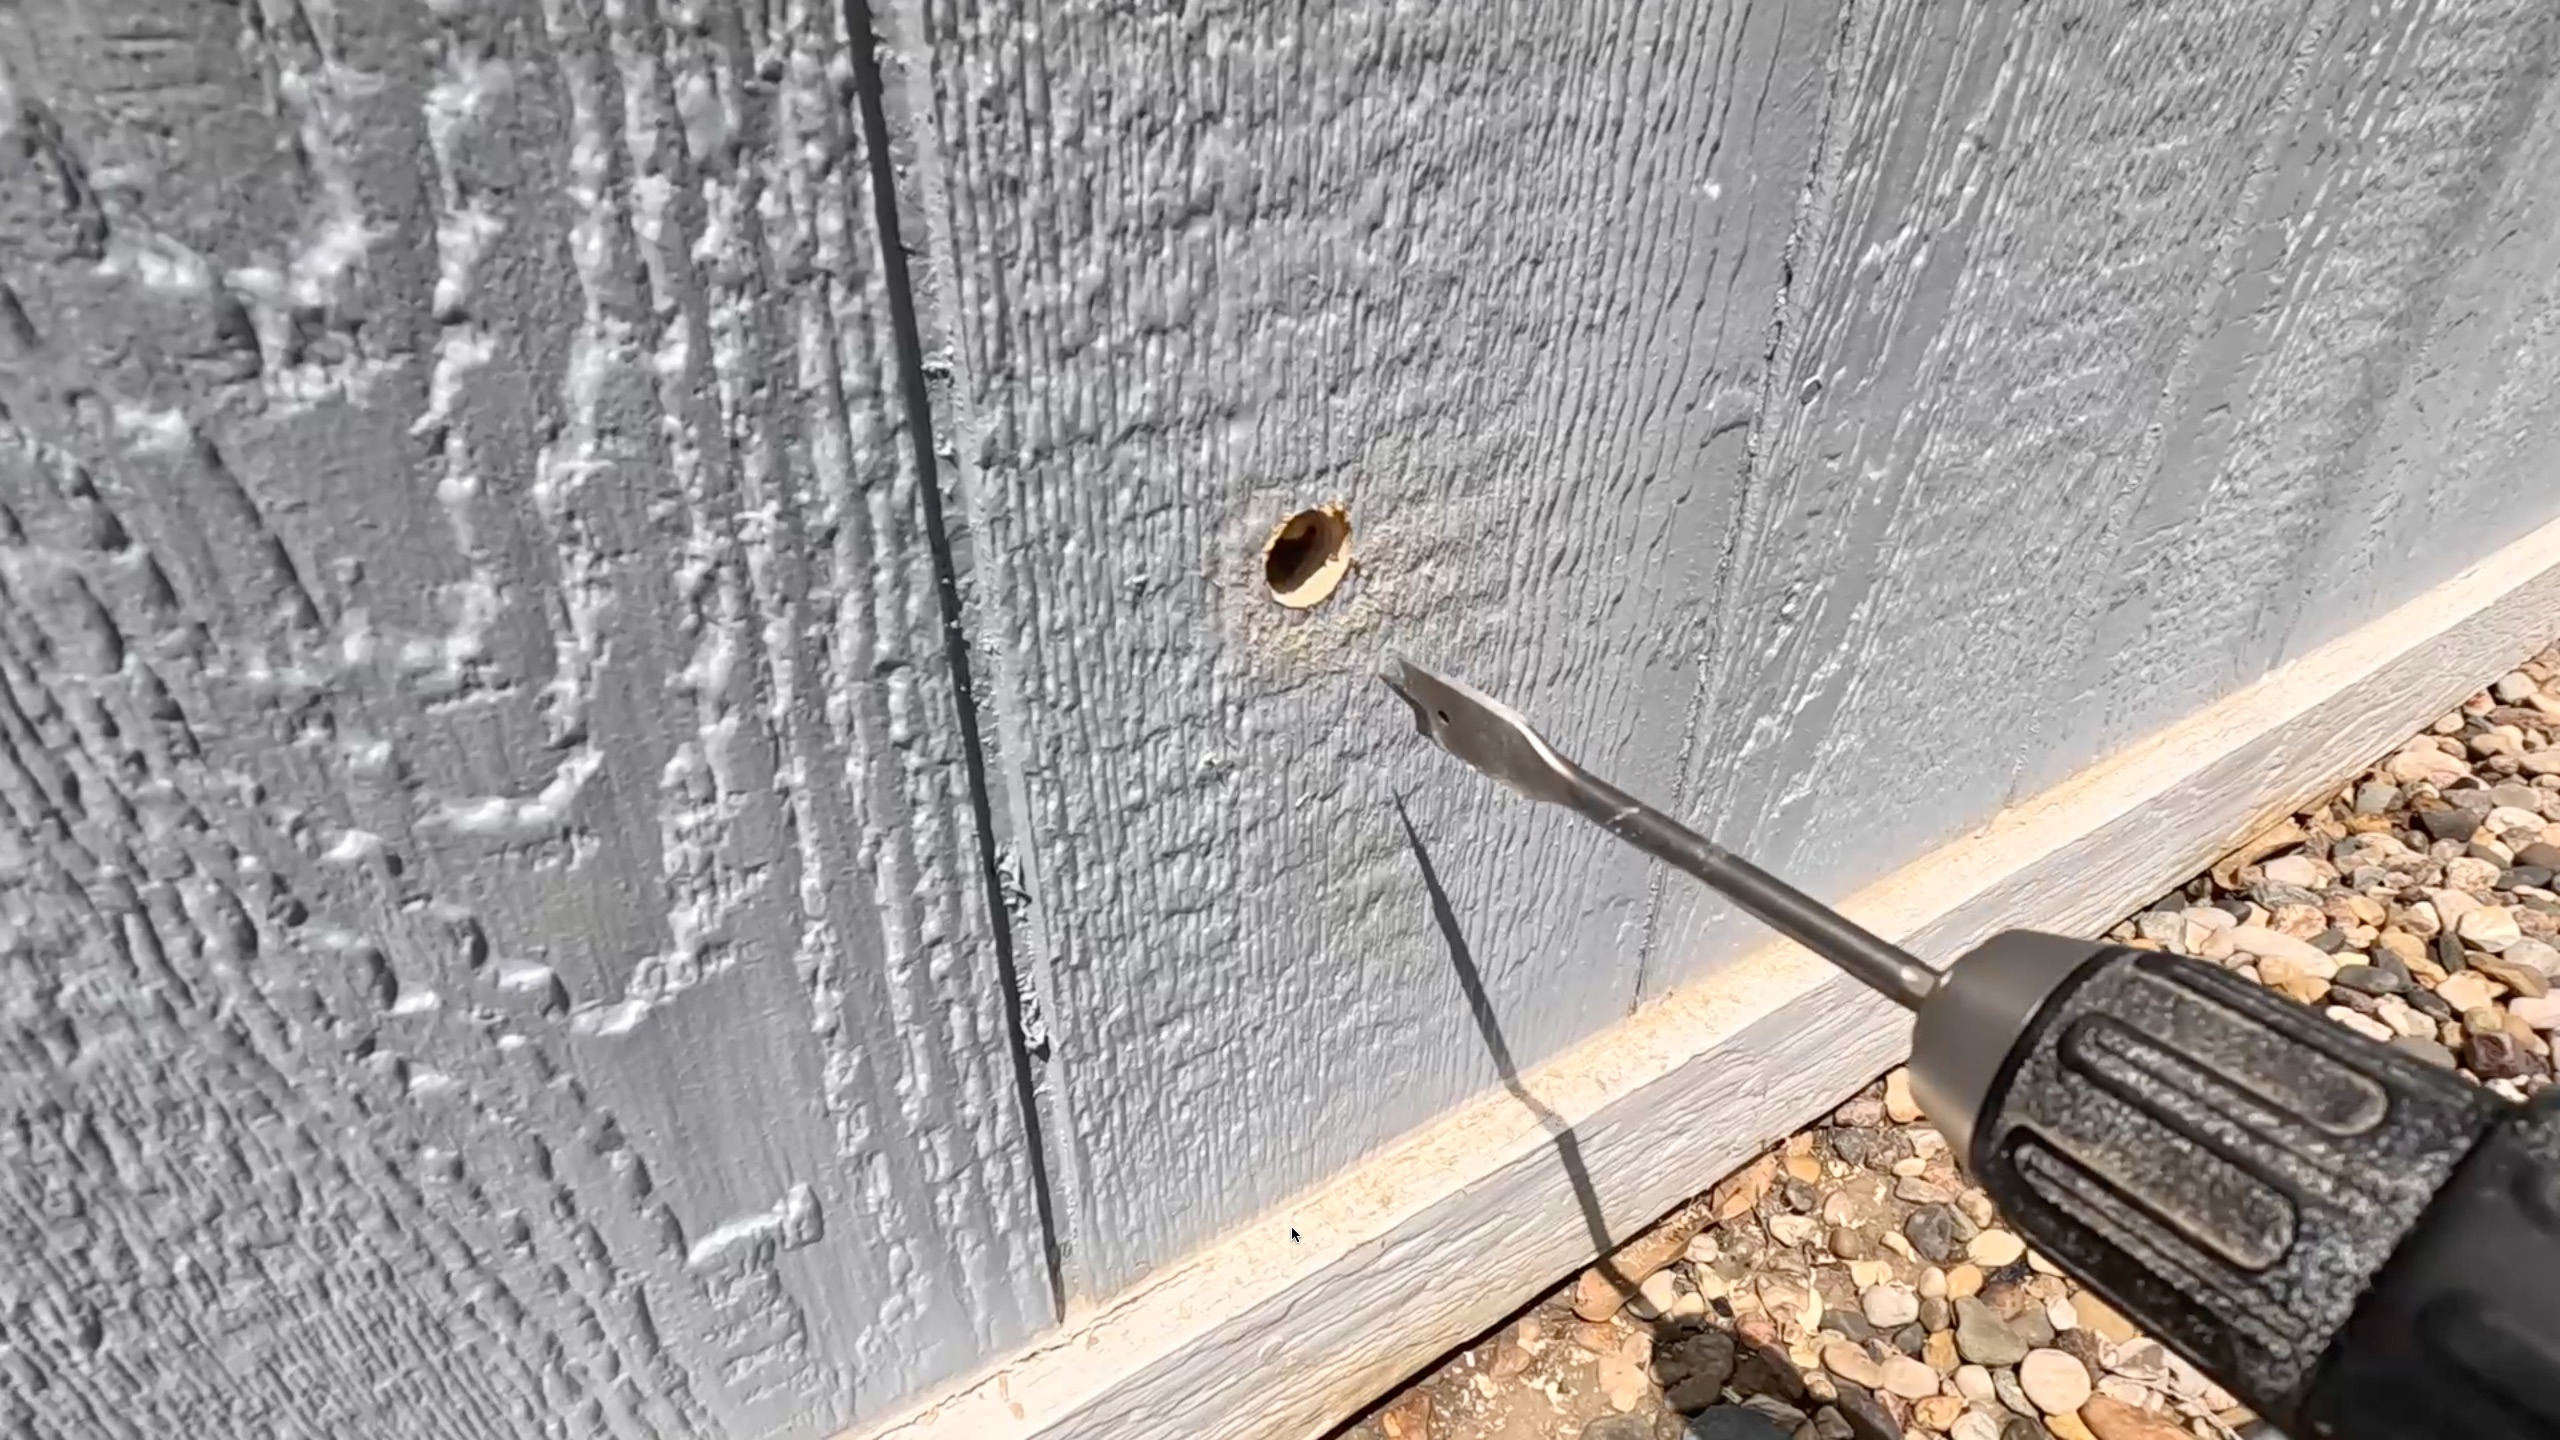
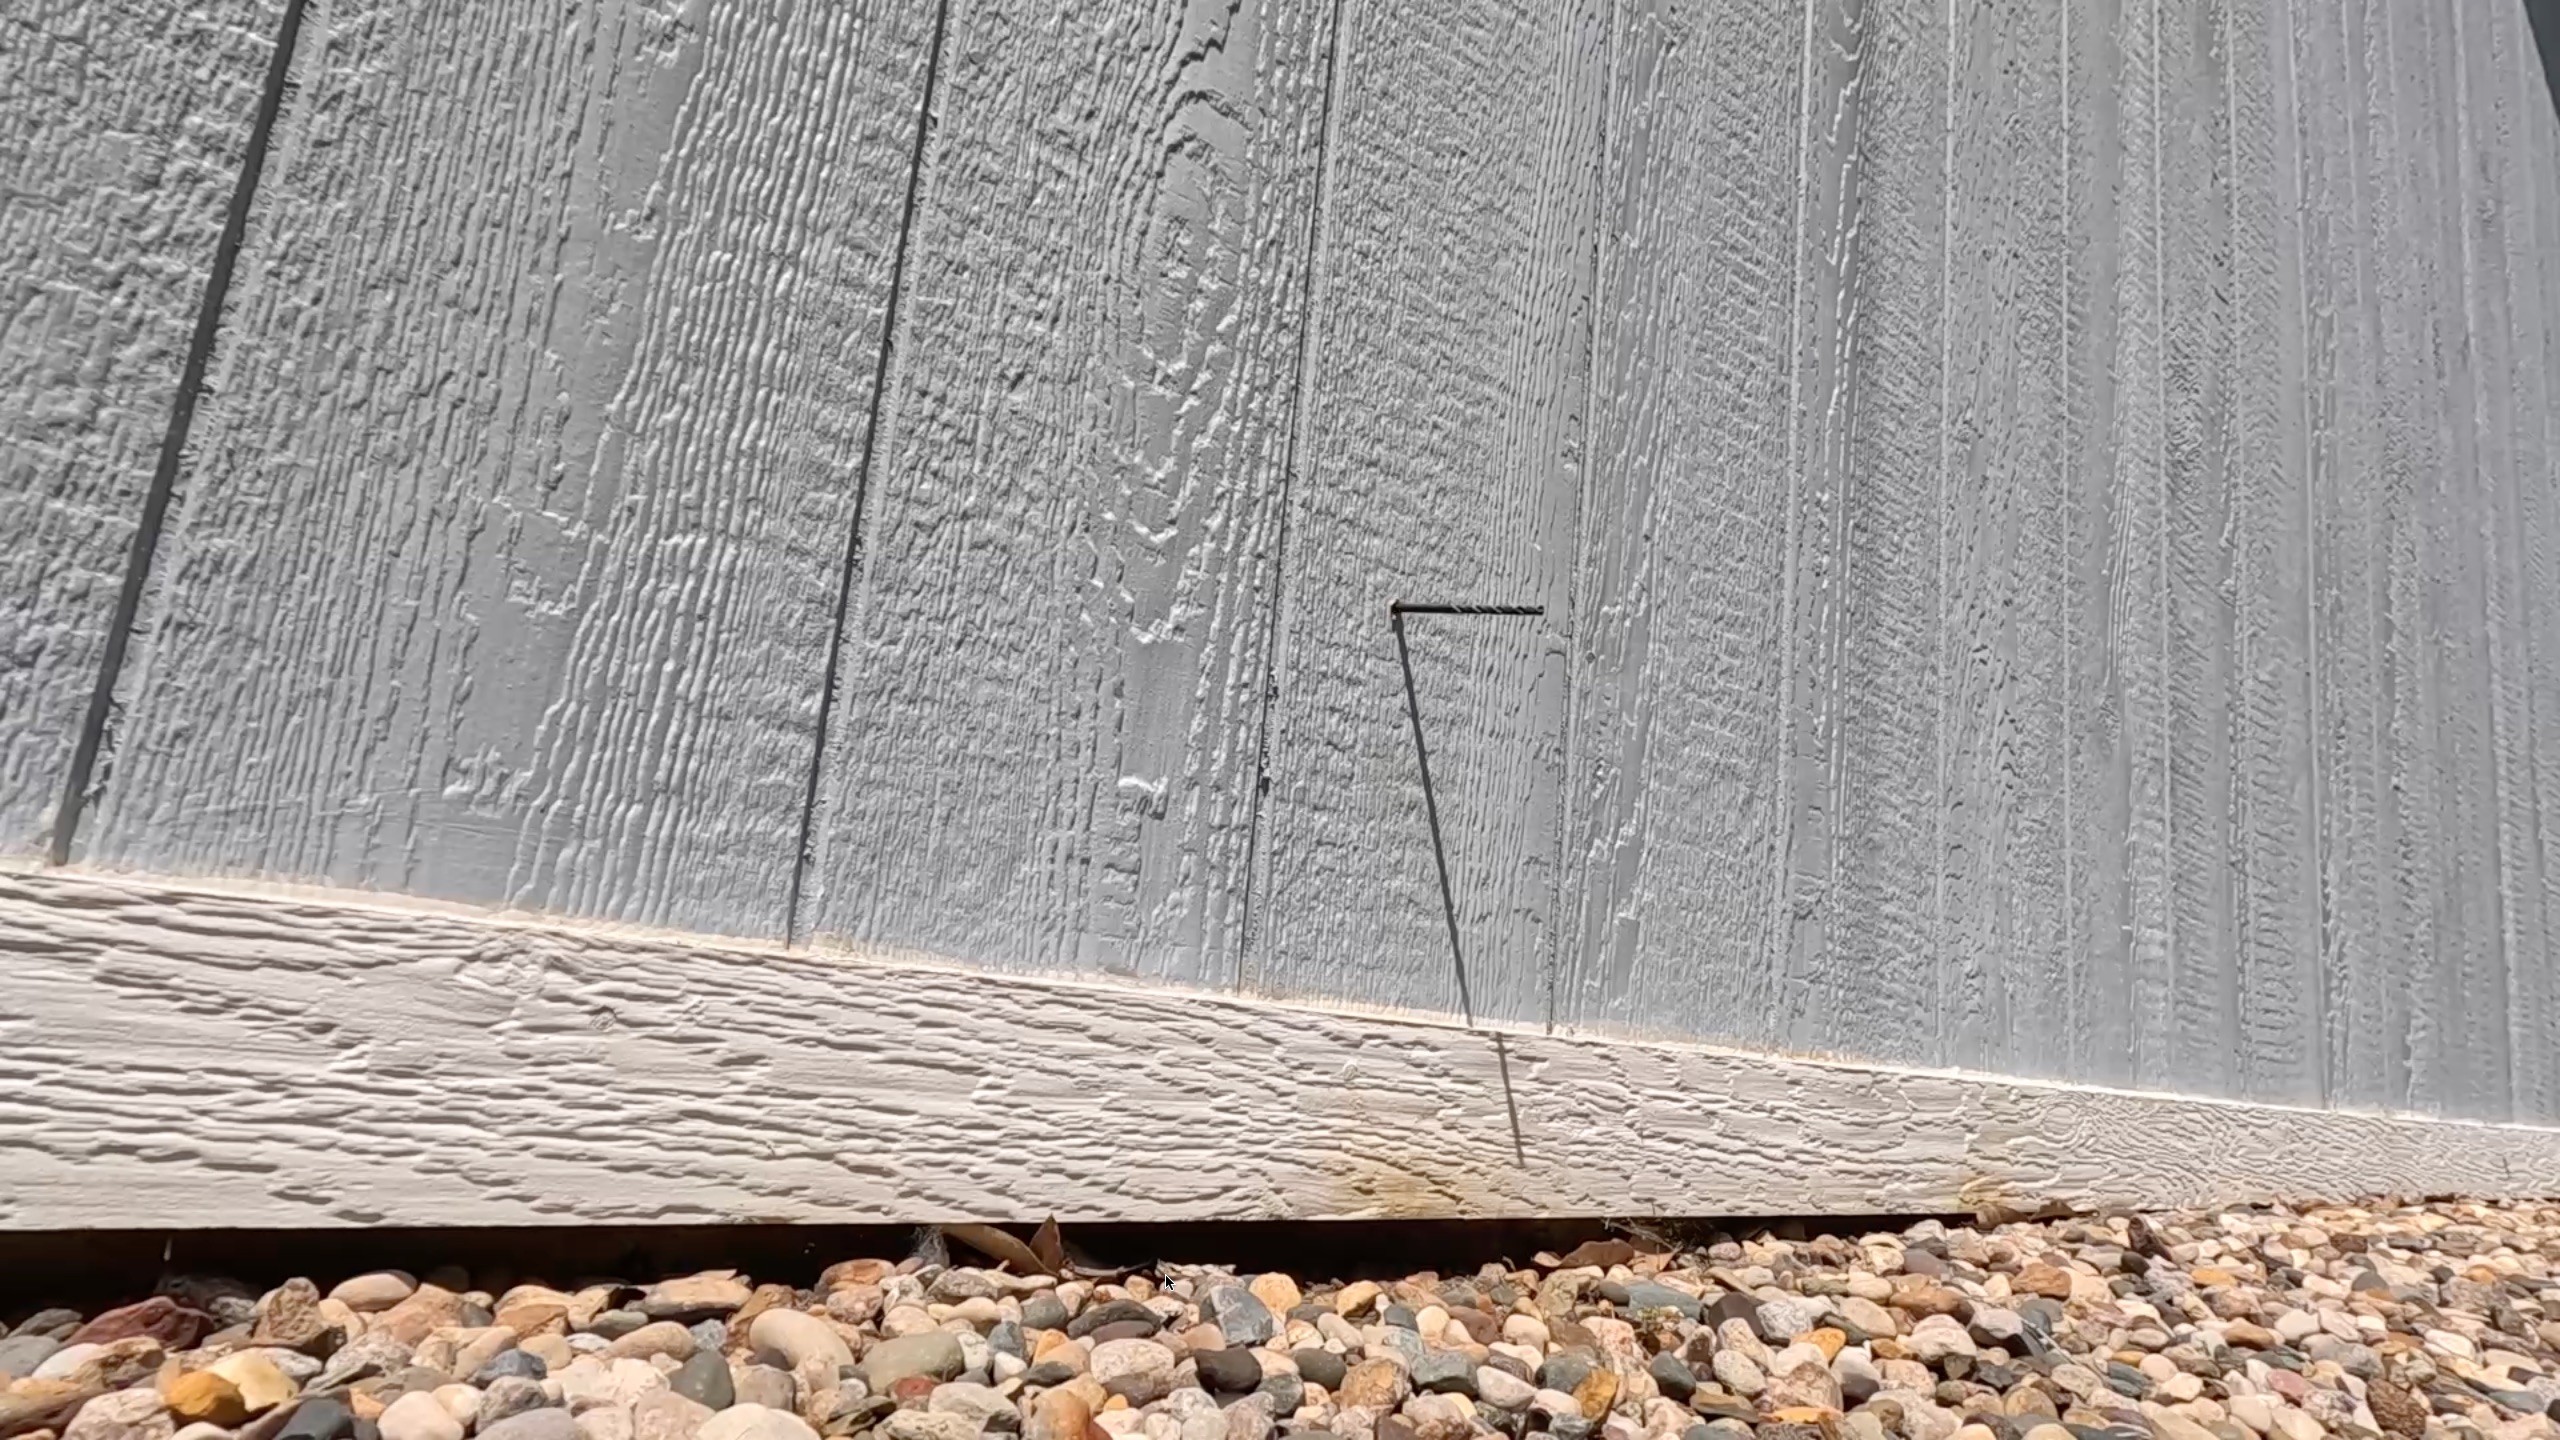
Now move outside and do the same thing. Use the spade bit to drill a hole through the siding and plywood sheathing. You only need to drill far enough to get to the wall cavity. At this point, you should have a 3/4″ hole on both sides of the wall. You might not be able to see all the way through because of the insulation, but that’s ok.
Route the Starlink cable through the wall
Grab the included cable routing tool from the kit. The Starlink cable should be inside already. Identify the dish side connector. It’s the straight one, not the angled connector. Attach the dish side of the cable to the cable routing tool.
Guide the tool through the hole, going from inside to outside. Remember, we drilled at a slight angle, so you might need to poke around a bit to find the exterior hole. Once you’ve located it, pass the tool as far as you can through the wall, and then go around to the outside.
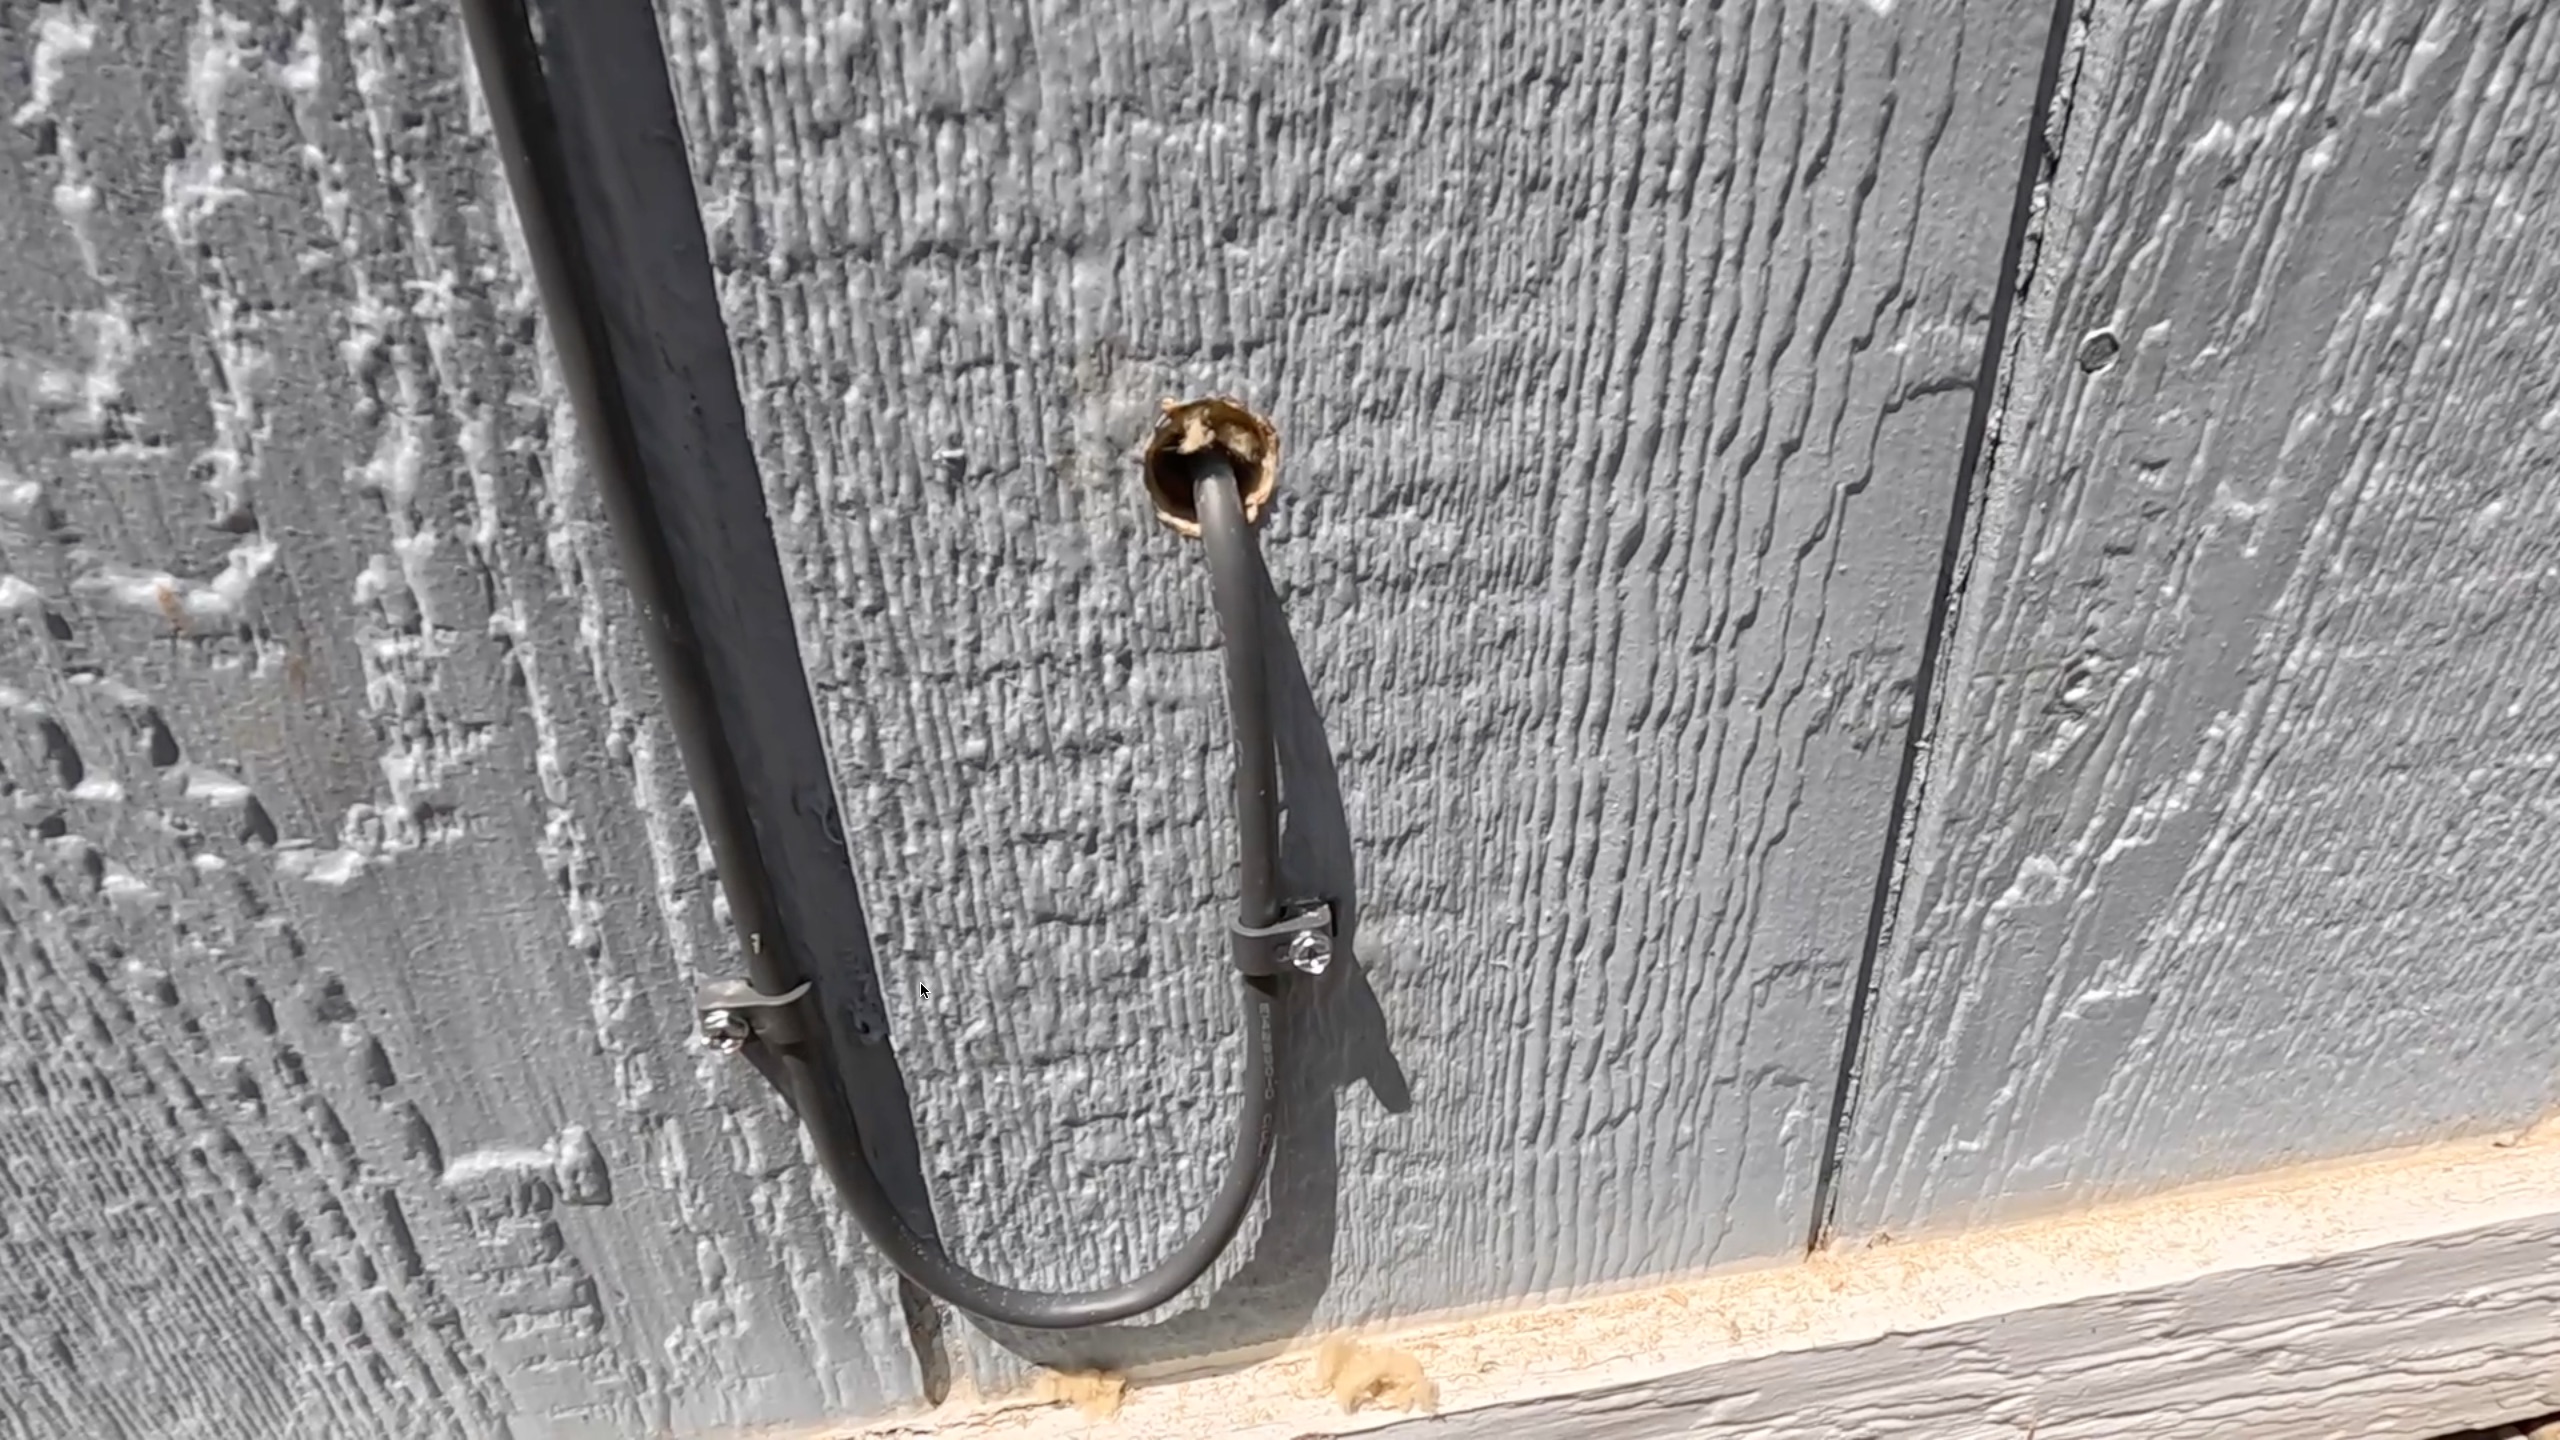
Pull the cable from the exterior hole. You will need to pull enough cable to get up to where your dish is located. I would also advise pulling a few extra feet for a service loop.
Cable management
When you have enough of the Starlink cable pulled, go ahead and plug it into your dish. The AC power to the Starlink router should be disconnected, we don’t want power applied to the dish yet. I always make a service loop at the dish, and secure it with zip ties.
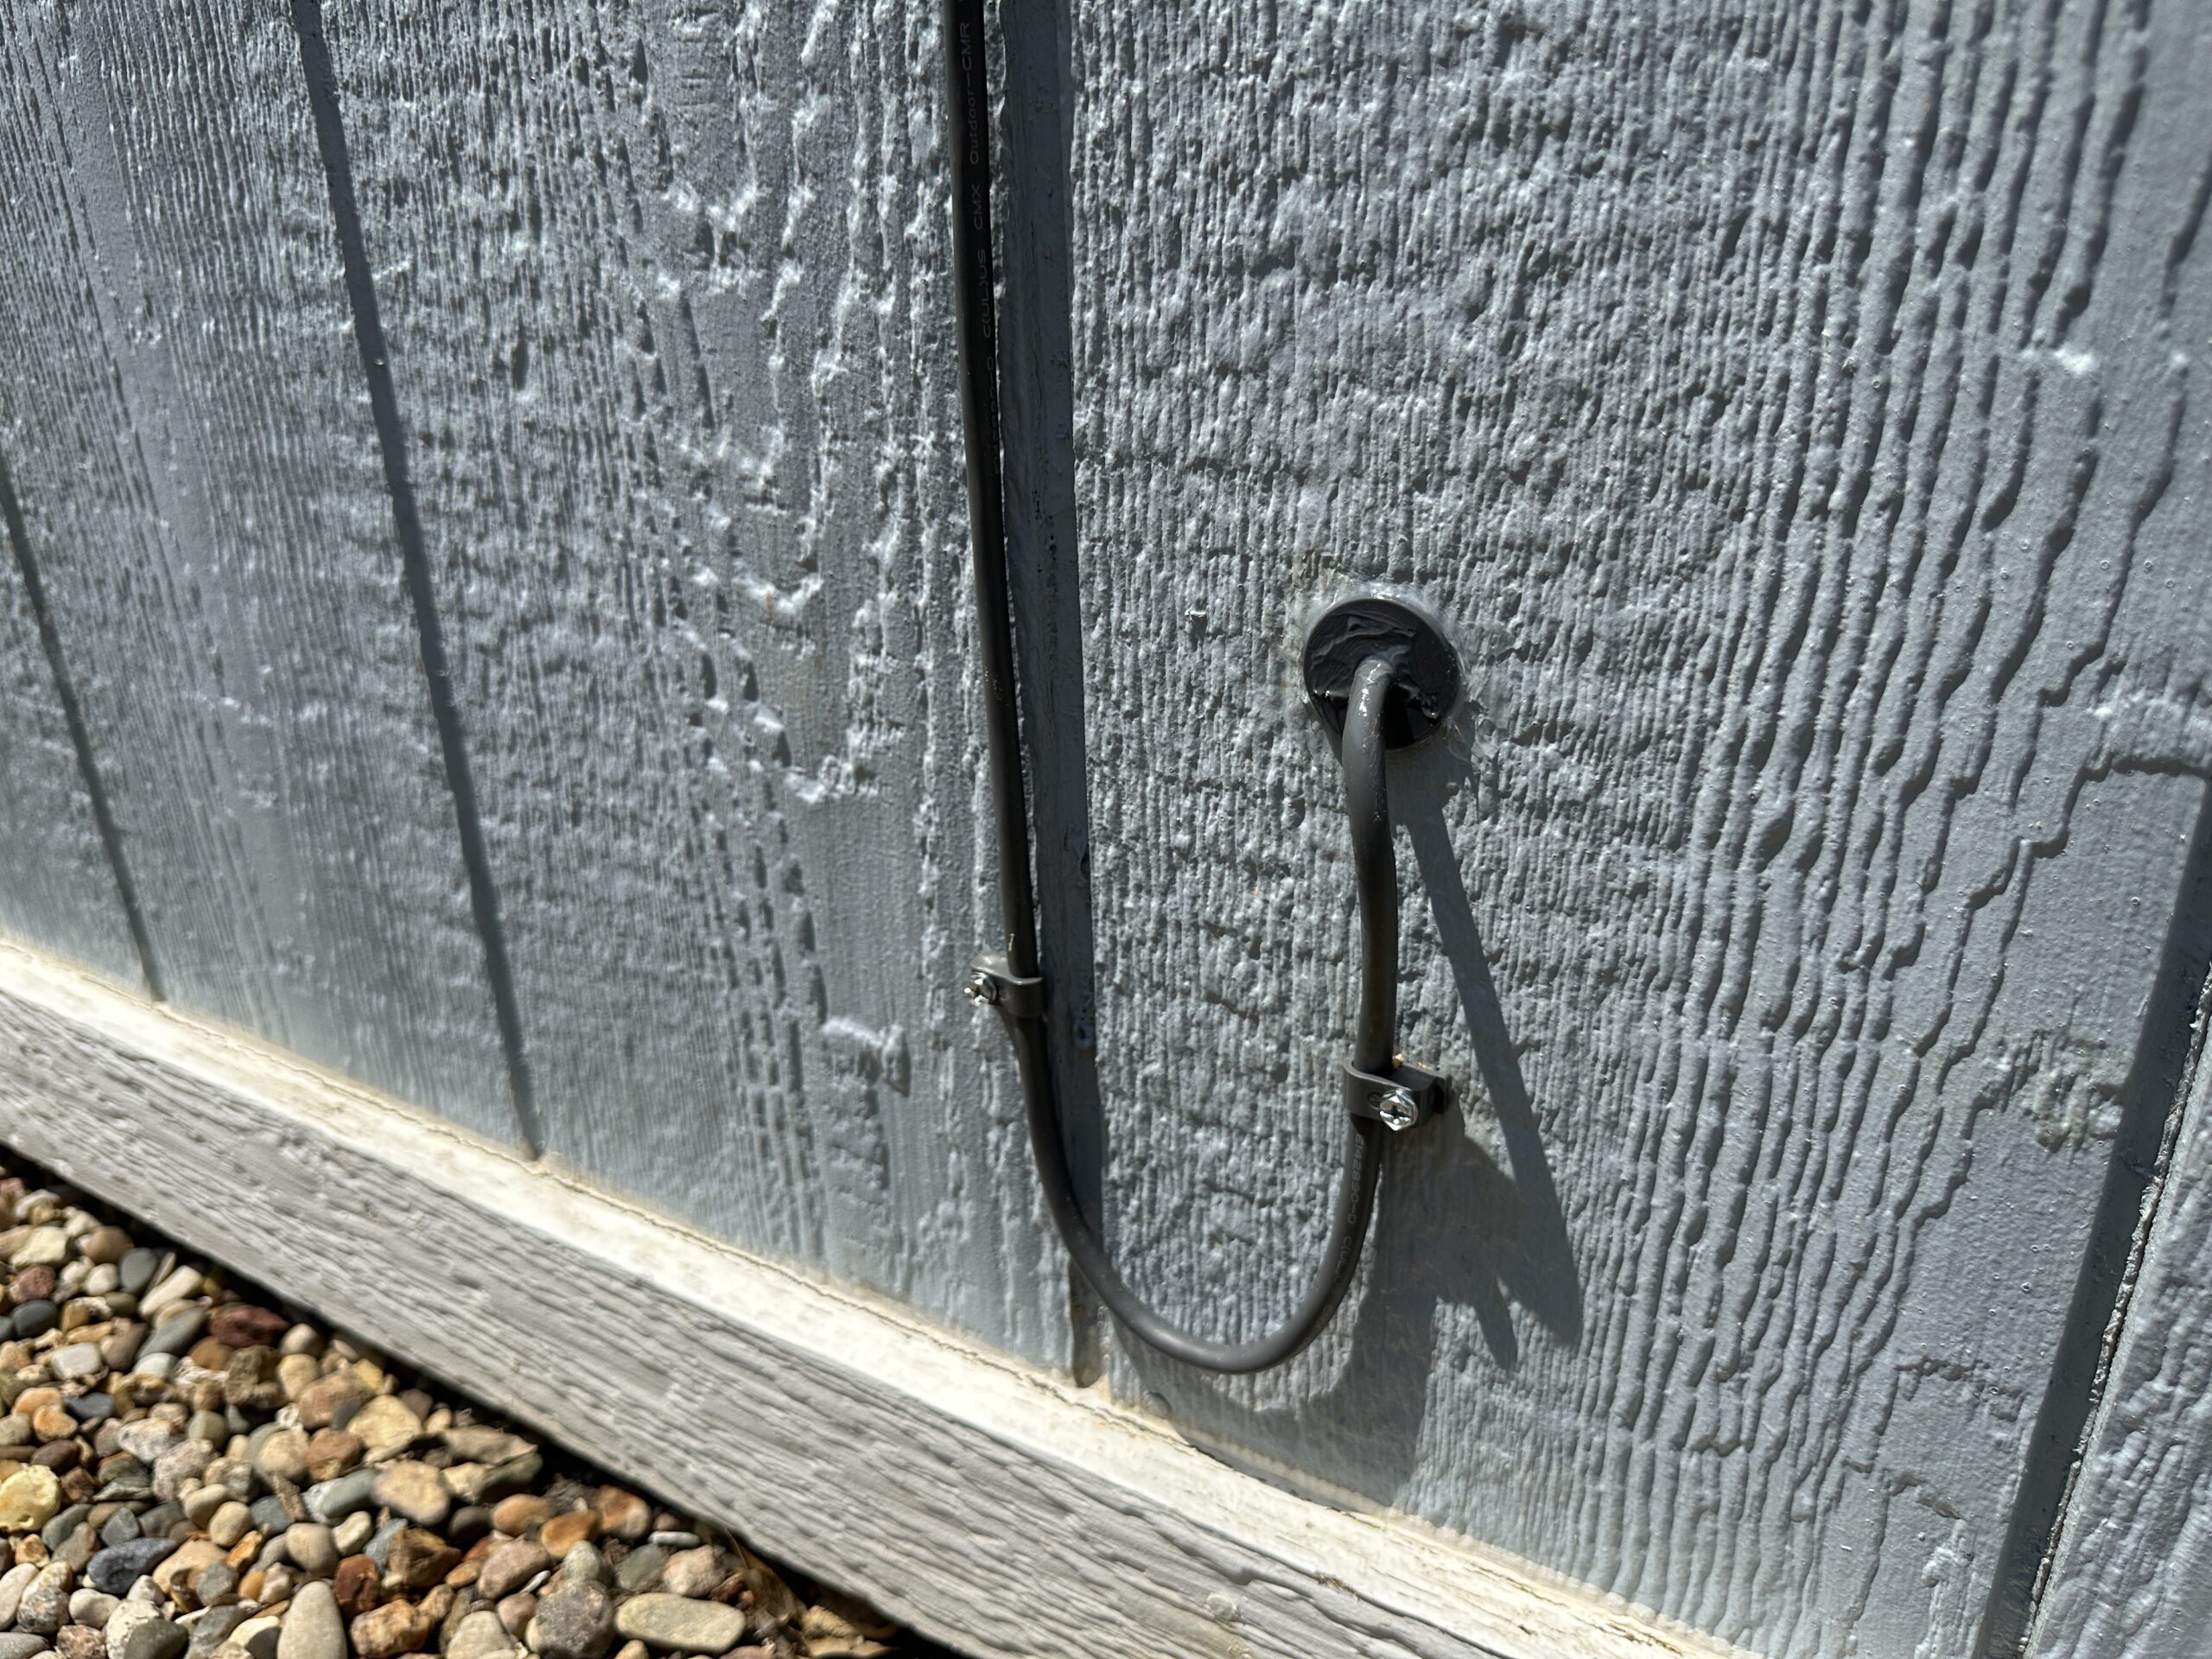
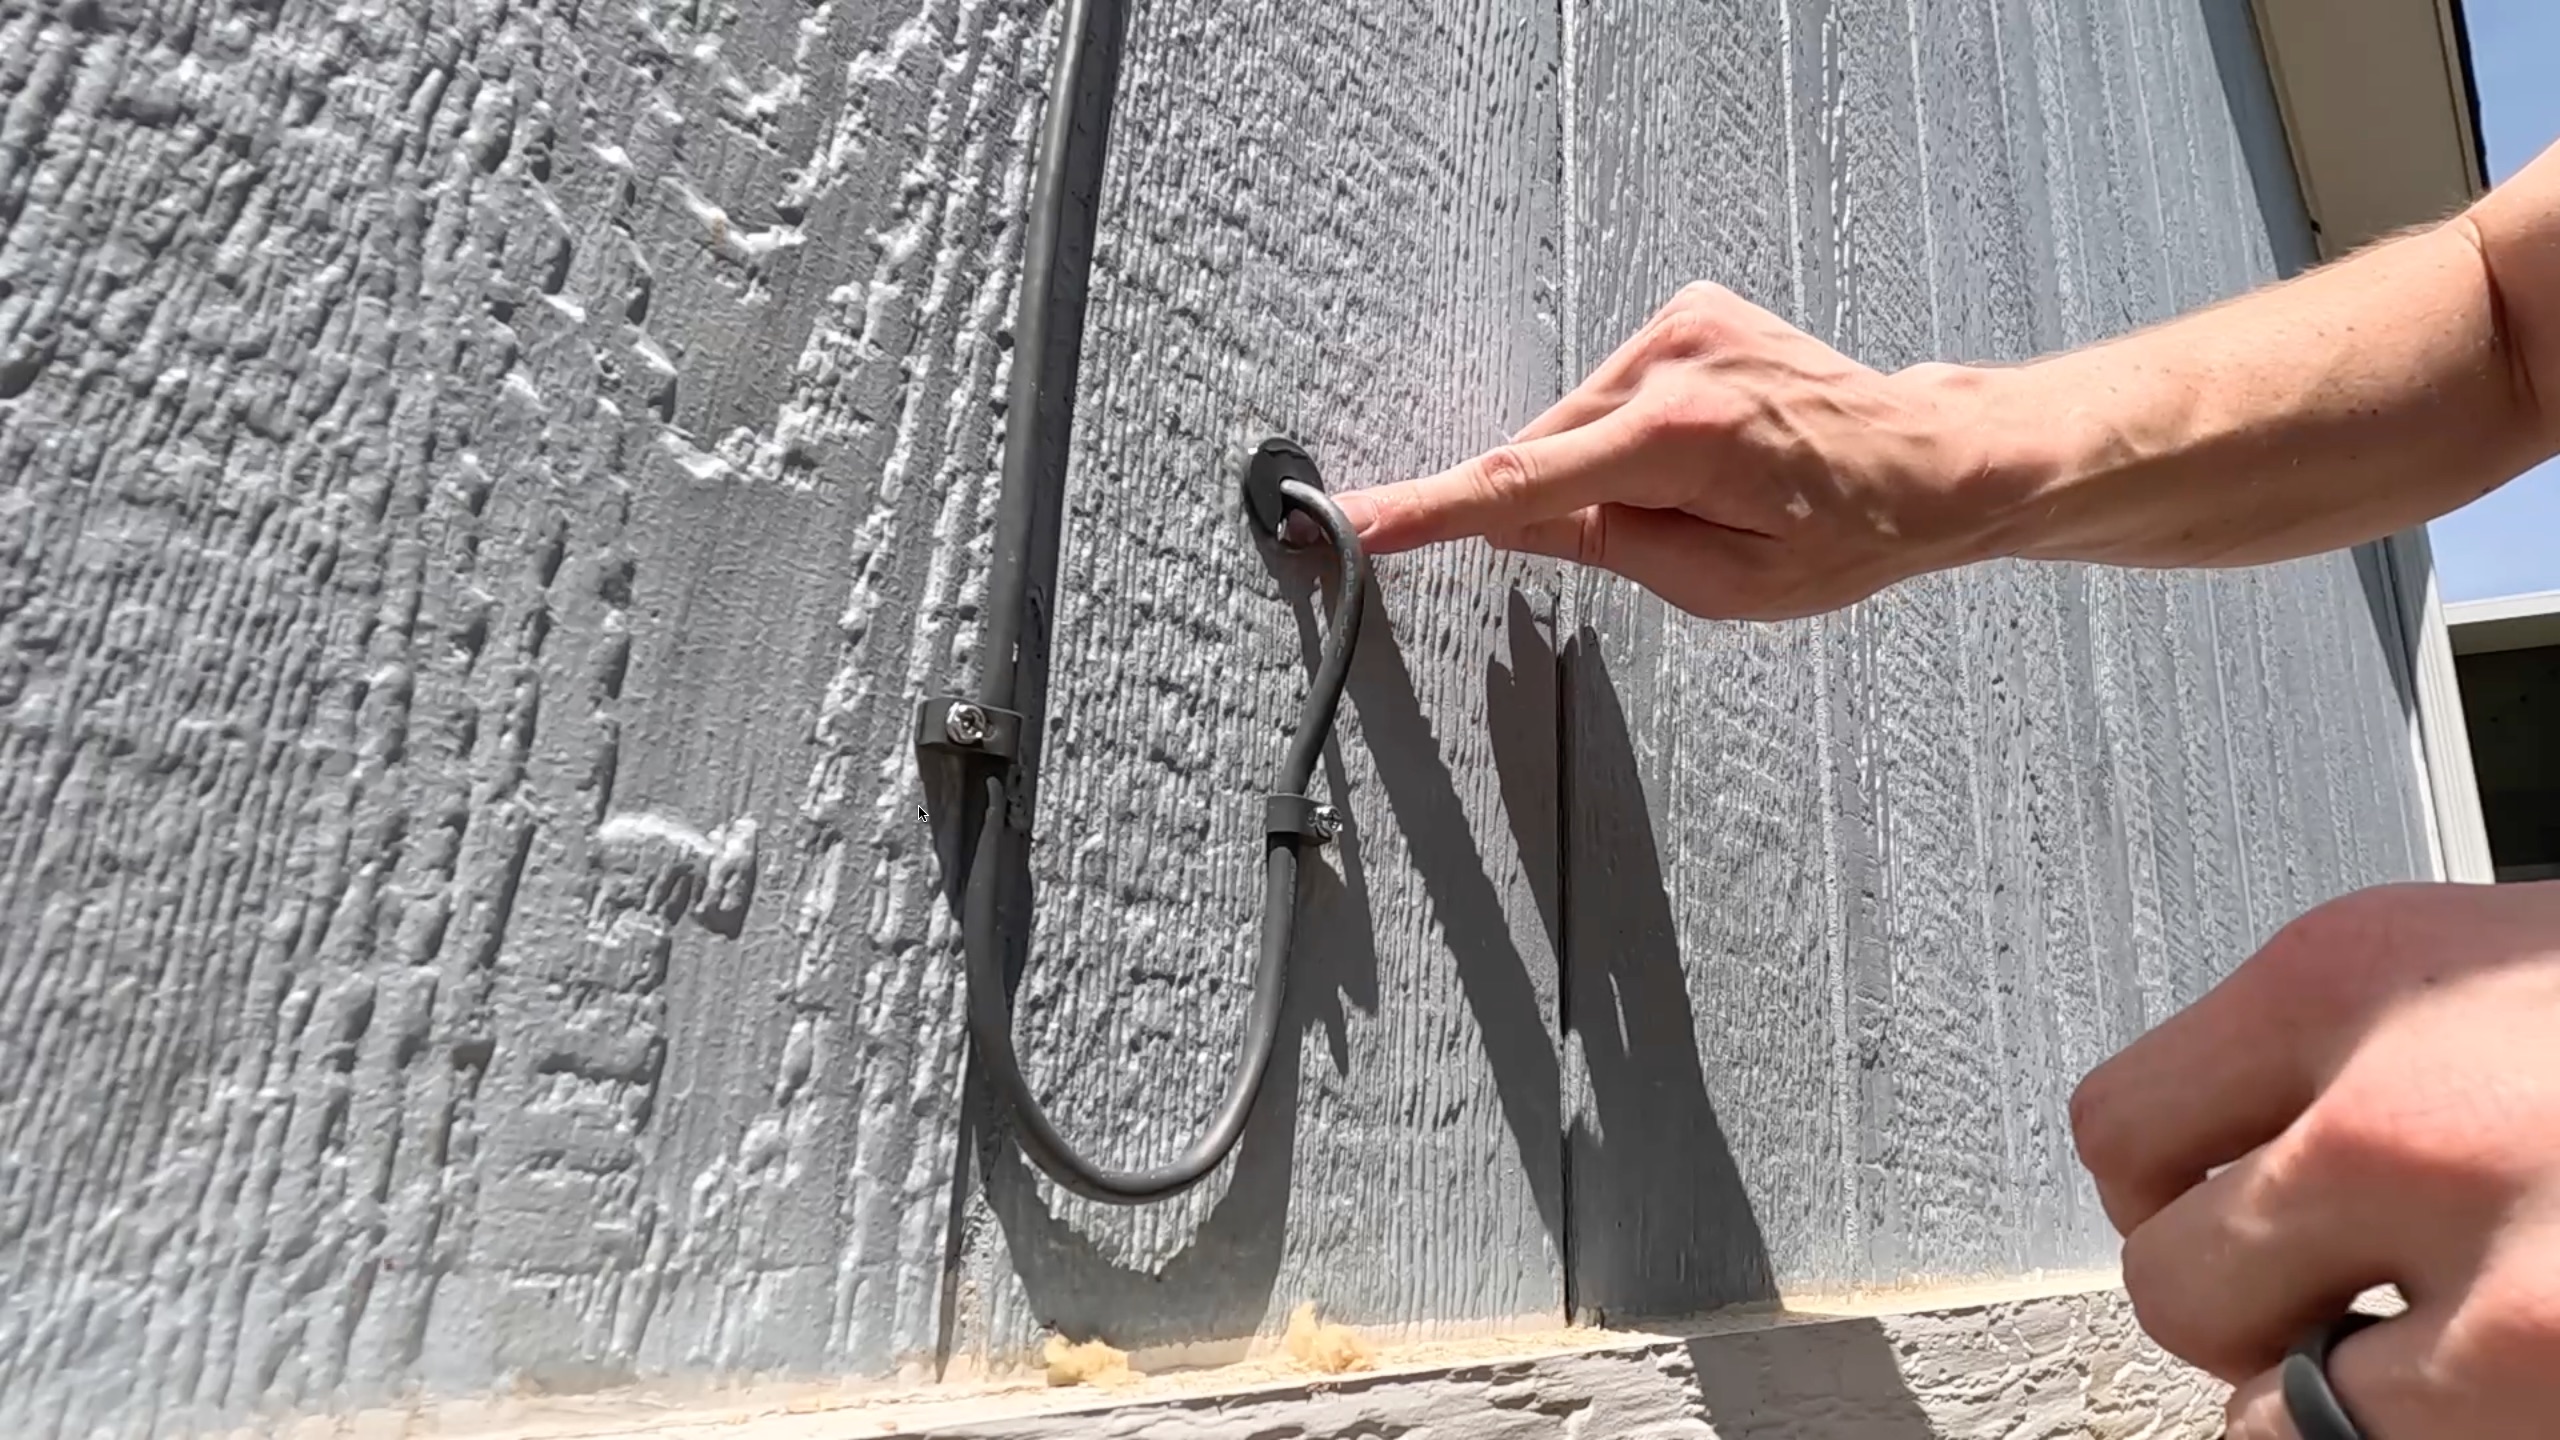
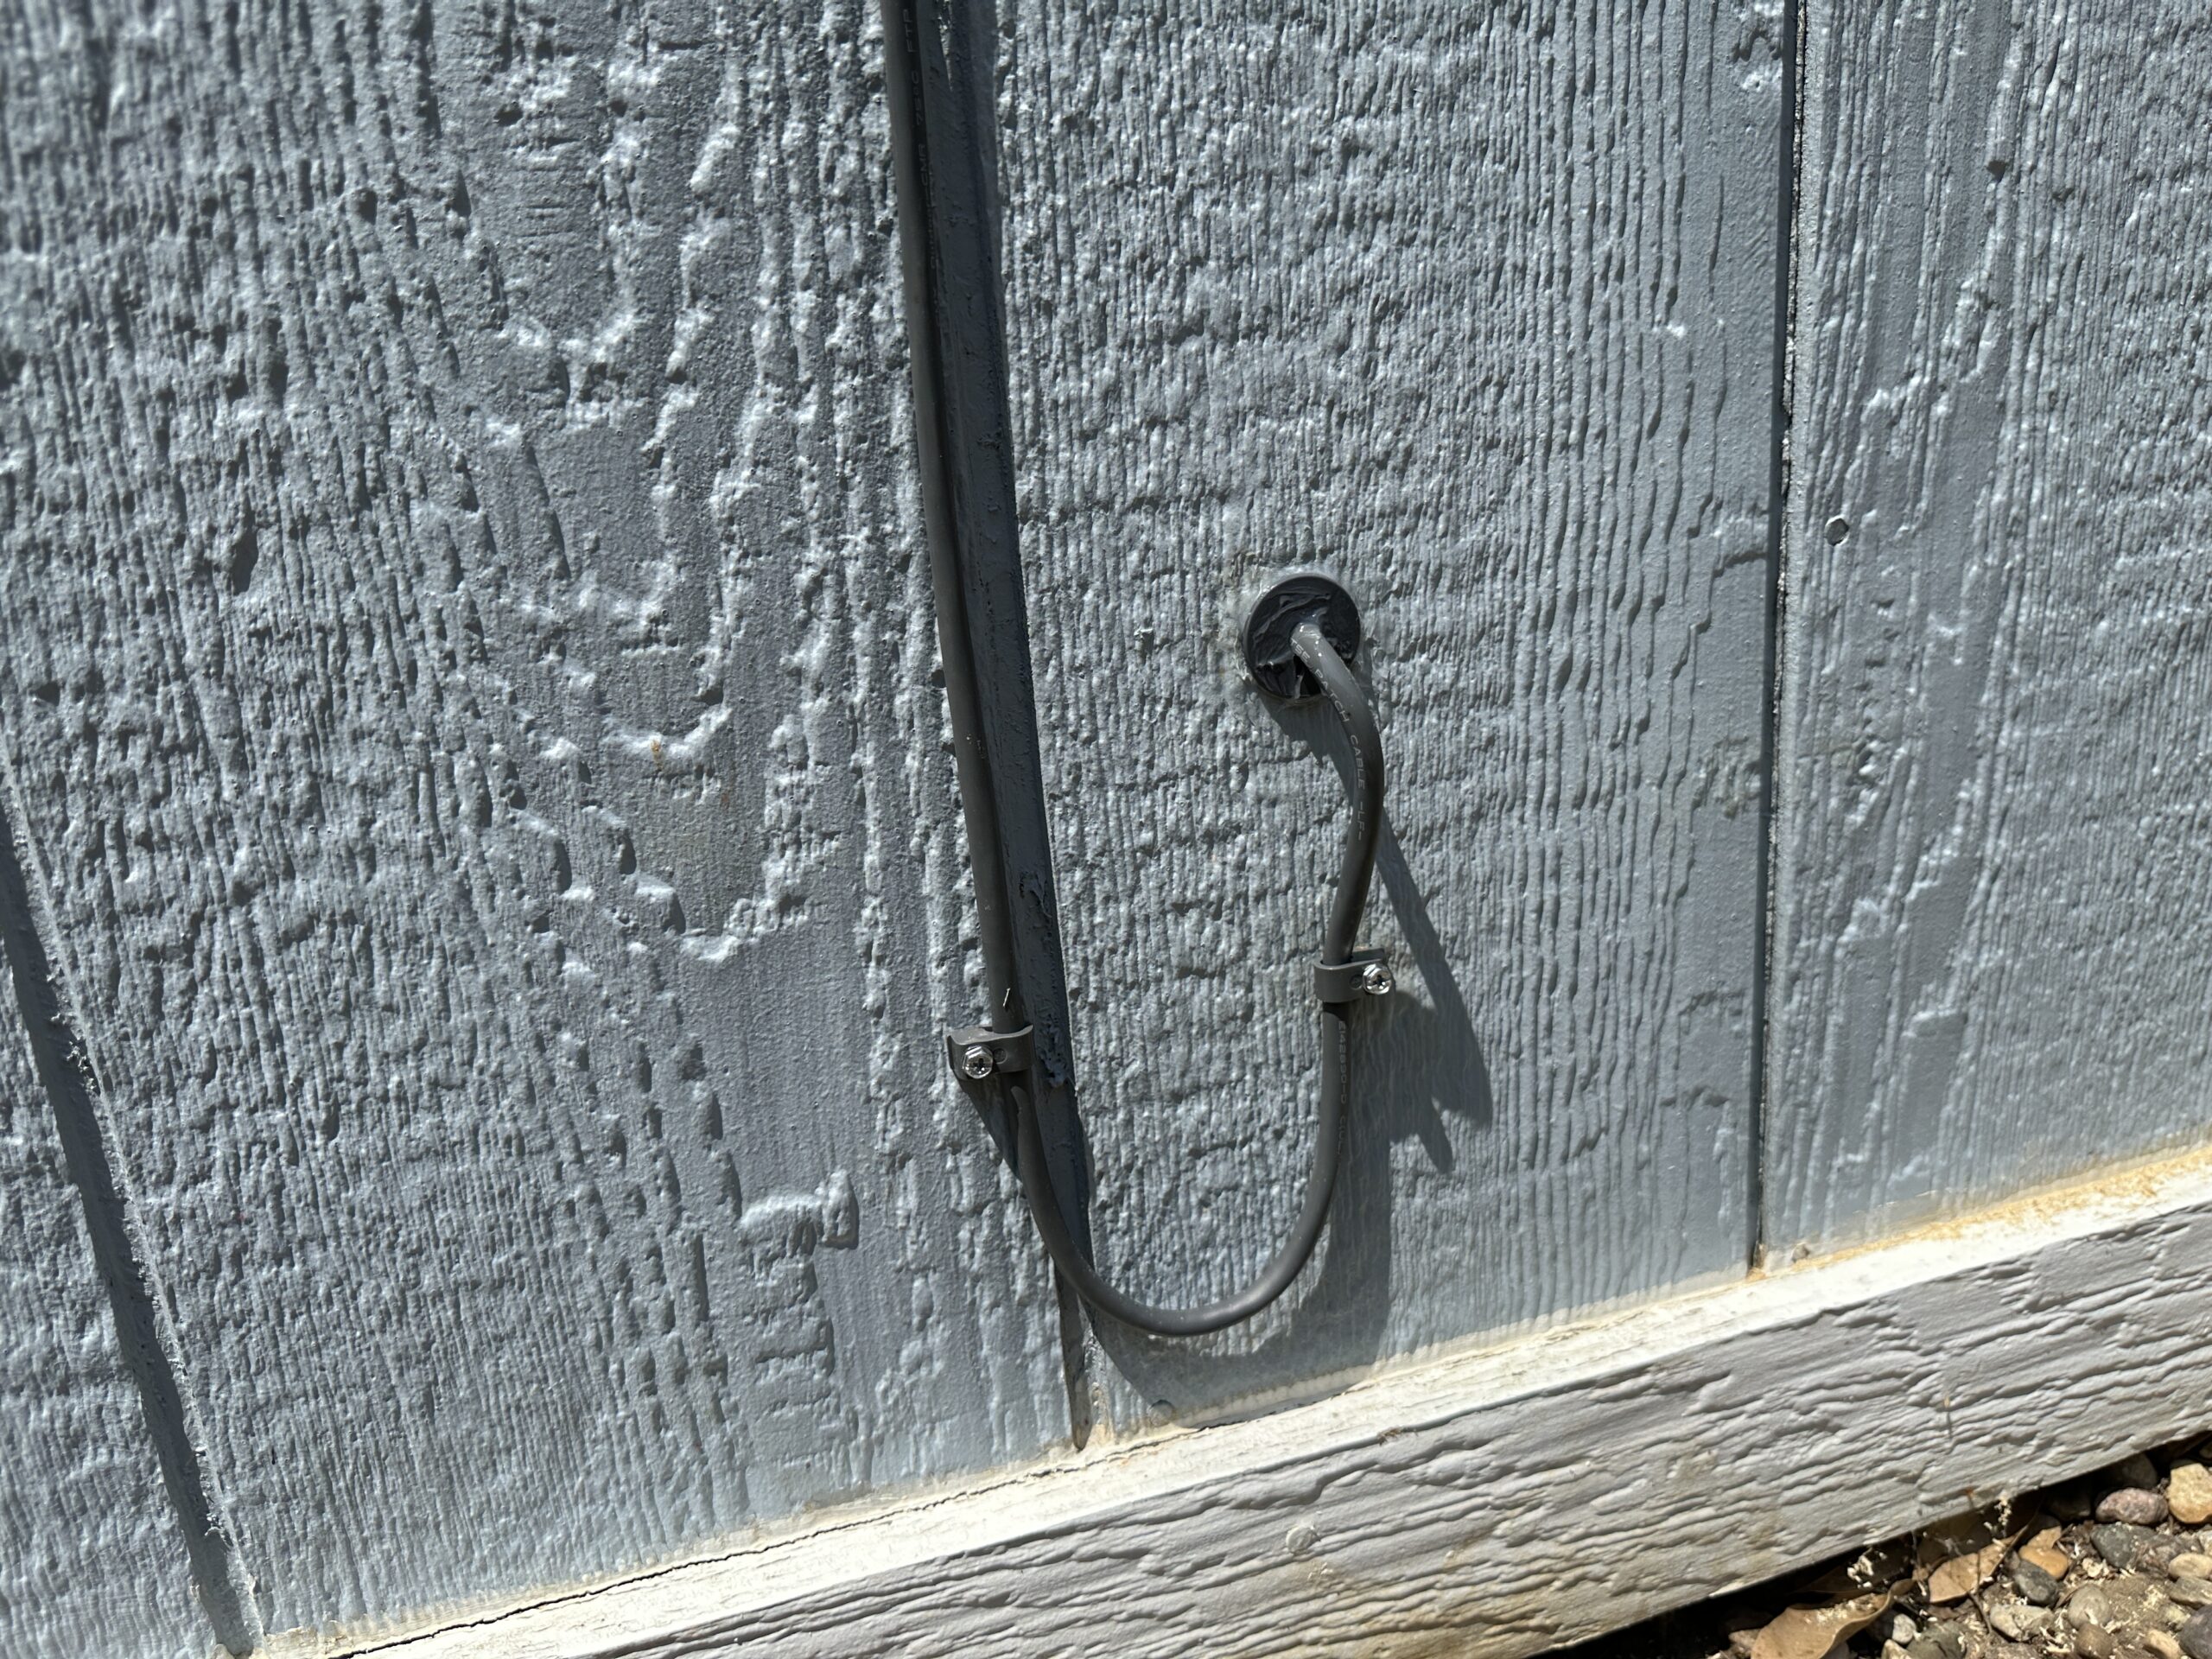
With the cable connected, use the included wall clips to secure the Starlink cable to the exterior wall. When you get down to the hole, install a drip loop. The loop below the hole ensures that water can’t leak into your home.
Return inside and route the cable to the Starlink router. I recommend coiling up excess cable and hiding it behind a bookshelf. You can also coil up the excess at the dish, at the drip loop, or wherever you prefer. The next step involves sealing up the hole, so get your cable management done now before proceeding.
Install grommets

Now you can install the cable grommets and seal up the hole on the interior and exterior. To install the grommets, slide them down onto the cable with the opening pointing down. Before sliding the grommet into the hole, use the included silicone sealant to apply a bead around the perimeter of the hole.
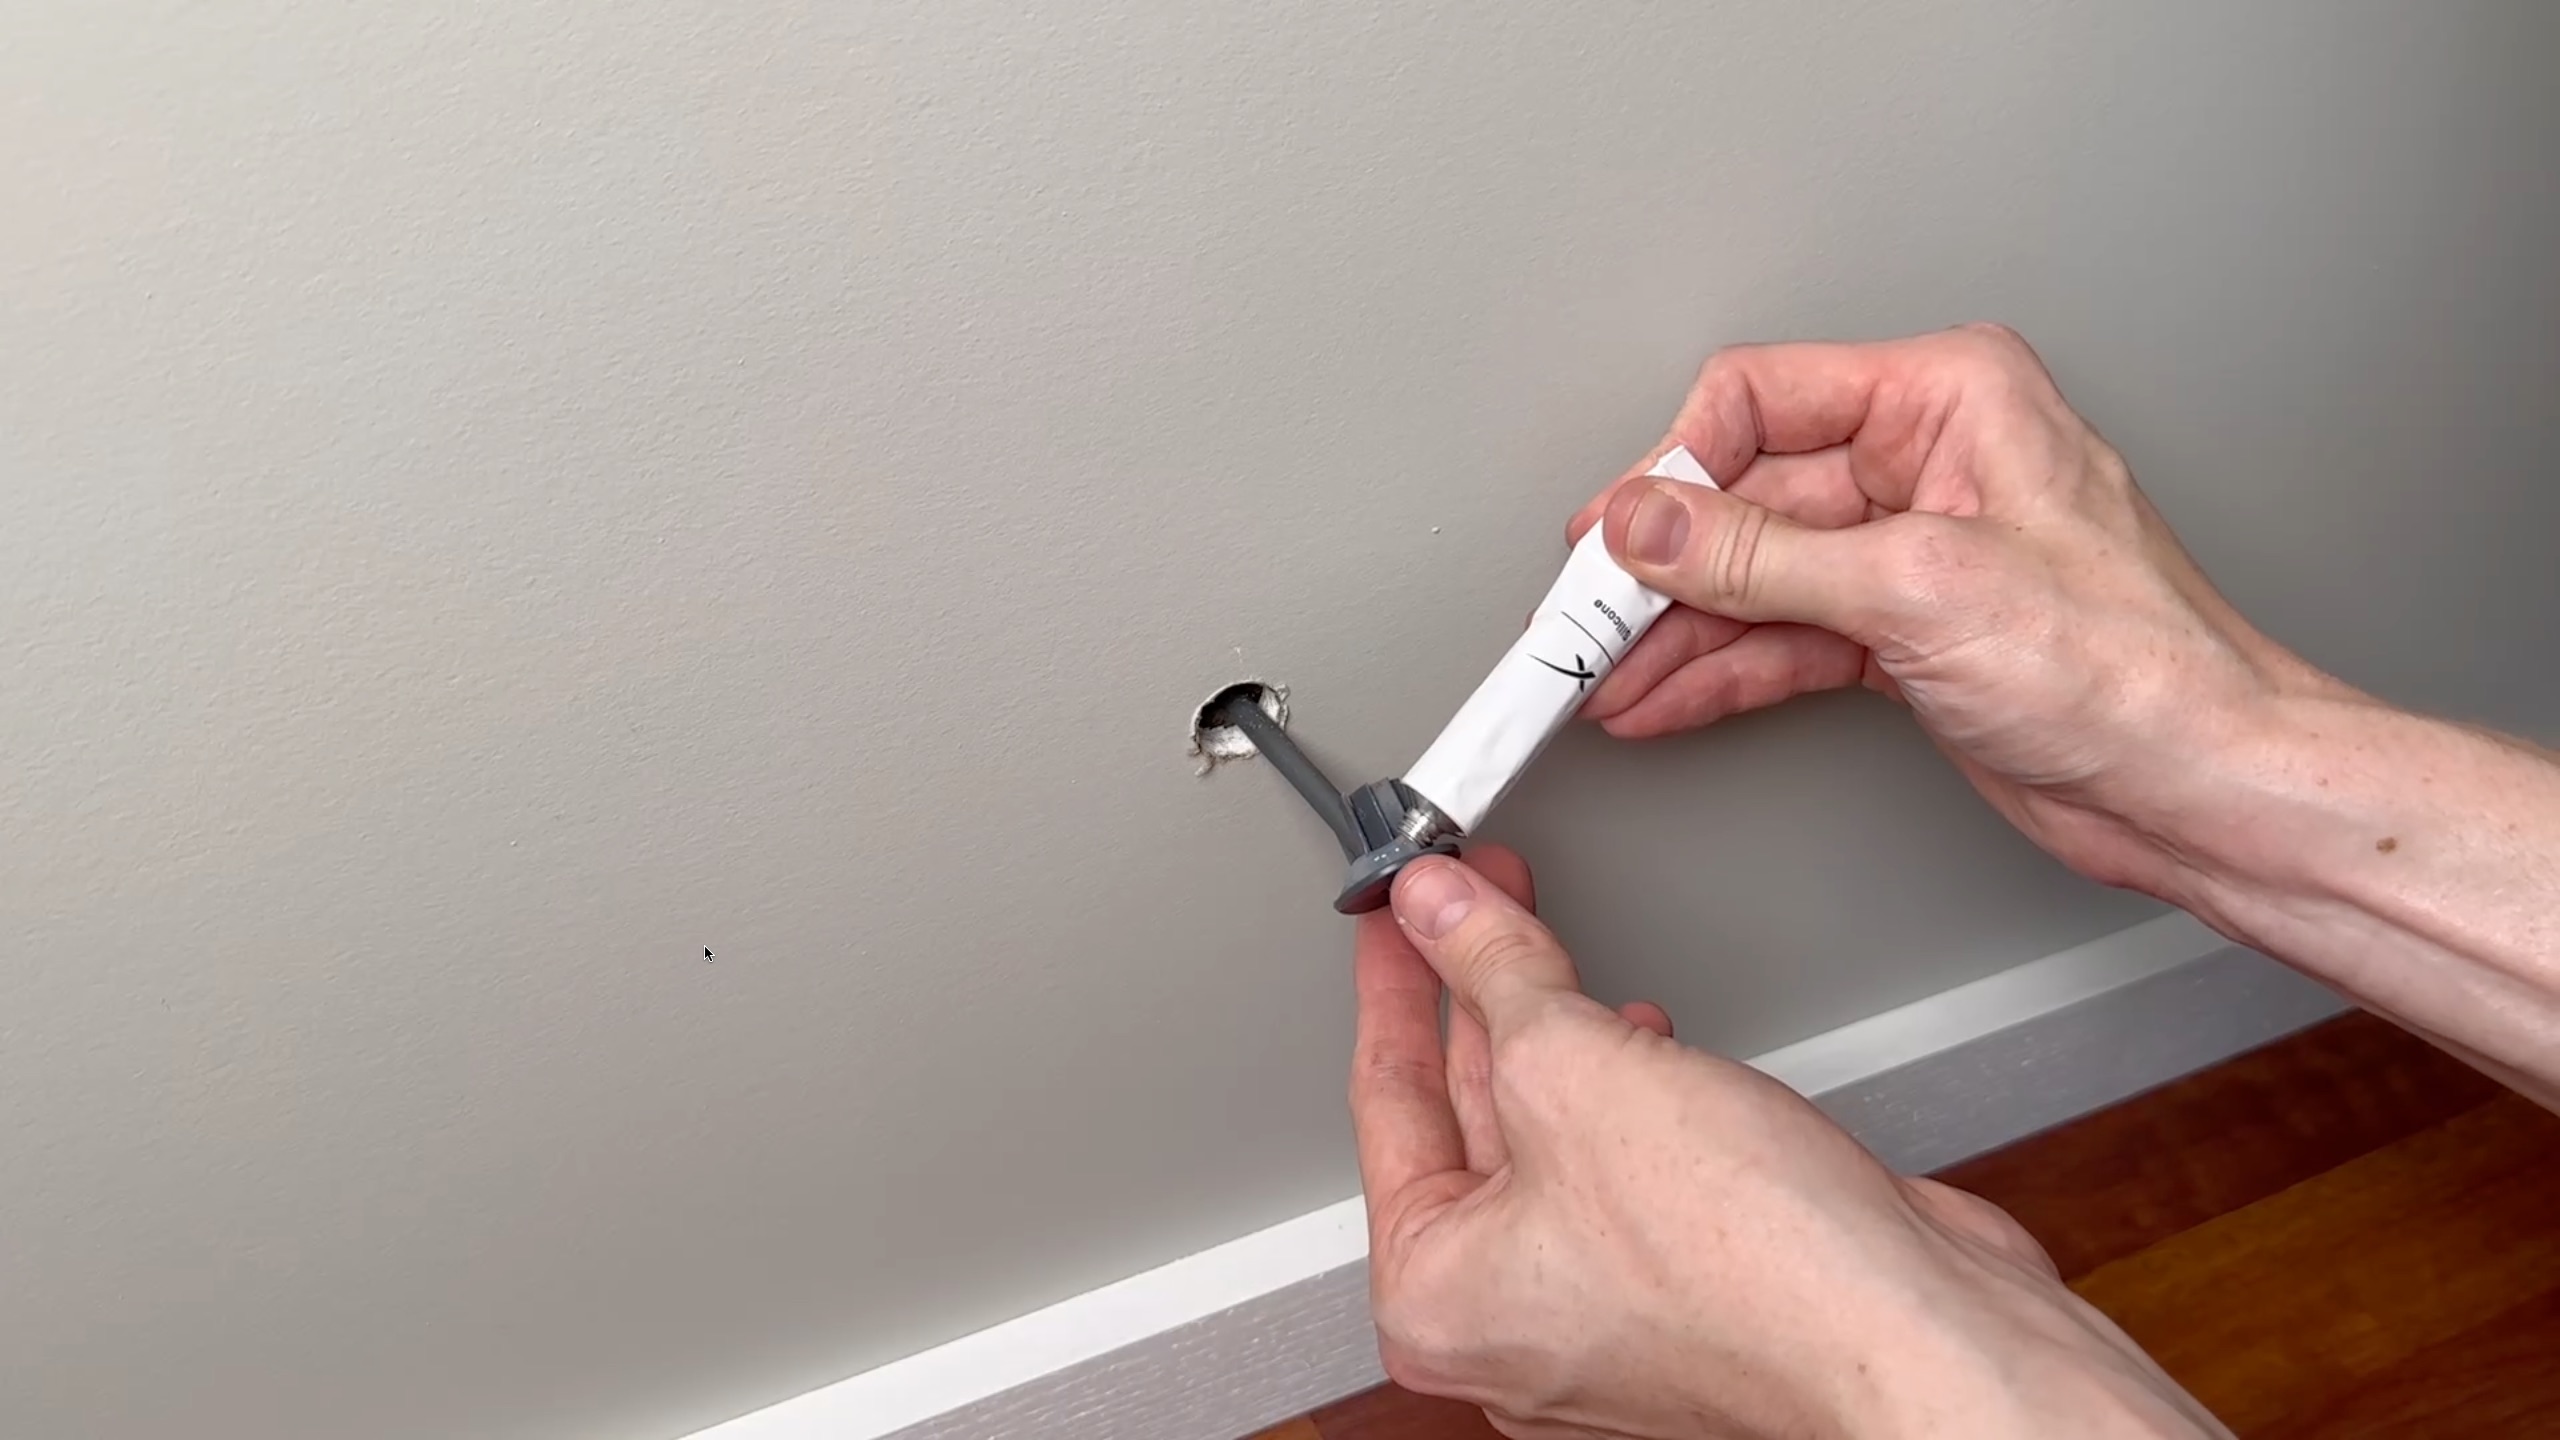
With the sealant applied, insert the grommet into the hole, with the cut out pointing down. After the grommet has been installed, run a bead of sealant around the cable and along the grommet cut out.
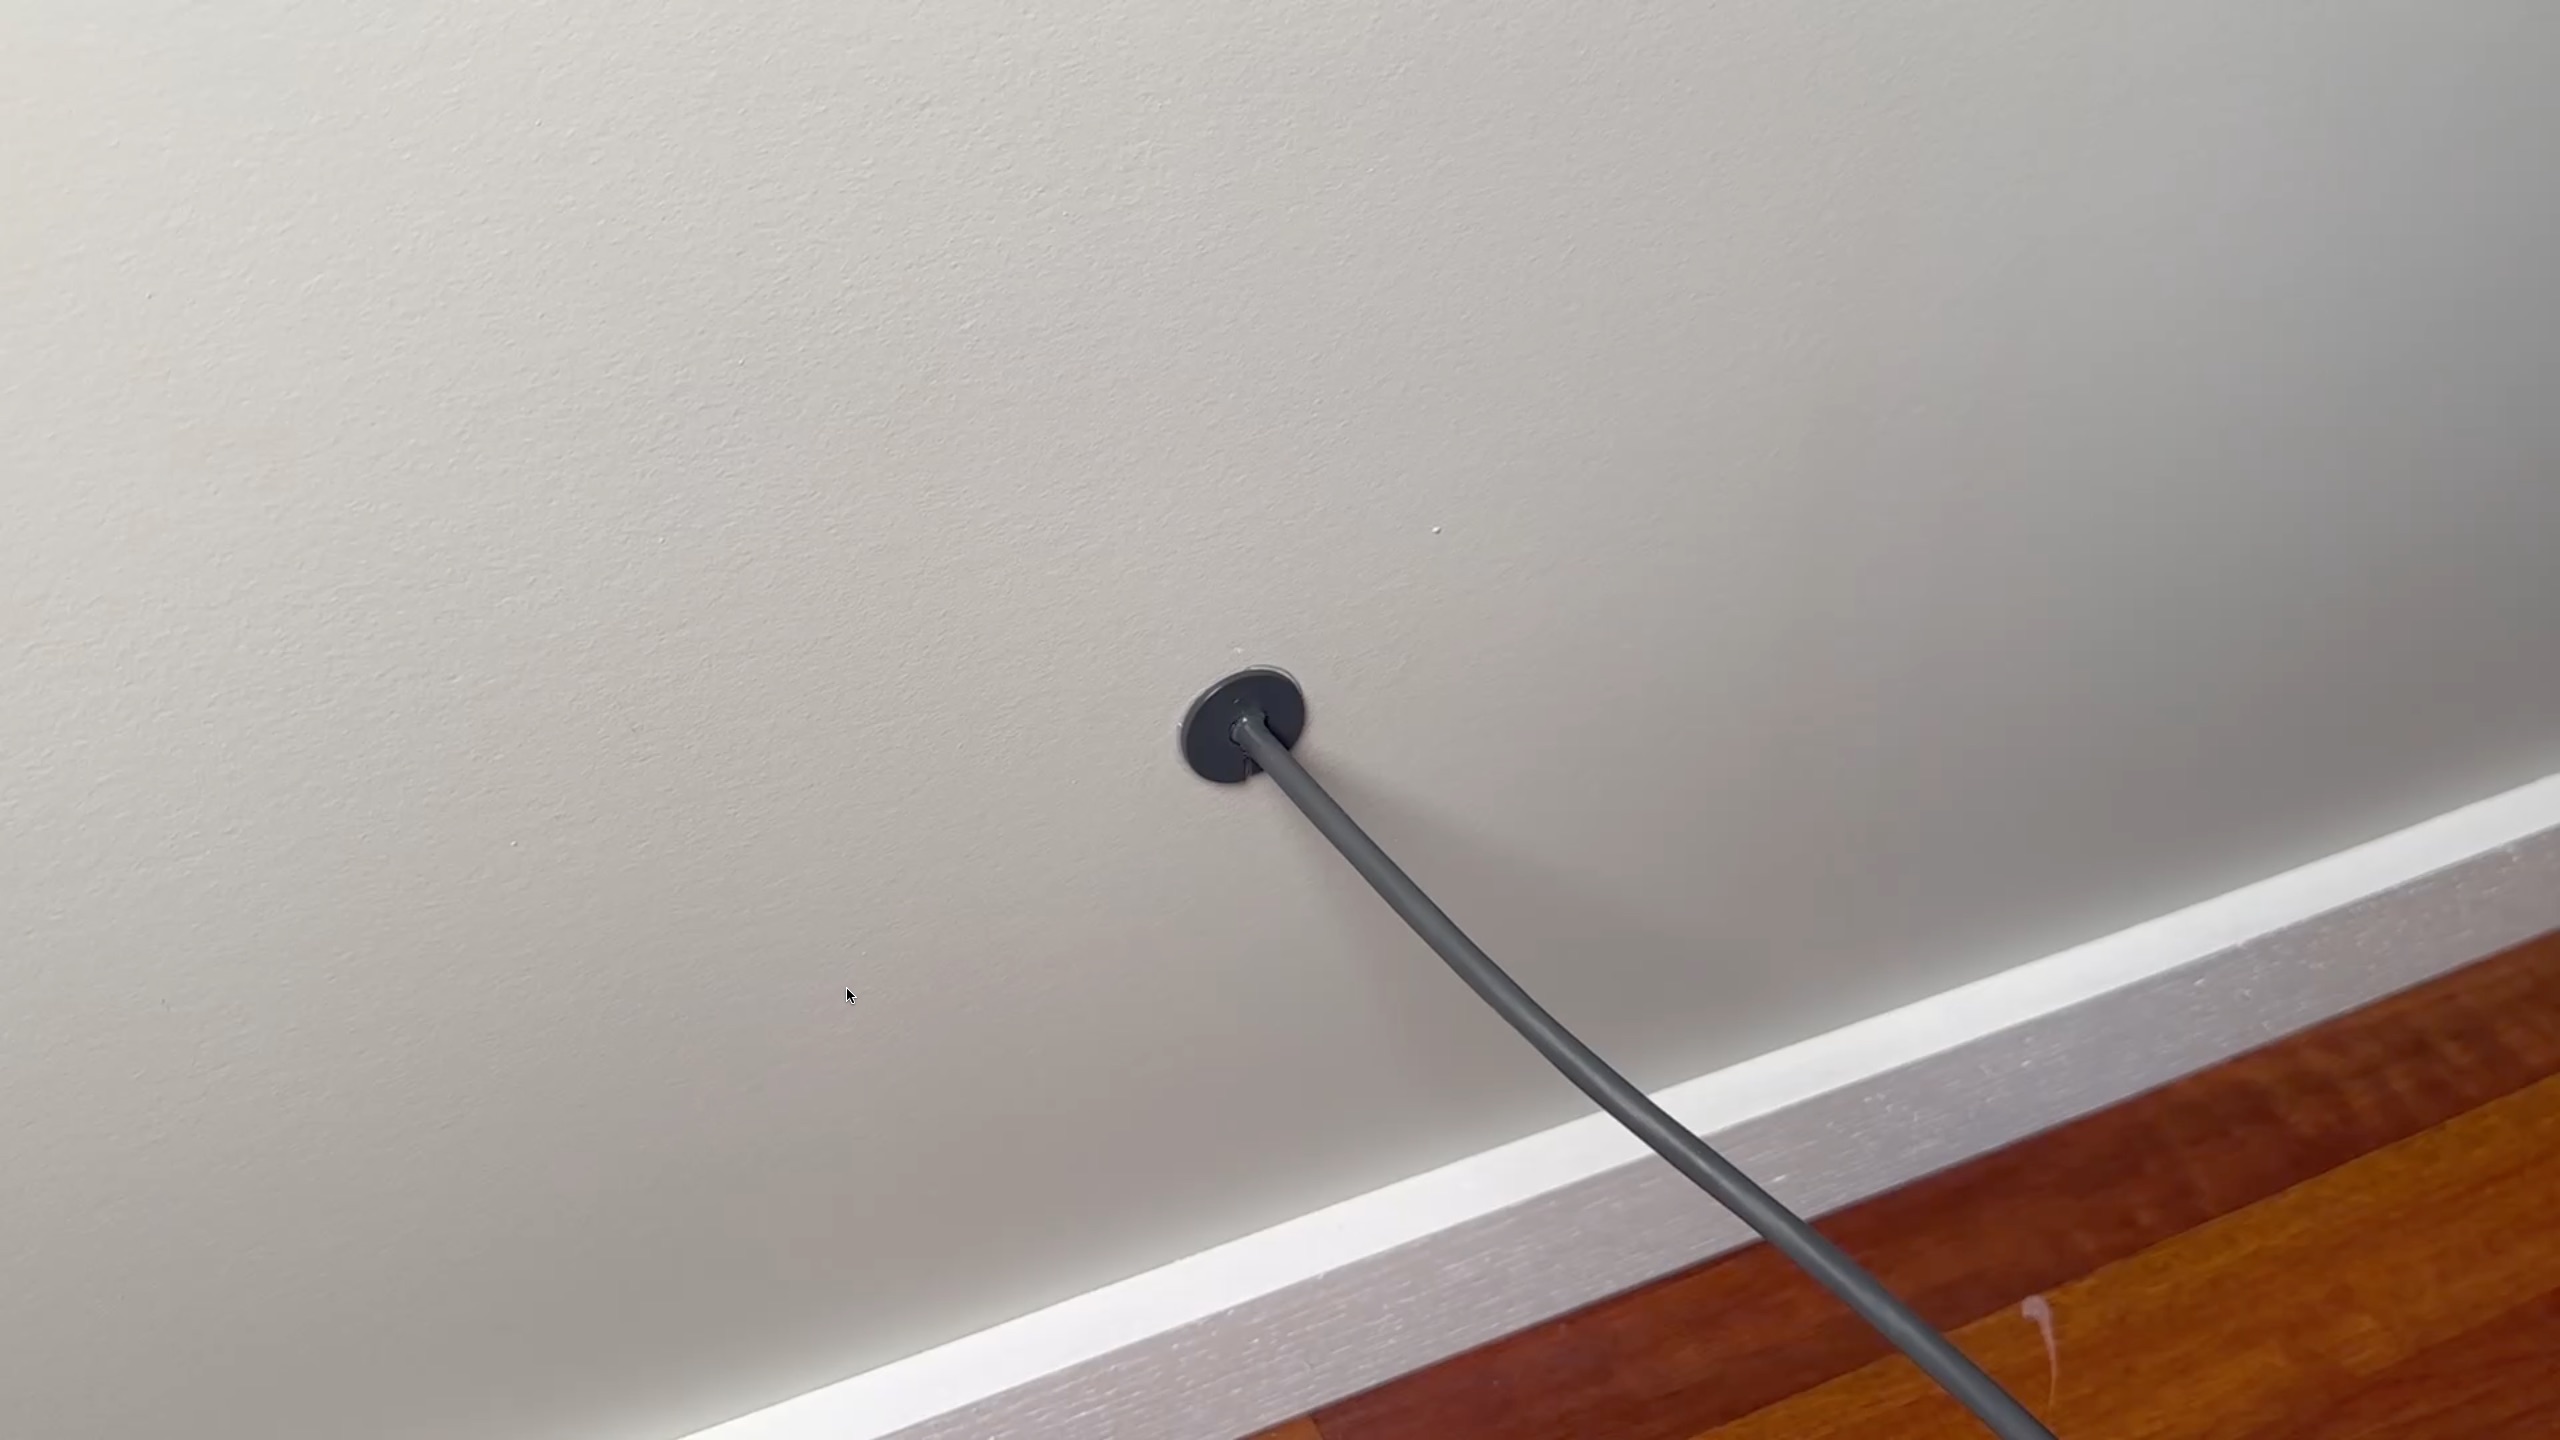
Repeat this procedure on the other side of the wall. On the interior, it’s more about sealing up the gaps for air rather than being worried about water. Be generous with the sealant on the exterior to prevent water from coming inside.
Review and final thoughts
I have only positive things to say about the Starlink Cable Routing Kit. It’s only $26 directly from Starlink, and includes everything you need to properly run the Starlink cable into your house.
As you can see from the photos above, both sides look clean and professional. The silicone sealant will prevent water and air from coming inside. The wall clips hold and help route the cable to the dish. Overall, I couldn’t be happier with how this project turned out.
If you have any questions or feedback, let me know in the comments below!
Doesn’t the cable need to be in conduit for protection outside?
No, not against the typical outside elements. It only needs to be in conduit if buried in the ground.
My dishy came with the wire already attached to dish. I am nervous about removing to permanently install any tips to do this without harming unit?
Pull straight down. The connector slides into the dish mast from the bottom. If it seems stuck, don’t worry, it’s just a manufacturing defect that caused a bit of material to essentially glue the connector in. If it won’t pull out with a bit of pressure, try to pry between the mast and the connector with a small screwdriver. Try wiggling the connector to break the glue. It is supposed to be detachable, so it should come out. If you still can’t get it without worrying about breaking it, contact Starlink support for next steps.
My outside wall isn’t wood but plaster over block. I don’t think these grommets would work for that? Do they offer grommets for my type of construction. Thanks
Yep! Try the Masonry Routing Kit. I don’t know that the grommets are different, but it includes the appropriate bits for dealing with masonry.
https://shop.starlink.com/products/us-consumer-masonry-routing-kit-gen2
do you know where one can purchase grommets like those provided in the kit? Thanks for a great article.
I’m not sure you would find something that works the same way, but you could try a grommet from a hardware store. If you modify it by cutting a slit to the center, and then drill out a hole big enough for the cable, you could create something similar.
thank you