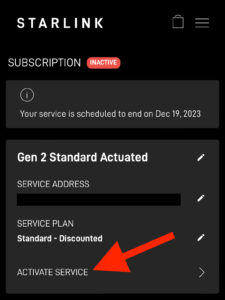
Starlink’s Secret $90 Service Plan Has A Major Loophole
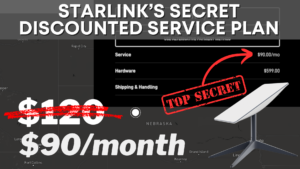
In this video post, I talk about Starlink’s hidden service plan that is mentioned nowhere on their website. The “Standard – Discounted” plan is supposed to be only available for select rural addresses in the United States. But a huge loophole in the Starlink account management system allows…