
I recently bought the “Standard Pivot Mount” from Starlink to try out. In this post, I’m going to share my installation experience, and give you my thoughts and impressions along the way.
The Pivot Mount is designed to attach directly to a shingled roof. It’s called the Pivot Mount because the mounting tube is adjustable to virtually any roof angle. I bought the Gen 3 version, but Starlink also makes a Pivot Mount for the older Gen 2 Standard Actuated dish.
I purchased this mount for $74. It’s available directly from Starlink, here is the product page. That price includes cable routing clips, lag screws, the mount, a mast, an adapter plate, and sealant tape. To complete the installation, I used a drill, impact driver, 1/4″ drill bit, 9/16″ socket, a level, and a tape measure.
Installation
The first step was to find a good location for the dish. I used the Starlink app to scan the sky at various points on my roof. I settled on a location near the peak. It’s generally best to mount Starlink as high as you can on your roof.
Next, I tackled the pilot holes. I figured out that I had a rafter about 16″ from the edge of my roof (I checked in the attic for the location of the rafters). With that information, I was able to mark the location of the two pilot holes for the Pivot Mount. You need to secure this mount to a solid structure, like a rafter. I used a drill and a 1/4″ drill bit to create the pilot holes for the lag screws.

With the pilot holes drilled, I used the supplied sealant tape to prevent water leaks. This was a two step process. The first step was to ball up the smaller squares, and press them into the pilot holes. The second step involved laying down a strip of sealant tape over the pilot holes. Tip: Use one of the lag screws to make an indentation in the sealant where the pilot holes are, so you can more easily locate where to drive in the lag screws.
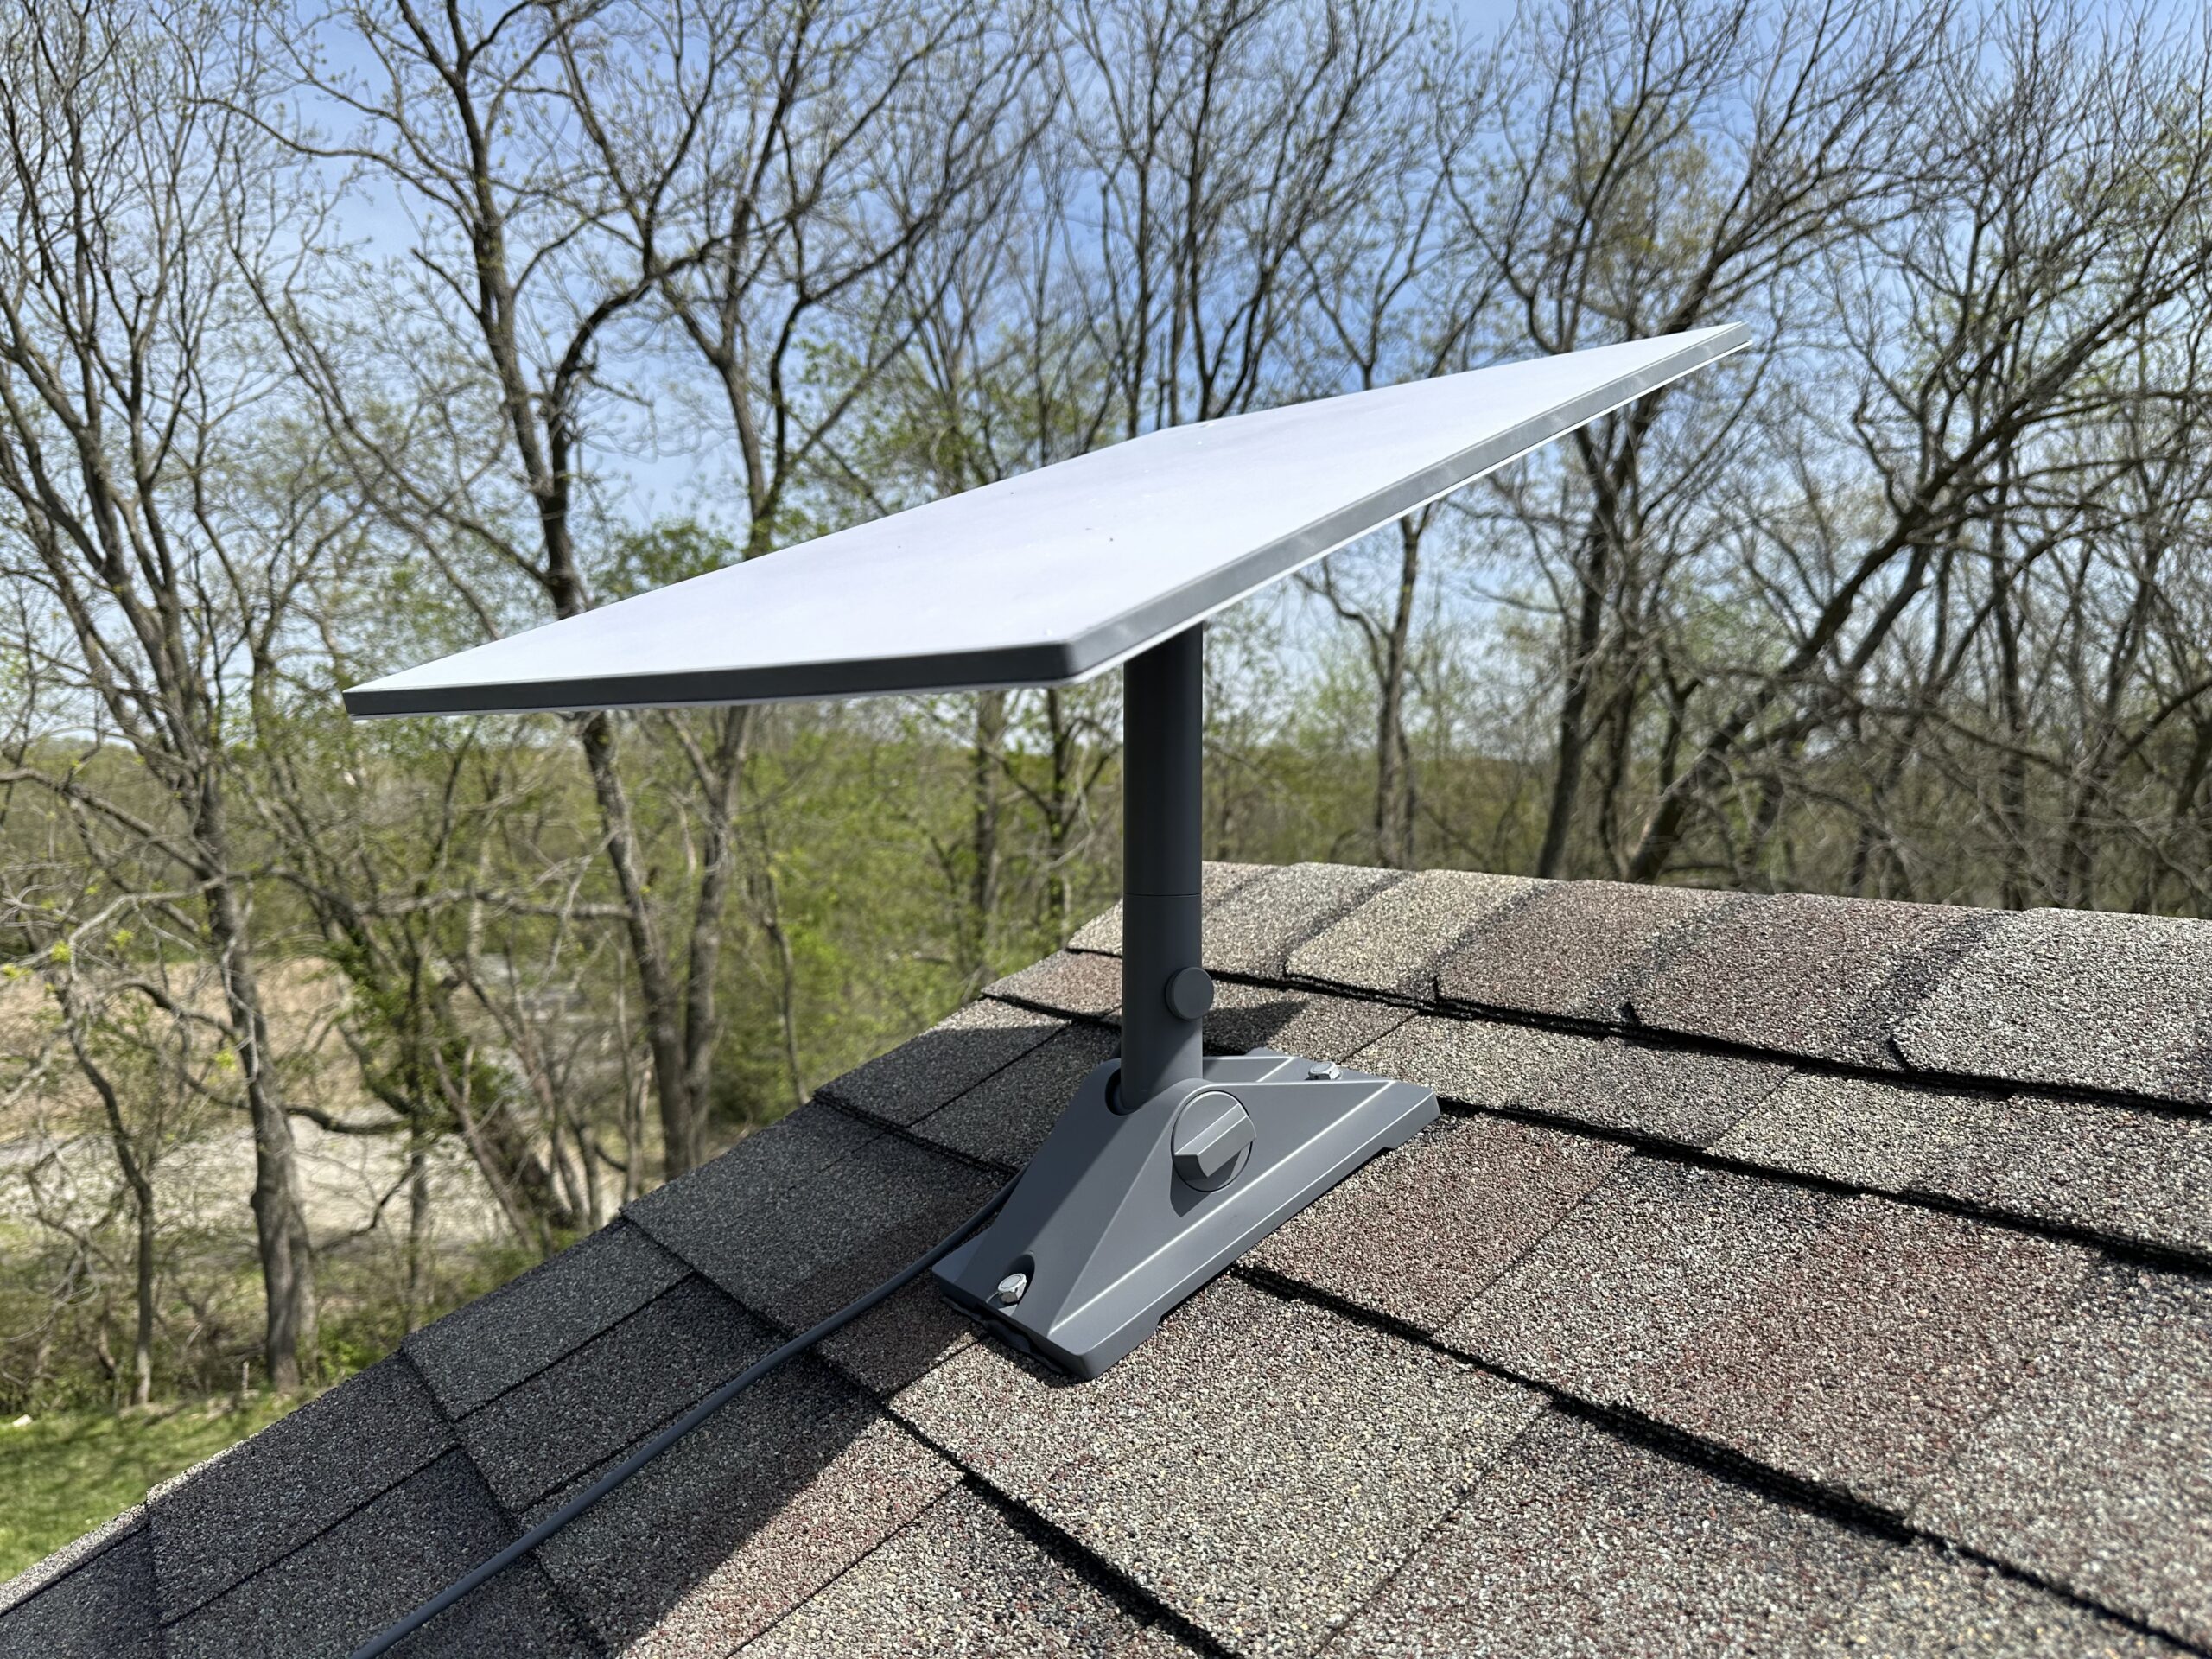
The next step was to drive in the lag screws. I put the Pivot Mount in place (arrow facing up), using the indentation I mentioned previously as a guide to where the pilot holes were. I started the lag screws by hand until I could feel they were in the pilot holes. I used my impact driver and a 9/16″ socket to tighten them, securing the Pivot Mount to my roof.

With the Pivot Mount installed, it’s time to get the mast tube vertical. I used a level to adjust the angle of the Pivot Mount until it was plumb. The mast needs to be vertical or you will get an error message in the Starlink app. When plumb, tighten the adjustment knob.
I returned back to the ground to retrieve my Gen 3 dish. At this point, I was ready to install the dish on the Pivot Mount. But first, I had to install the mast and adapter plate. The mast piece from the Pivot Mount kit simply snaps into the mast adapter plate. The Starlink cable is routed up through the mast, out the top of the adapter plate, and then plugs into the Gen 3 dish. Then the whole assembly just replaces the Gen 3 kickstand, sliding into place where the kickstand used to be.

Unfortunately, Starlink no longer provides the handy dish carrying bags with any of the Gen 3 mounts. It was pretty awkward trying to climb the ladder with the dish and able in hand. But once I was back up on the roof, the mast slides right into the Pivot Mount. Make sure you loosen the adjustment knob first. Don’t tighten it down just yet, you will need to perform the manual alignment in the Starlink app first.
Pointing the dish

Plug in the Starlink cable to the router, and power everything on. Let it boot up for about 15 minutes. I grabbed a snack and returned a bit later. By that point, the dish had booted up, and I was ready to manually aim it. Aiming the Gen 3 dish is pretty simple. Just open up the Starlink app. If you don’t see any error messages, you can go ahead and tighten down the adjustment screw. If you do see a message that says “Starlink Misaligned”, just tap on it to open the alignment tool. Rotate the dish by hand as directed, until the app says it is aligned. Tighten the adjustment screw on the mast and double check it is still aligned. Click “Done” in the app when finished.
If you need more information on manually aiming the Gen 3 dish, check out the full tutorial.
Review
The installation process for the Gen 3 Pivot Mount was pretty straightforward. If you can use basic power tools, and you are comfortable climbing on your roof, you can do this project yourself. The included sealant tape and lag screws was a nice touch.
I think most people will avoid this mount simply because they don’t want to drill holes in their shingles. I understand that completely. It wasn’t my first choice as far as Starlink mounting options go. For most people, I recommend the Standard Wall Mount instead. You can secure it to the side of your home instead, avoiding any future water leaks that you might get by drilling into your shingles.
That being said, the one advantage this Pivot Mount has is how flexible you can be with your mounting location. With the Standard Wall Mount, you are really limited to just two sides of your home. With the Pivot Mount, you can secure it virtually anywhere on your roof.
My one gripe with the Pivot Mount is not really a problem with the product, but with the Gen 3 design in general. Every Gen 3 mount has this issue. Even when everything is completely tightened down on the mount, the Gen 3 dish wobbles a bit. While this doesn’t cause any performance or reliability issues, it just feels cheap to me for the dish to move around after it’s secured in the mount.
Final thoughts
Overall, I think the Standard Pivot Mount is another solid mounting option to consider if you will be purchasing a Gen 3 dish. If, for whatever reason, the wall/fascia mounts won’t work for you, the Pivot Mount is perfect for mounting to a shingled roof.
Be sure to check out our guide to other Starlink mounting options.
YouTube version
We upload a lot of content on YouTube if you are interested in a more visual experience. Here is a link to this review and install tutorial on YouTube:
I wonder why none of the Dish mounting options include grounding provisions as required by the National Electric Code.
Early on, Starlink said their system complies with the NEC even without an external grounding solution. Reading it myself, I don’t see how, as any mast/antenna needs to be bonded in with the homes grounding system. My guess is that Starlink doesn’t install these, and sells a “portable” kit, so they can get away with it. The responsibility transfers to the homeowner.
I put one of these mounts on a corrugated roof. I had no rafter to screw into, so I drilled 4 new holes in each of the corners as these line up with the corrugations and used tek screws in each corner with the black sealant under each corner. It seems to be working well.
Good to know, thank you for the info. I’ve seen other people say it also works fine secured to plywood and other less structural places as well.
i willl be more than glade to have any information about the starling to install on the roof of my motocaravan?
There are companies out there that specialize in modifying the Gen 2 and Gen 3 dishes for roof flat mounting. I suggest looking into those services if you are wanting a permanent roof mount for in-motion use: https://star-mountsystems.com/collections/mounts
Otherwise, the Flat High Performance dish is the only one truly designed for such an installation. It includes the Wedge Mount that secures the dish to a vehicle roof.
The Gen 3 kickstand can be flat mounted, but I wouldn’t trust that for highway speeds and permanent installations.
Is there a new/updates exterior wall kit that works for the gen3? I am weeks, maybe a month from finally getting ready to place an order. The snow has melted at my far northern property, time for me to get onto that crazy high pitched roof, and get Dishy mounted on the fascia.. figure out some external cable routing, then finally, get a hole through the exterior into the interior. I dont recall anything recent about gen3 wall kits.
They do have a wall mount for Gen 3. I did a review/tutorial on it here: https://www.starlinkhardware.com/gen-3-standard-wall-mount-review-and-installation-tutorial/
If possible move the mount out to locate it on the roof overhang on the first rafter so if the mounting screws have a small leak it will not be inside but on the bottom of the overhang.
Good advice!
I encourage you, if you haven’t already, to explore and write about Starlink installations on boats. I just completed such a project and learned a lot about how to make it work.