
In this post, I’m going to show you something I never thought I would do – cut a hole in a Starlink dish! With a small hole on the back of the dish, I am able to access the motor connector. By unplugging it, I can disable the Starlink dish motors to manually point it wherever I want.
There are a couple of reasons why you would want to disable the Starlink motors. Maybe you are dealing with obstructions, and believe you would have better luck with Starlink pointing in a different direction. Or you could have a portable use-case for Starlink, requiring the Standard dish to be flat mounted on your RV roof.
Whatever the reason, in this tutorial, I’m going to walk you through the steps that I took to disable the motors for the Standard rectangular dish. I will cover the supplies needed, and then go step-by-step through the modification process.
Warning: The information here is to be used at your own risk. You will void the Starlink warranty with this modification. You could potentially damage the dish beyond repair.

The Starlink dish should not be manually aimed. It automatically points in the best directly for your location. You can't communicate with more satellites just by pointing it a different direction. Starlink strictly controls what areas of the sky your location is permitted to transmit to.
Table of Contents
Supplies needed
Here are all the supplies I used for this modification:
- Drill
- 7/8″ drill bit
- Tweezers
- Rubber grommet
- Sealant
Step 1 – Reboot Starlink
The first thing to do is reboot the Starlink dish, wait for it to point straight up, and then unplug it. You want it in the vertical position in order to make it easier to drill the hole. It can take a couple of seconds or several minutes for the dish to point straight up once plugged back in.

Once vertical, unplug the dish, take it off the mount, and transport it to a workbench for the next step. Obviously, leave the dish unplugged for this modification. Always practice electrical safety and common sense!
Step 2 – Cut access hole
Now that the dish is upside down on the workbench, mark the location of the access hole. Through my research for this project, I was able to figure out that drilling a hole 5 inches from the bottom and side of the dish is a perfect location.
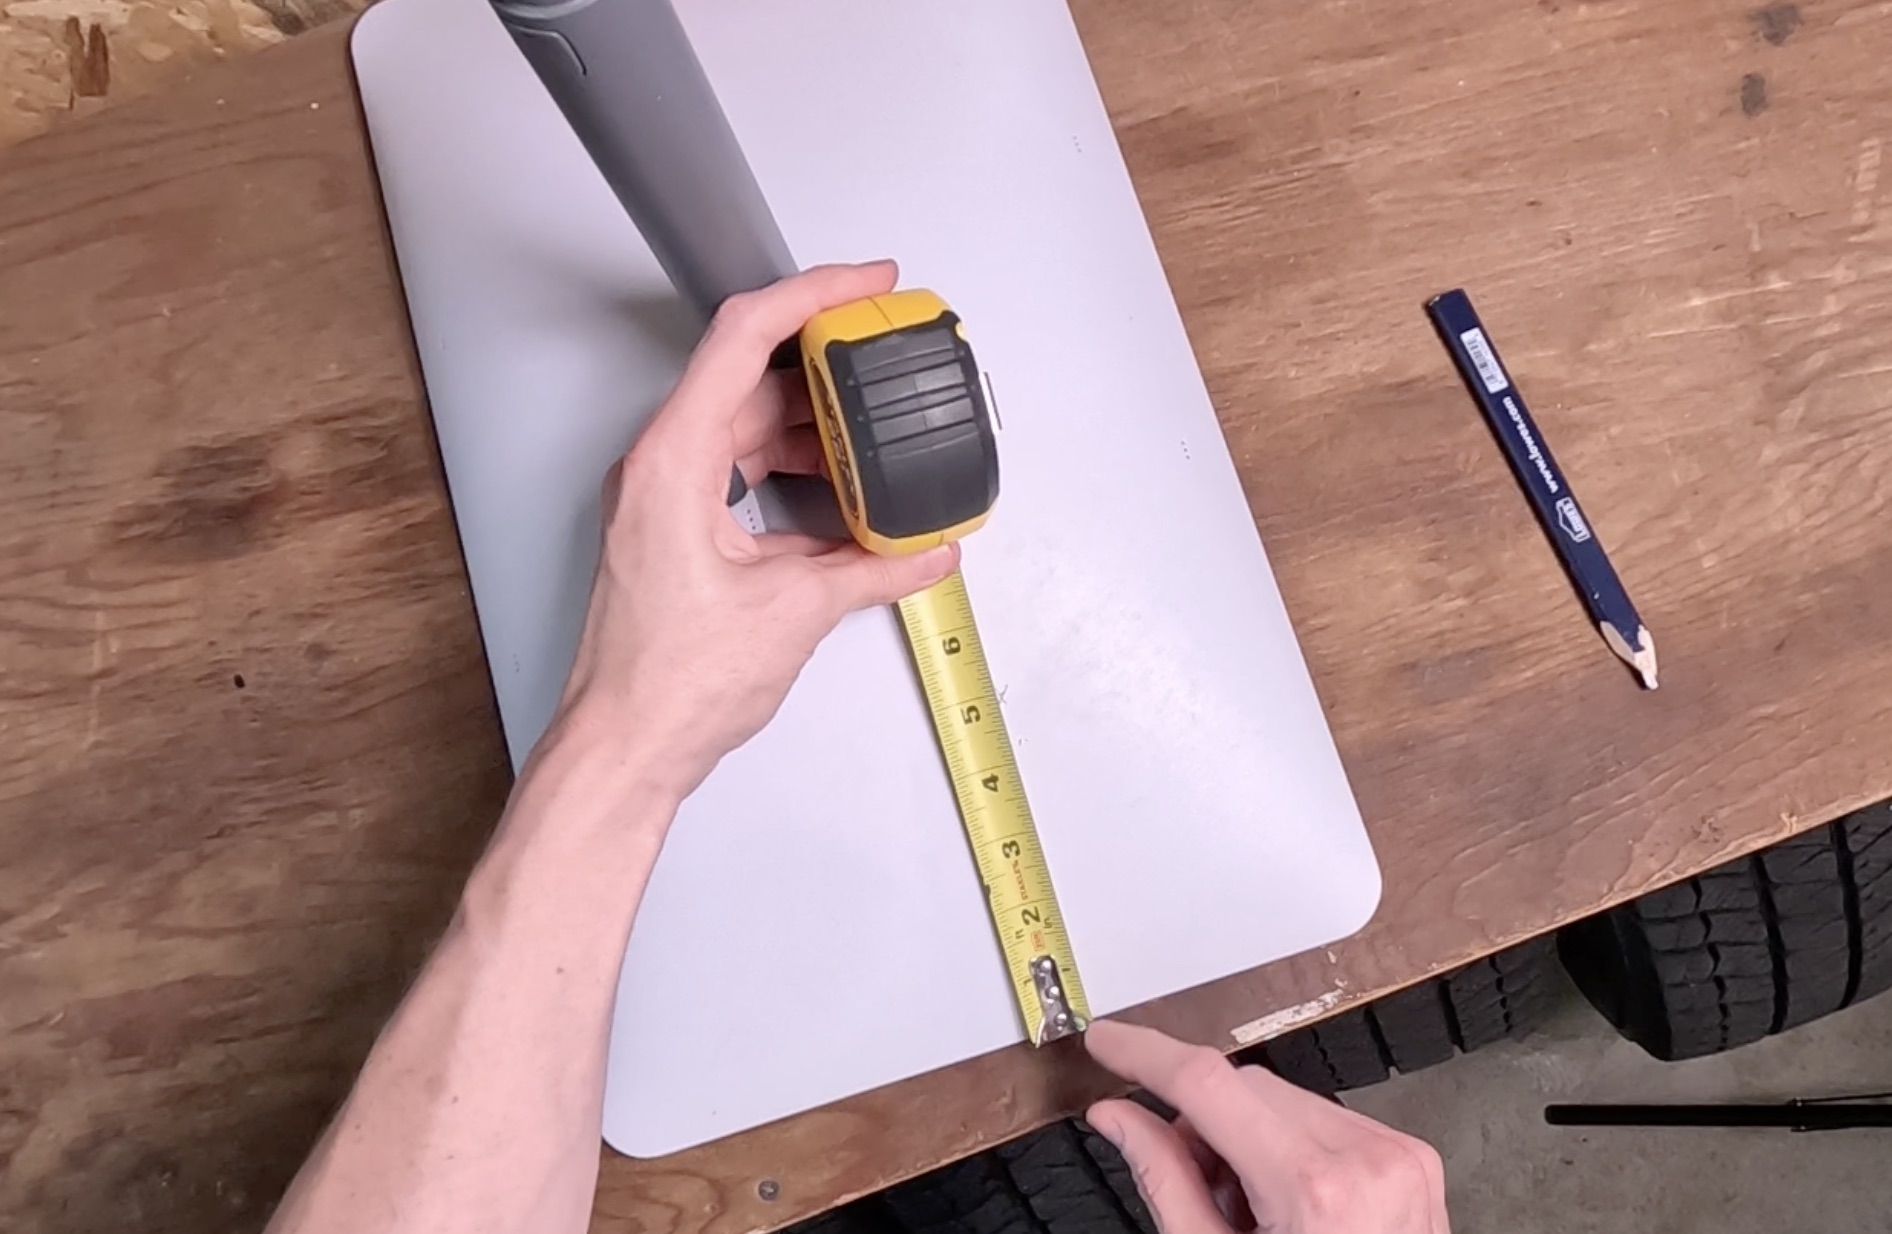
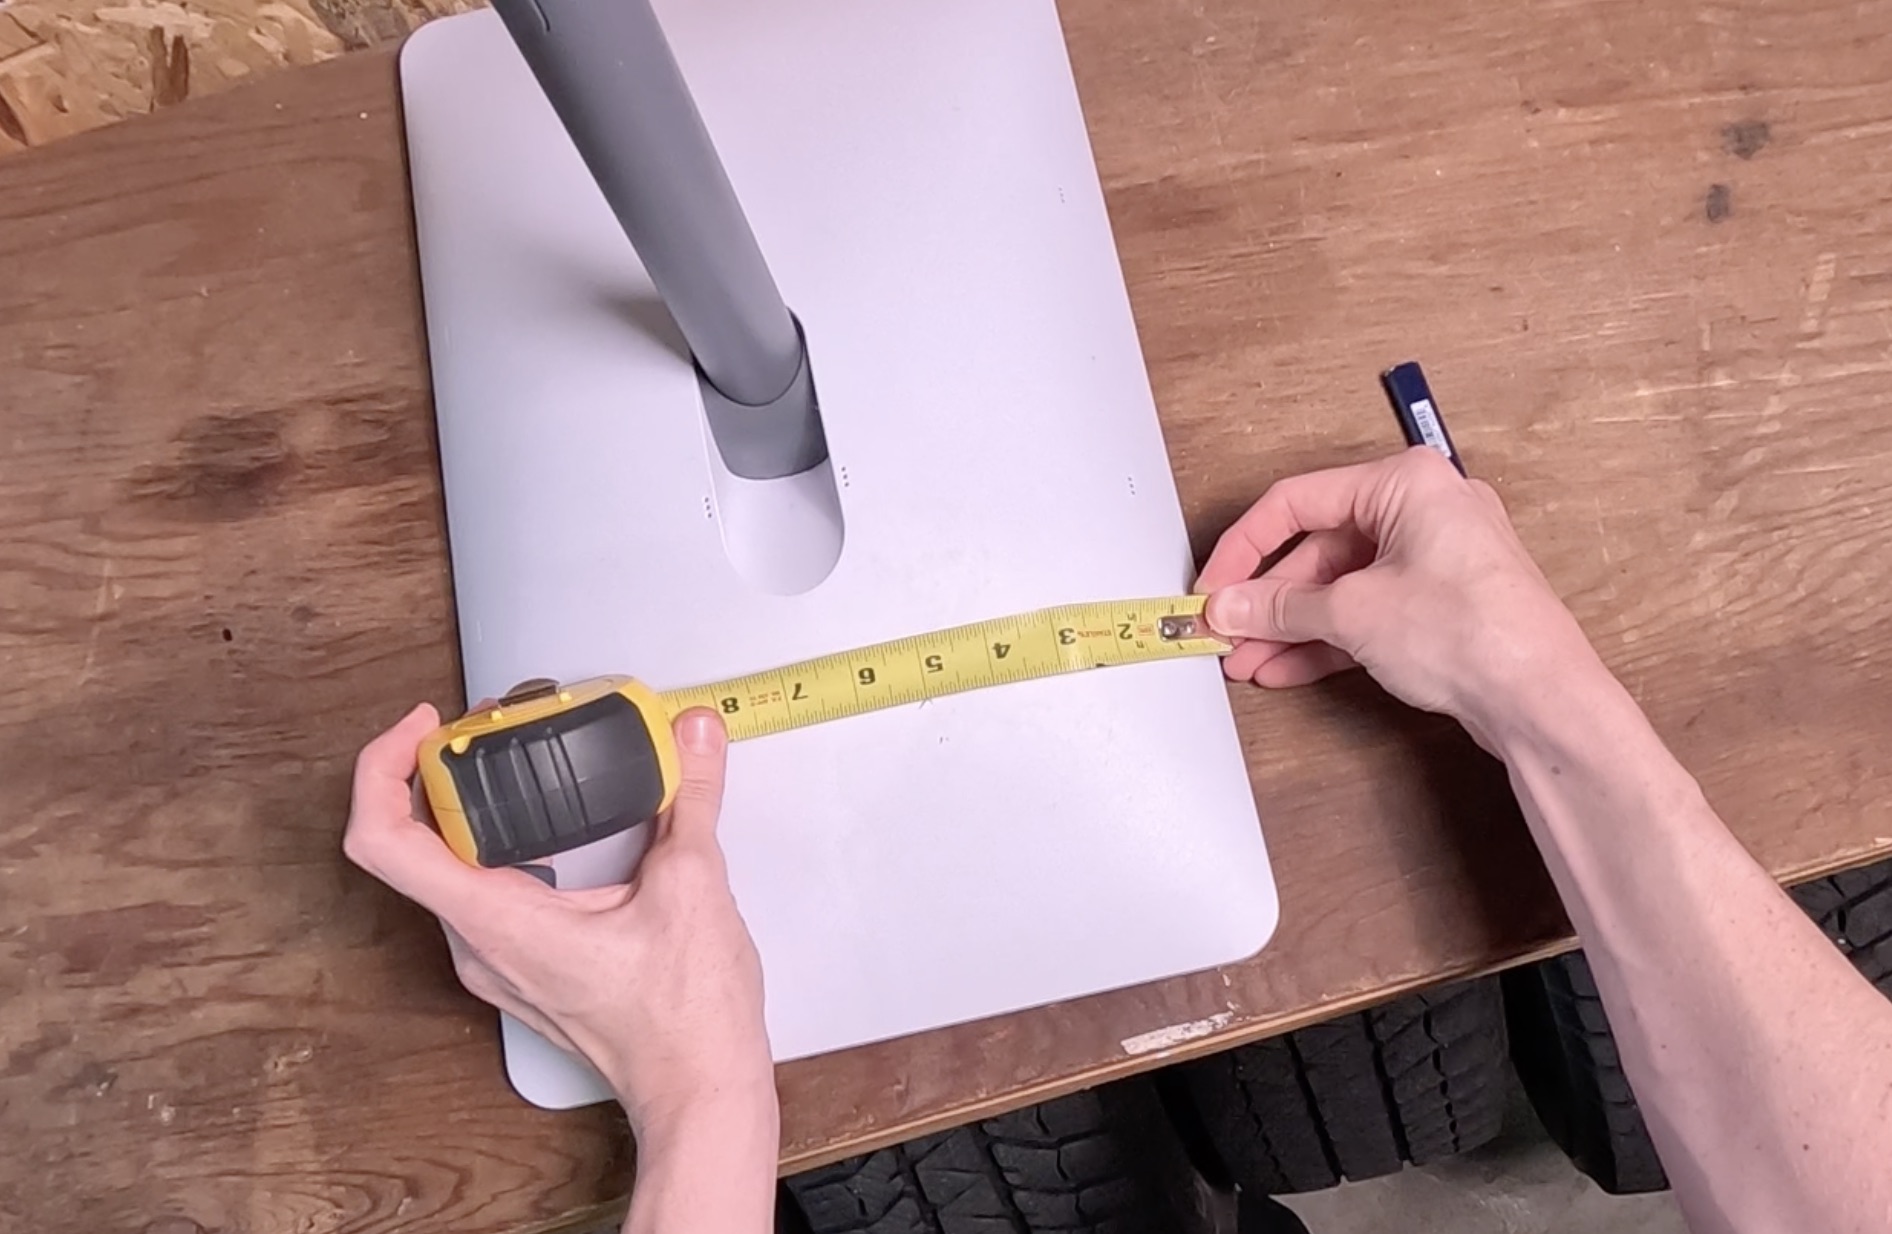
The bottom side of the dish is the side with the indentation. If you are looking at the dish from the bottom, you need to measure 5 inches from the right side, and 5 inches from the bottom side. The intersection is where you will drill the hole. It helps to use a flexible tape measure. You will want to measure the surface distance, so follow the contour of the dish when using the tape measure to mark the location of the hole.

I used a 7/8″ spade bit because that’s what I had available. A drill bit or hole cutting attachment might work better for you. In any case, you need to be extremely careful when drilling the hole. If you go too deep, you can damage the dish permanently. The plastic isn’t very thick, so I made sure to drill slowly and carefully. I also used a shop vac to suck up any loose debris as I drilled.
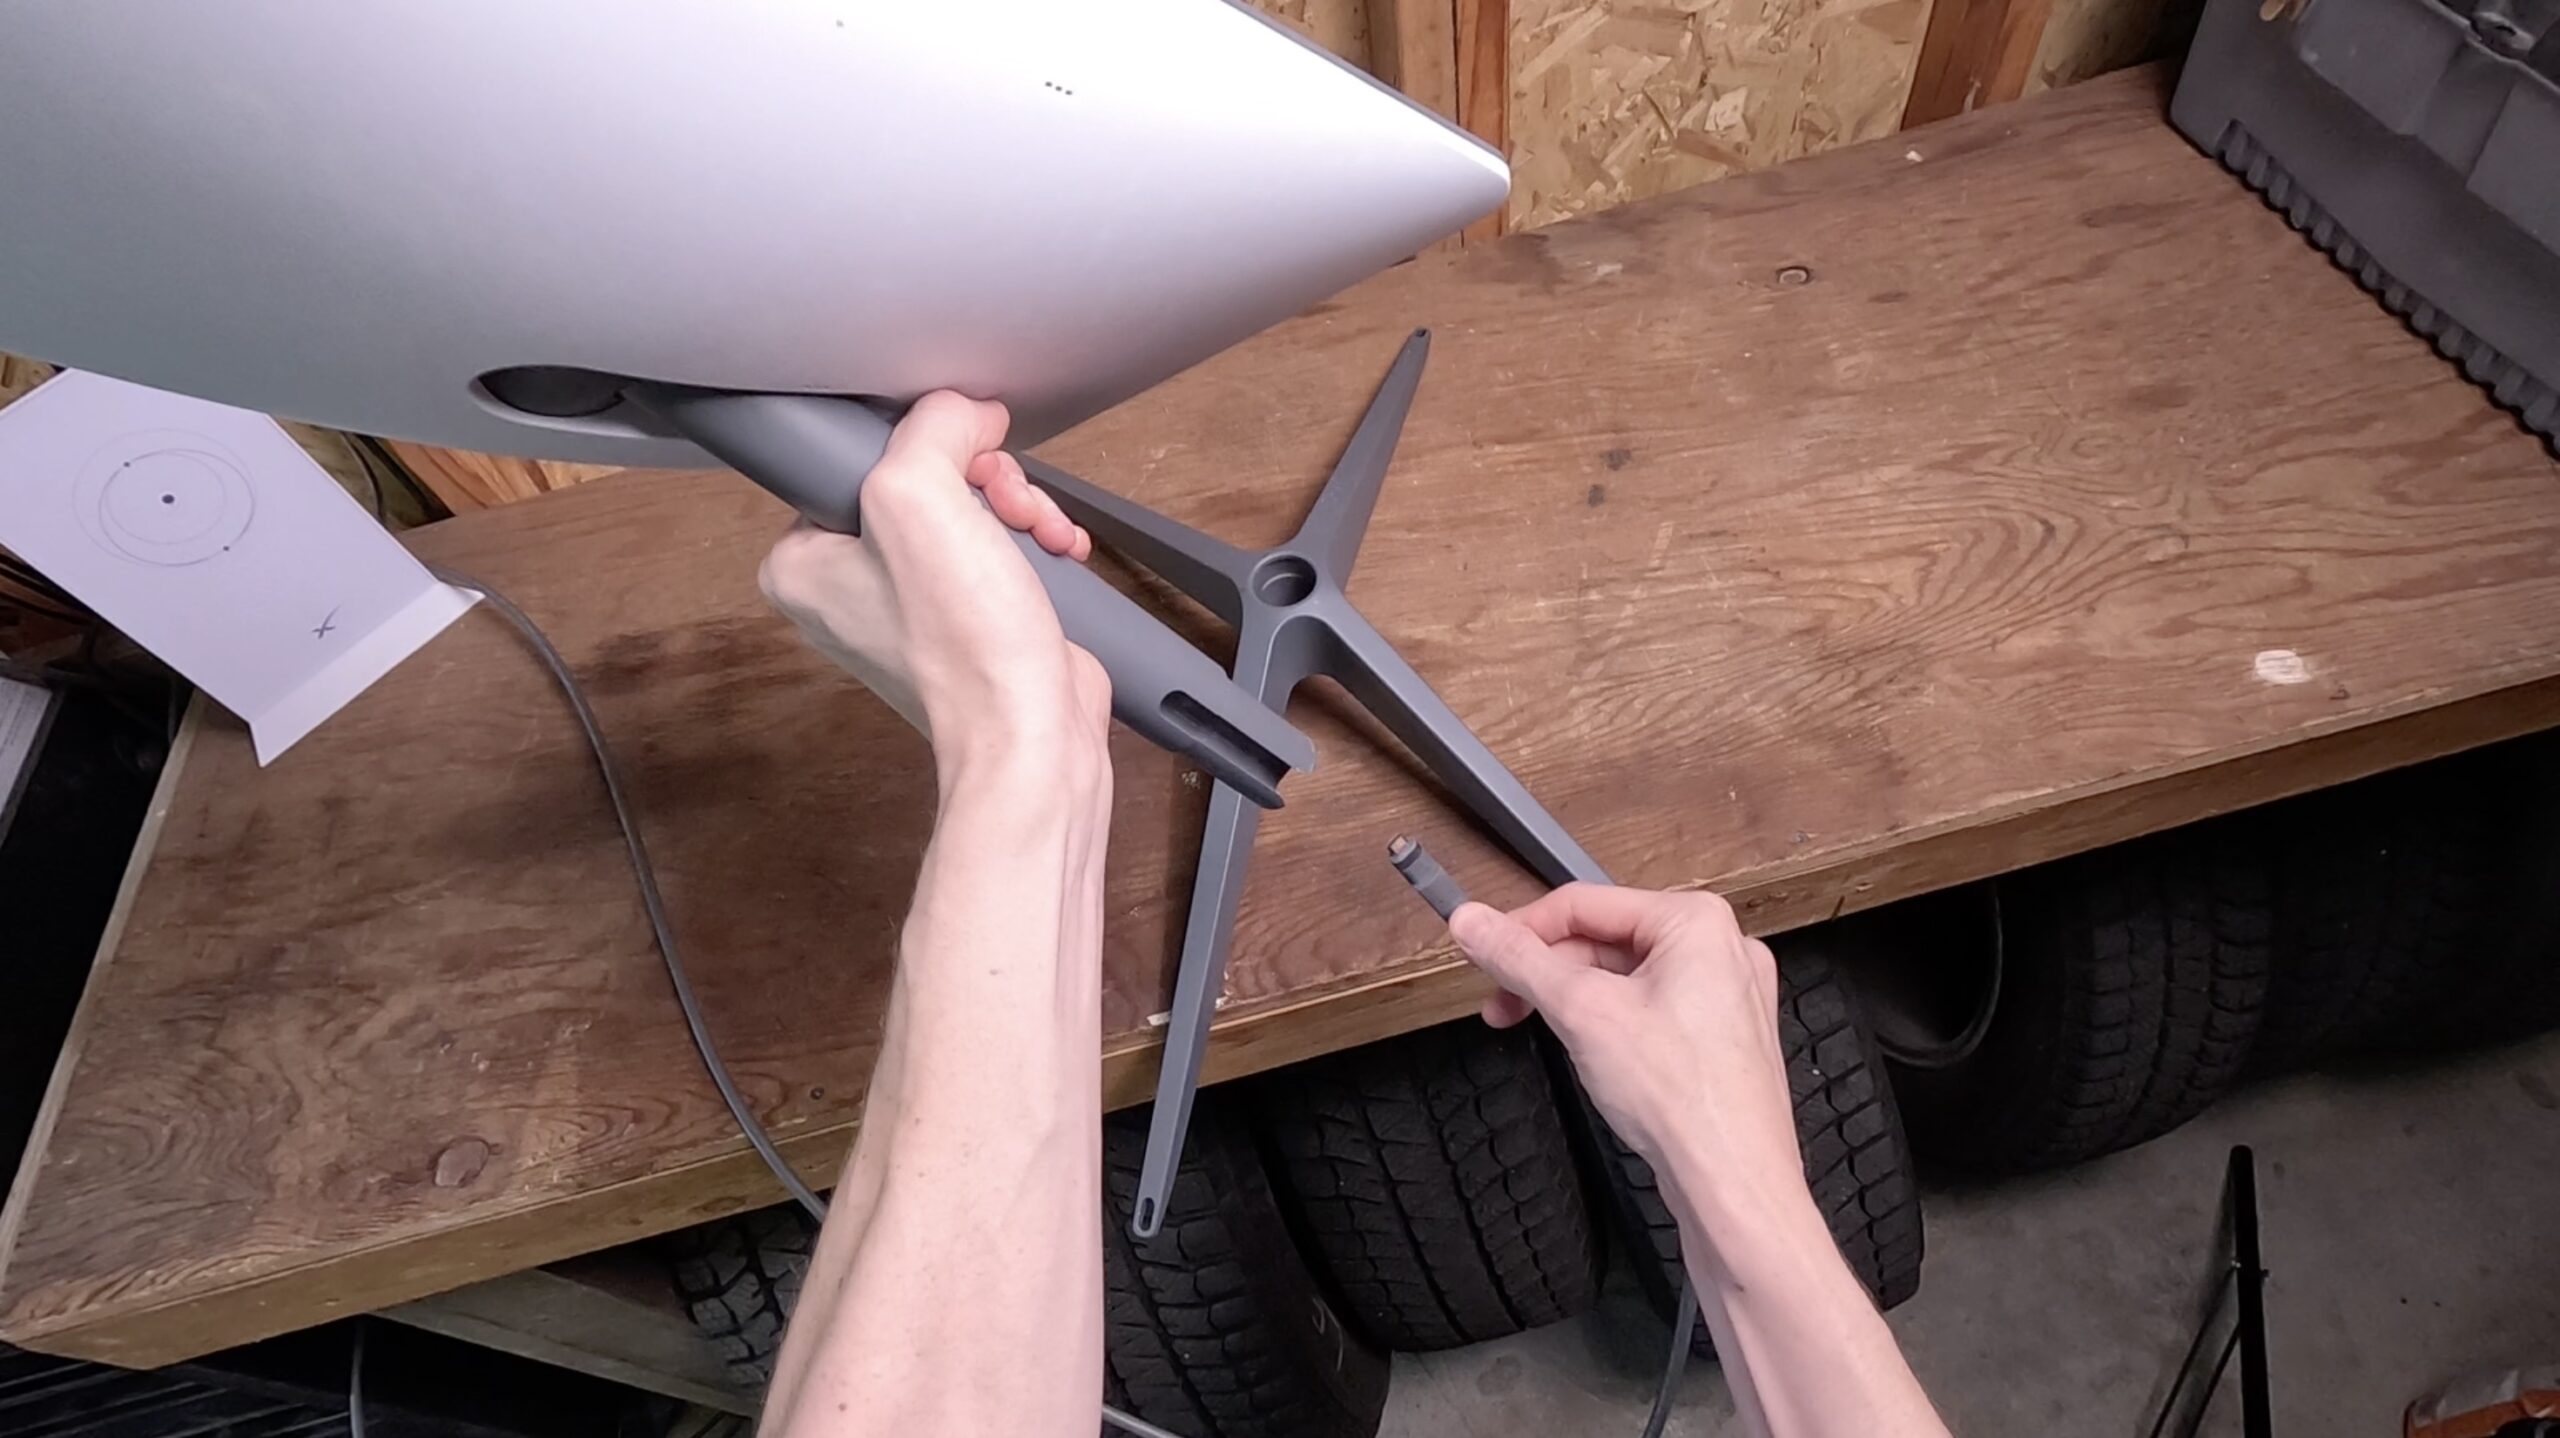
Step 3 – Unplug motor connector
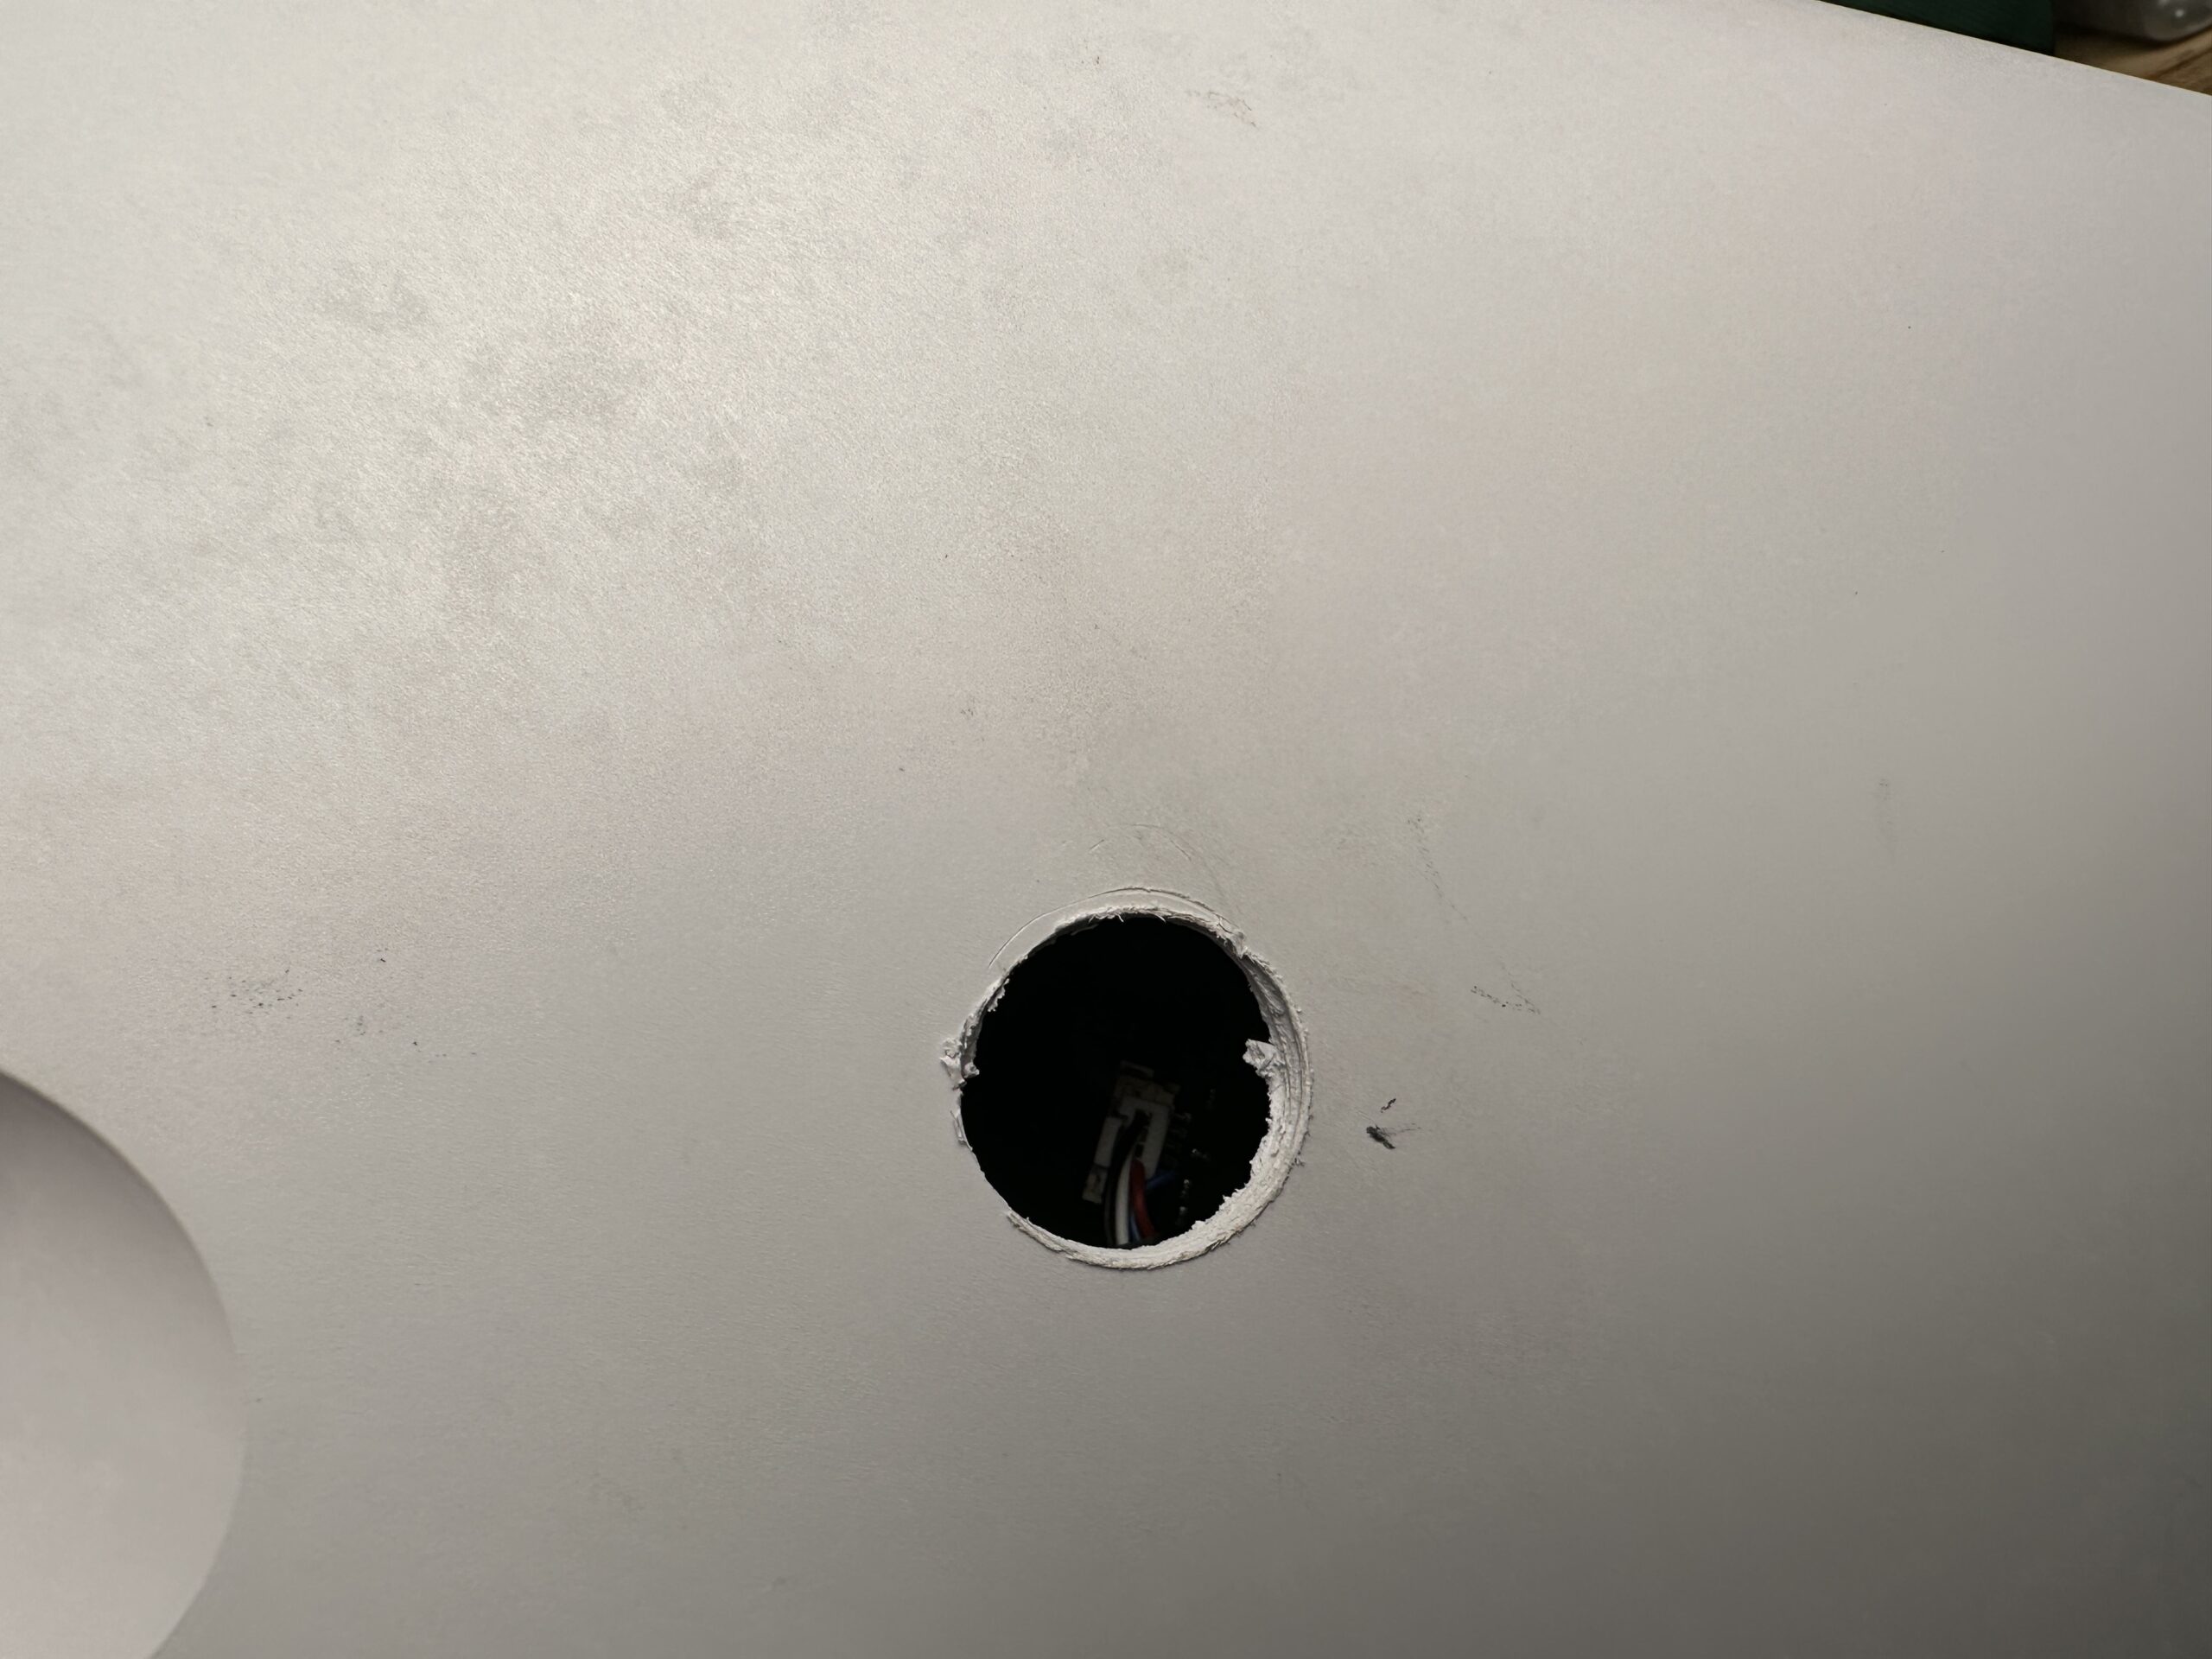
If you drilled the hole in the right place, you should be able to see the motor connector. There are four wires on the motor connector. The white and black wires control one motor, and the red and blue wires control the other motor.
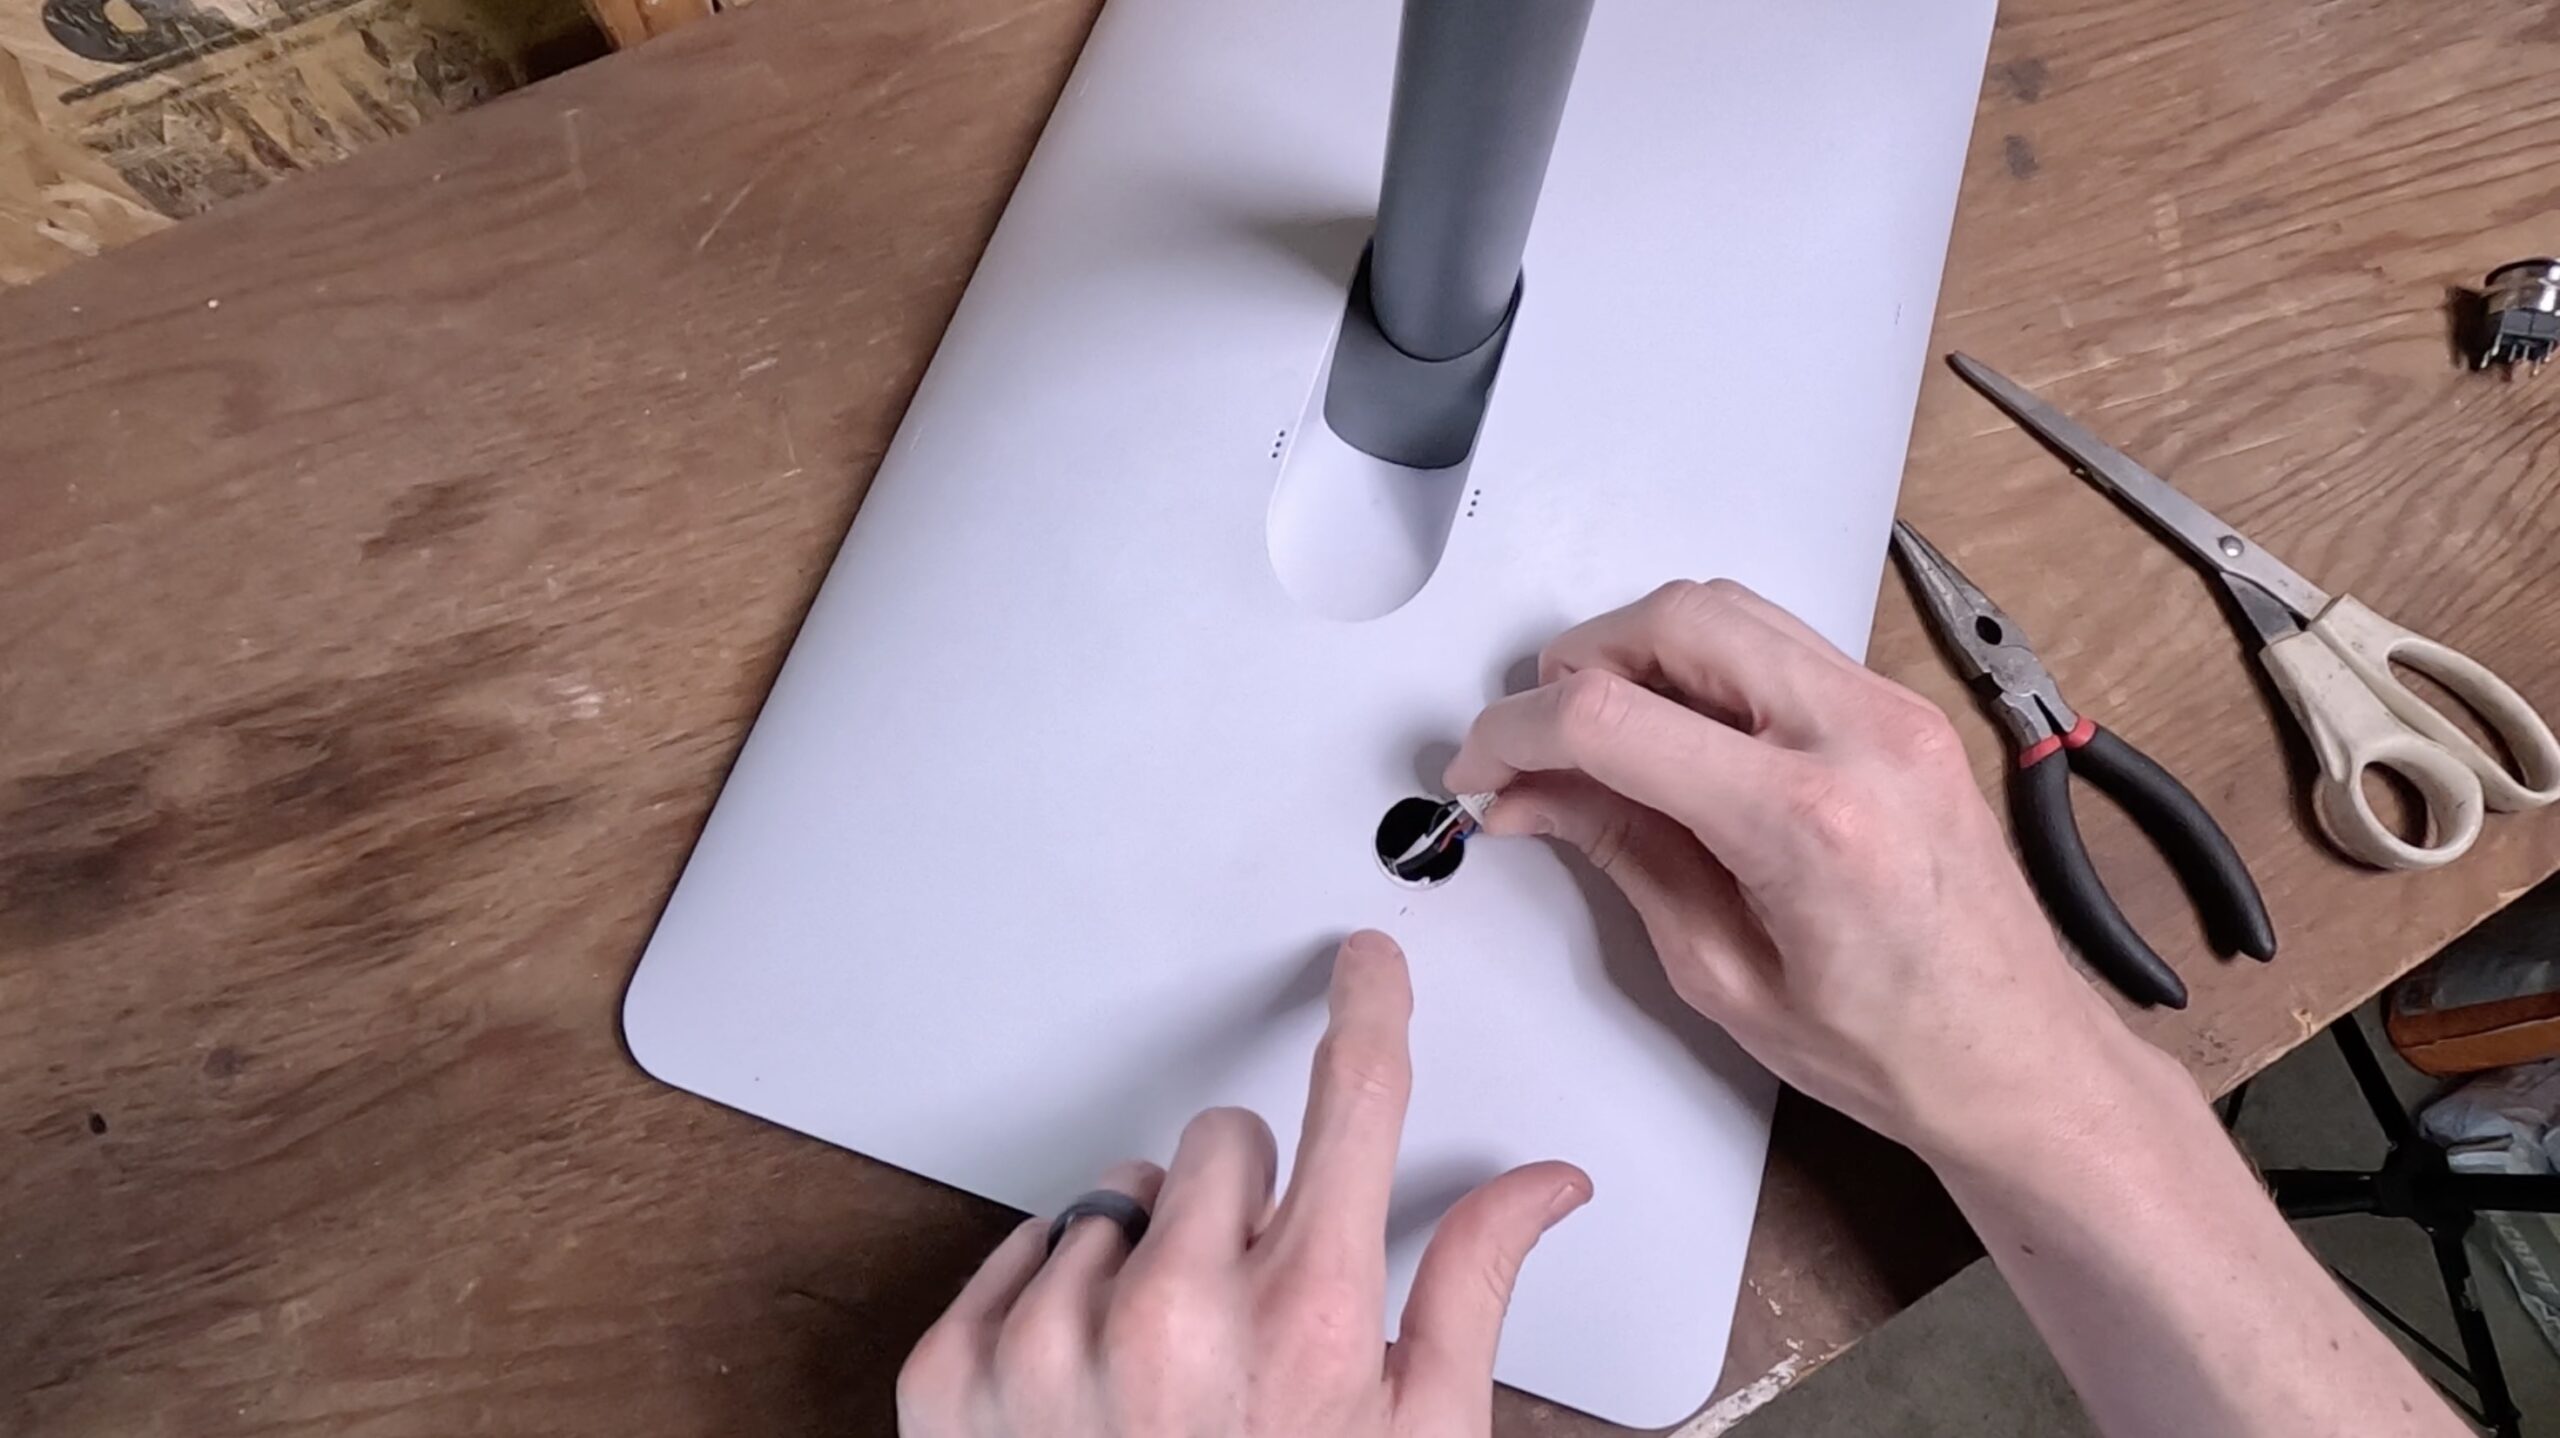
I used tweezers to unplug the Starlink motor connector. All you need to do to disable the motors is leave the motor connector unplugged. Alternatively, you could wire up a switch to be able to turn this modification on and off.
If you go the switch route, get a DPST (double pole, single throw) switch. You’ll switch one wire from each motor pair. For example, you could cut the red wire and the black wire from the motor connector. Wire the red wire to one pole of the switch, and the black wire to the other.
Step 4 – Seal access hole
The last step is to seal off the access hole you cut. I managed to find a rubber grommet at my local hardware store that was approximately the same size as the 7/8″ spade bit I used to drill the access hole. A bit of sealant applied to the grommet ensures that water won’t be able to leak in to the dish.
How to manually aim the dish
I’ve explained how I disabled the motors, now I’m going to talk about what to do with this mod. For me, the goal is to be able to manually orient the dish where I have the best view of the sky. There are a few ways to accomplish this, which I will detail below.
I performed this mod on my Mobile (Roam/RV) dish, which I take camping pretty often. I’ve noticed on previous camping trips that Starlink will usually point itself north or northwest, even if that means pointing directly into the path of large trees.
Vertical orientation
By disabling the motors, I can rotate the dish to point in a direction that has a better view of the sky. I typically want it pointing straight up to get the best signal. I often camp around trees, so there is more sky straight up than to the north or northwest.
It’s important to note that you don’t necessarily gain addition field of view by manually aiming the dish. Starlink controls which satellites you can communicate with. In other words, just because you point the dish south, doesn’t mean your antenna will actually communicate with satellites in that direction.
Manually move the dish
The other way to manually point a Starlink dish is to physically force it to move. This is a last resort, in my opinion. Forcing the motors to turn can damage the internal components like the gears, or even the motors. But if you are careful and move slowly, you can manually move the dish to the angle you want. This might be a useful method if you have trees directly overhead, but a clearing off to one side.
Final thoughts
The Starlink app has an obstruction checker tool that is handy when trying to manually point your dish. You can use it to visualize which areas of the sky your Starlink will be allowed to get a signal from. Keep in mind, Starlink controls which satellites and areas of the sky that you can receive satellite communications from. Just because you point it due south doesn’t mean it will work with the satellites in that direction.
I will typically use the app to see which areas of the sky are best to point to, and then manually aim my dish using one of the methods listed above. This has solved a lot of obstruction issues for me when using my Mobile dish at camp.
If you try this mod, I would love to hear your feedback! Let me know if this guide was easy to follow, and if your Starlink is performing better at a manually assigned orientation.
Thank you! This saved me, still have the same speeds and feeds.
Double pole, single throw. 😉
Good catch, thank you!